Toshiba SD-V395 Service Manual - Page 11
One-touch Timer Recording OTR, Timer recording, Timer recording continued
 |
View all Toshiba SD-V395 manuals
Add to My Manuals
Save this manual to your list of manuals |
Page 11 highlights
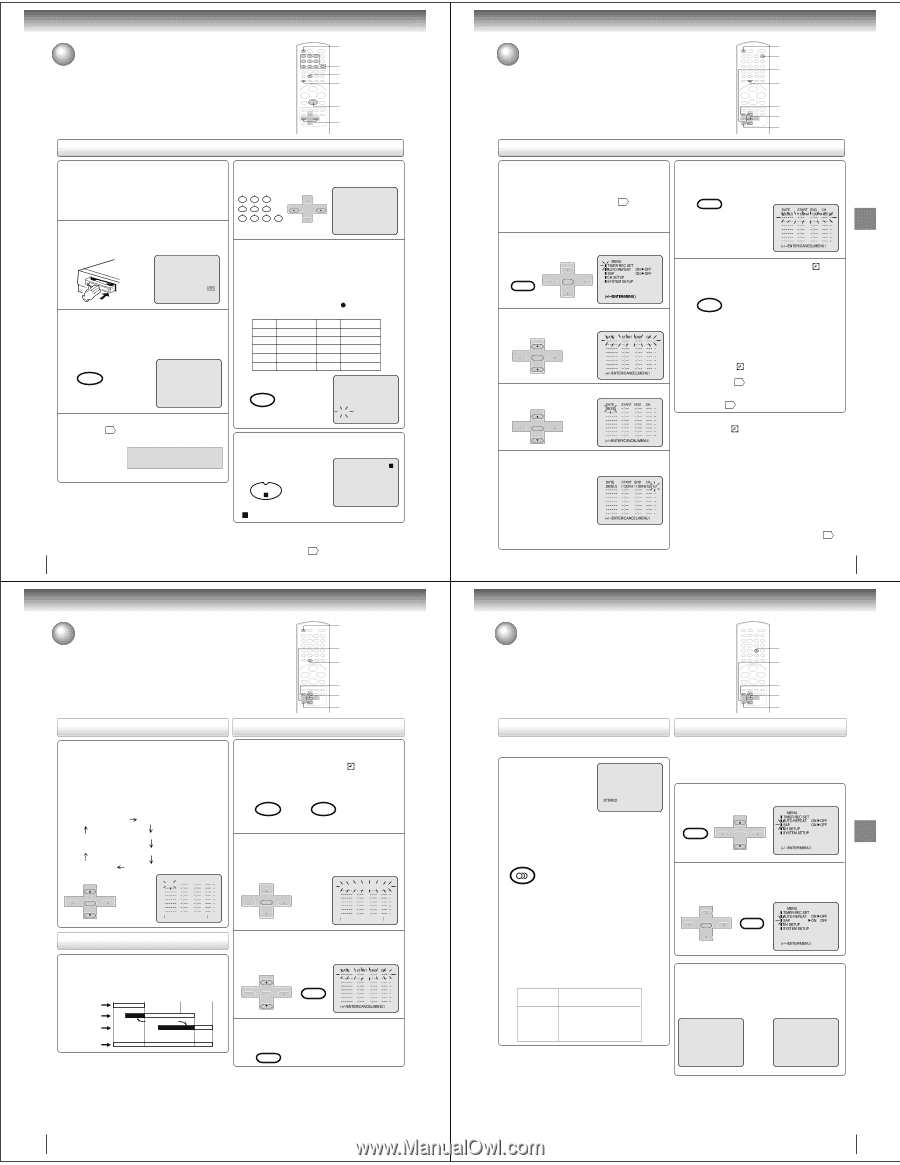
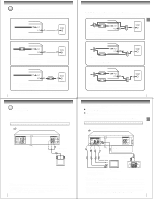
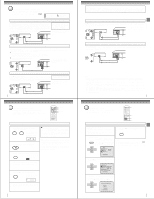
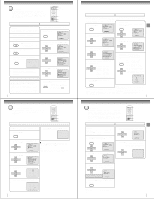
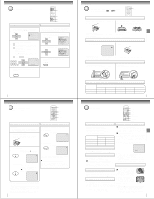
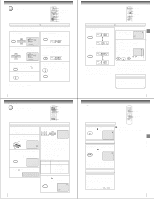
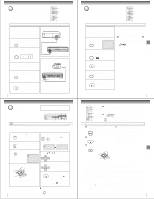
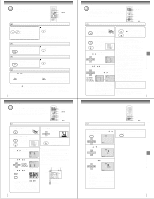
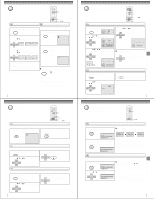
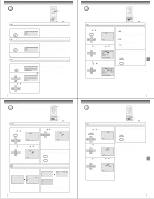
Recording (VCR) One-touch Timer Recording (OTR) The One-touch Timer Recording feature provides a simple and convenient way to make a timed recording. VCR DVD 4 2 5 STOP 4 One-touch Timer Recording (OTR) Preparation: • Turn ON the TV and select to the corresponding video input. • Press VCR DVD selector to select the VCR mode. (The VCR indicator will light.) Example: One-touch Timer Recording for 30 minutes. 1 Load a cassette tape with the erase prevention tab intact. The VCR will automatically turn on. 2 Press SP/SLP to select the desired tape speed SP or SLP. The tape counter and "SP" or "SLP" will appear on the screen for about 4 seconds. SP/SLP PLAY MODE 00 : 00 : 00 SP 3 Set "TV" or "CATV" option to the appropriate position 27 . TV - VHF/UHF channels CATV - CABLE TV channels 4 Press Number button or CH +/- to select the channel to be recorded. 123 456 7890 CH - SET + ENTER SET - CH + CH 110 5 Press OTR. Recording begins. Press the button again to stop recording after 30 minutes. Each additional press of OTR will increase recording time as shown in the chart below, up to a maximum of 6 hours. The OTR and recording time will appear on the screen for about 4 seconds. And, " " will appear on the display. Press Recording time Press Recording time once NORMAL REC 6 times 3:00 twice 0:30 7 times 4:00 3 times 1:00 8 times 5:00 4 times 1:30 9 times 6:00 5 times 2:00 10 times NORMAL REC REC/OTR OTR 0 : 30 CH 110 INDEX To cancel OTR Press STOP or turn off the power. STOP 36 " " will appear on screen for about 4 seconds. Note: If you wish to watch the DVD playback during OTR or standard recording, press VCR DVD selector to change to DVD mode and perform the DVD playback 43 . Recording (VCR) Timer recording (continued) VCR DVD SET +/- TIMER REC To sSeetttdinagilyp/wroeceekdlyurteimer VCR MENU ENTER CANCEL To confirm or cancel a program Weekly (e.g. WKL-TU: each Tuesday) or daily (e.g. MOSA: Monday to Saturday) Timer recording Follow the procedure of timer recording on the previous page. At step 3 press SET + or - repeatedly until the desired setting appears. Then press ENTER. When you press SET - repeatedly, the DATE indicator will change as follows, in this case the day is Friday. 1 If the Timer has been activated, press TIMER REC to deactivate the Timer. The timer symbol ( ) will disappear. Then press VCR DVD selector to change to VCR mode. VCR TIMER REC DVD The current day (Friday) SU-SA (Sunday to Saturday) One month later minus one day WKL-WE (Weekly Wednesday) SET + CH - ENTER SET - CH + MO-SA (Monday to Saturday) MO-FR (Monday to Friday) WKL-TH (Weekly Thursday) DATE START END CH WKL-WE á+/-/ENTER/CANCEL/MENUñ 2 To confirm Timer program: At step 1 on the previous page select "TIMER REC SET" and press ENTER. The timer program list will appear on the screen. CH - SET + ENTER SET - CH + DATE START END CH 26(SU) 11:00PM 11:30PM125SLP á+/-/ENTER/CANCEL/MENUñ If the programs overlap another Do not overlap timer programs as portions of the conflicting programs will be lost. The first recording time has priority over the next recording time as shown in the diagram below. Program 1 8 : 00 9 : 00 10 : 00 11 : 00 3 To cancel Timer program: Press SET + or - to select the unwanted program, then press CANCEL to cancel the program. CH - SET + ENTER SET - CH + CANCEL DATE START END CH á+/Ð/ENTER/CANCEL/MENU ñ Program 2 Program 3 Recording Control Settings Prog.1 Deleted Parts Non Recorded Portion Parts Prog.2 Prog.3 4 Press VCR MENU repeatedly until the menu screen is cleared. VCR MENU SETUP Notes: • The daily/weekly recording can be made continuously until the recording is canceled or the tape reaches the end. Notes: • During timer recording the automatic rewinding mechanism • If there are other timer record programs remaining, TIMER does not function. REC must be pressed to reactivate the timer, otherwise the remaining timer record programs will be ignored. • You cannot confirm the Timer program during timer recording operation. • You can correct or cancel a programmed setting in program confirm mode. 38 Timer recording Timer recording can be programmed on-screen with the remote control. The built-in timer allows automatic unattended recording of up to 8 programs within 1 month. VCR DVD EJECT 2,3 TIMER REC Timer recording 1,5 1-3 CANCEL Preparation: • Press VCR DVD selector to select the VCR mode. • Load a cassette tape with the erase prevention tab intact. • Check the time and date are correct 24 . Example: Program a timer recording for the 26th day, channel 125 (CATV), 11:00 - 11:30 PM on timer program number 1 (Tape speed: SLP). 1 Press VCR MENU. Select "TIMER REC SET", then press ENTER. SET + VCR MENU SETUP CH - CH + ENTER SET - MENU TIMER REC SET AUTO REPEAT ON OFF SAP ON OFF CH SETUP SYSTEM SETUP á+/-/ENTER/MENU ñ 2 Press SET + or - to select one of the program line, then press ENTER. CH - SET + ENTER SET - CH + DATE START END CH á+/Ð/ENTER/CANCEL/MENU ñ 3 Press SET + or - to select the date, then press ENTER. DATE START END CH 26(SU SET + CH - CH + ENTER SET - á+/Ð/ENTER/CANCEL/MENU ñ 4 Set the start time, end time, channel and tape speed as in step 3. DATE START END CH 26(SU 11:00PM 11:30PM125 SLP Notes: á+/Ð/ENTER/CANCEL/MENU ñ • Press CANCEL to move cursor backward for correction. • To record from external source set the channel to "L1" or "L2". 5 To enter other programs, repeat step 2 through 4. VCR MENU • To return to the normal screen, SETUP press VCR MENU twice. DATE 26(SU START END CH 11:00PM 11:30PM125 SLP á+/Ð/ENTER/CANCEL/MENU ñ 6 Press TIMER REC. The timer symbol ( ) will appear on the display and the VCR stands by for recording. TIMER REC At the same time, VCR mode will change to DVD mode automatically. You can use DVD even if the VCR is in the timer recording mode. If you do not use the DVD, turn the power off. Notes: • The timer recording will start at 5 seconds before the time you predetermined. • If the timer symbol( ) does not appear on the display in spite of the pressing of TIMER REC, the cassette may not have been loaded. 29 • If the cassette is ejected in spite of the pressing of TIMER REC, the erase prevention tab of the cassette may have been removed. 29 Notes: • If the timer symbol ( ) blinks when the timer recording ended, the TV program has not been completely recorded because of an insufficient tape length. Press TIMER REC to cancel the timer program or press EJECT to remove the cassette tape. • During timer recording standby mode, the VCR mode cannot be operated. To use the VCR, press TIMER REC at first, then press VCR DVD selector to change to VCR mode. After you use the VCR, press TIMER REC again to put the VCR into timer recording standby mode. • If you press TIMER REC during timer recording, the recording operation will be interrupted. If you press TIMER REC again within the programmed time, the recording operation will start again. • After a power failure or disconnection of the power plug, all programmed recording settings and time display will be lost upon resumption of power. In this case, reset the clock 24 and reprogram any timer recording. 37 Other functions (VCR) Stereo recording and playback / Second Audio Program (SAP) AUDIO SELECT SET +/- VCR MENU ENTER CANCEL Stereo recording and playback The VHS Hi-Fi audio system permits high fidelity recording of MTS STEREO TV broadcasts. When a MTS STEREO broadcast is received, "STEREO" will appear on the screen for about 4 seconds and the program can be viewed or recorded in stereo. The Hi-Fi stereo recording procedure is the same as for normal recordings. STEREO Note: When using a CATV system, stereo TV programs may be transmitted over a mono cable channel. In this case "STEREO" will not appear and the sound will be in mono. AUDIO SELECT AUDIO Output selection When viewing an MTS stereo TV program, or playing a prerecorded VHS Hi-Fi stereo videotape, press AUDIO SELECT to select how the audio will be heard through the speakers. Normally set to the Hi-Fi stereo position, this button can be set to the MONO position if the stereo broadcast or videotape audio is of poor quality. The "R" and "L" positions allow the audio from the Right or Left HiFi channel to be heard over both TV speakers. This button has no effect when viewing a MONO videotape or TV program. Each time when you press the button, OUTPUT SELECTION display appears on the screen for several seconds. Refer to the chart below. OUTPUT SOUND HEARD ON BOTH SELECTION SPEAKERS STEREO L CH R CH MONO STEREO LEFT CHANNEL AUDIO RIGHT CHANNEL AUDIO MONO Second Audio Program (SAP) Your DVD/VCR is fitted with a SAP broadcast system which enables you to switch to a second audio program when viewing a selected channel. This function applies only when the program is broadcast in multi-languages through the SAP broadcast system. 1 Press VCR MENU. Then press SET + or - to select "SAP". VCR MENU SET + SETUP CH - CH + ENTER SET - MENU TIMER REC SET AUTO REPEAT ON OFF SAP ON OFF CH SETUP SYSTEM SETUP á+/-/ENTER/MENU ñ 2 Press ENTER to select "ON". Then press VCR MENU until the menu screen is cleared. CH - SET + ENTER SET - CH + VCR MENU SETUP MENU TIMER REC SET AUTO REPEAT ON OFF SAP ON OFF CH SETUP SYSTEM SETUP á+/-/ENTER/MENU ñ Listening to SAP When the VCR is turned on or a channel selection is made, make certain the letters "SAP" appears on the screen for about 4 seconds. This means that the "Second Audio Program" broadcasting is available. STEREO SAP SAP OR Notes: • When playing back a tape that is not recorded in Hi-Fi stereo mode, the audio will automatically be monaural. • When listening to a VHS Hi-Fi video tape or MTS broadcast through the VHF/UHF jack (Audio/Video cable not connected), the sound will be monaural. 39 Other functions (VCR) Recording (VCR)
-
 1
1 -
2
-
3
-
4
-
5
-
 6
6 -
 7
7 -
 8
8 -
 9
9 -
 10
10 -
 11
11 -
 12
12 -
 13
13 -
 14
14 -
 15
15 -
 16
16 -
17
-
18
-
19
-
20
-
21
-
22
-
23
-
24
-
25
-
26
-
27
-
28
-
29
-
30
-
31
-
32
-
33
-
34
-
35
-
36
-
37
-
38
-
39
-
40
-
41
-
42
-
43
-
44
-
45
-
46
-
47
-
48
-
49
-
50
-
51
-
52
-
53
-
54
-
55
-
56
-
57
-
58
-
59
-
60
-
61
-
62
-
63
-
64
-
65
-
66
-
67
-
68
-
69
-
70
-
71
-
72
-
73
-
74
-
75
-
76
-
77
-
78
-
79
-
80
-
81
-
82
-
83
-
84
-
85
-
86
-
87
-
88
-
89
-
90
-
91
-
92
-
93
-
94
-
95
-
96
-
97
-
98
-
99
-
100
-
101
-
102
-
103
-
104
-
105
-
106
-
107
-
108
-
109
-
110
-
111
-
112
-
113
-
114
-
115
-
116
-
117
-
118
-
119
-
120
-
121
-
122
-
123
-
124
-
125
-
126
-
127
-
128
-
129
-
130
-
131
-
132
-
133
-
134
-
135
-
136
-
137
-
138
-
139
-
140
-
141
-
142
-
143
-
144
 |
 |