Uniden SDS200 English Owner Manual - Page 21
Vehicle Installation
 |
View all Uniden SDS200 manuals
Add to My Manuals
Save this manual to your list of manuals |
Page 21 highlights
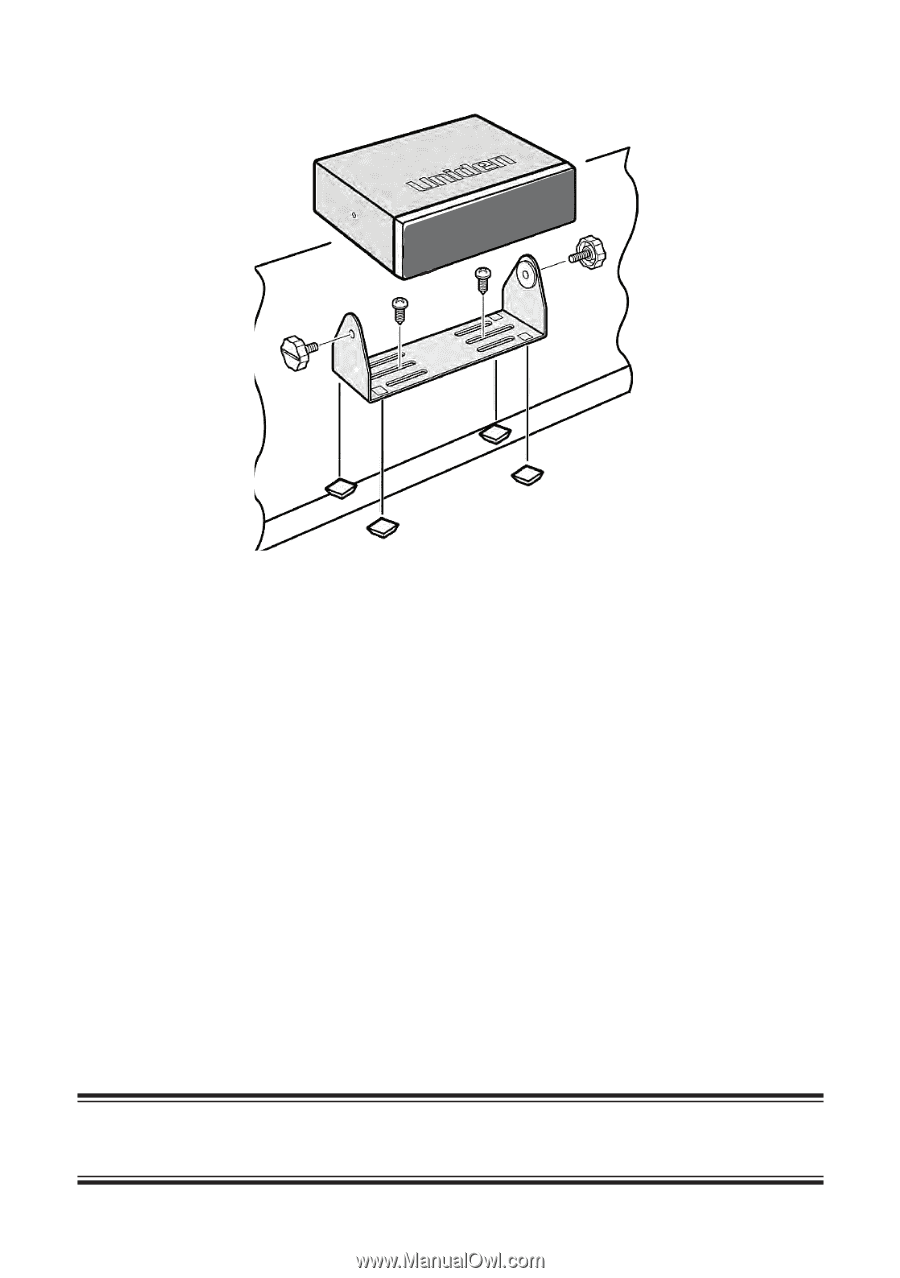
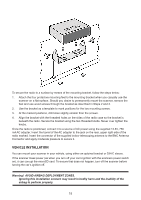
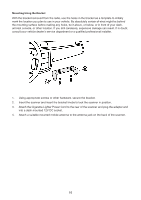
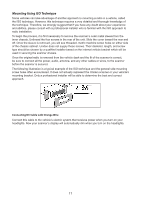
To secure the radio to a surface by means of the mounting bracket, follow the steps below: 1. Attach the four protective mounting feet to the mounting bracket when you casually use the scanner on a flat surface. Should you desire to permanently mount the scanner, remove the feet and use wood screws through the bracket as described in Steps 2 and 3. 2. Use the bracket as a template to mark positions for the two mounting screws. 3. At the marked positions, drill holes slightly smaller than the screws. 4. Align the bracket with the threaded holes on the sides of the radio case so the bracket is beneath the radio. Secure the bracket using the two threaded knobs. Never over tighten the knobs. Once the radio is positioned, connect it to a source of AC power using the supplied 13.8V, 750 mA AC adapter. Insert the barrel of the AC adapter to the jack on the rear, upper right side of the radio marked. Insert the connector of the supplied indoor telescoping antenna to the BNC Antenna Connector and apply moderate pressure to secure it. VEHICLE INSTALLATION You can mount your scanner in your vehicle, using either an optoinal bracket or DIN-E sleeve. If the scanner loses power (as when you turn off your car's ignition with the scanners power switch on), it can corrupt the microSD card. To ensure that does not happen, turn off the scanner before turning the car's ignition off. Warning! AVOID AIRBAG DEPLOYMENT ZONES. Ignoring this installation concern may result in bodily harm and the inability of the airbag to perform properly. 15
-
 1
1 -
2
-
3
-
4
-
5
-
6
-
7
-
8
-
9
-
10
-
11
-
12
-
13
-
14
-
15
-
 16
16 -
 17
17 -
 18
18 -
 19
19 -
 20
20 -
 21
21 -
 22
22 -
 23
23 -
 24
24 -
 25
25 -
 26
26 -
27
-
28
-
29
-
30
-
31
-
32
-
33
-
34
-
35
-
36
-
37
-
38
-
39
-
40
-
41
-
42
-
43
-
44
-
45
-
46
-
47
-
48
-
49
-
50
-
51
-
52
-
53
-
54
-
55
-
56
-
57
-
58
-
59
-
60
-
61
-
62
-
63
-
64
-
65
-
66
-
67
-
68
 |
 |