Uniden SDS200 English Owner Manual - Page 35
Main Menu, Sub Menu, Setting Or Sub, Setting
 |
View all Uniden SDS200 manuals
Add to My Manuals
Save this manual to your list of manuals |
Page 35 highlights
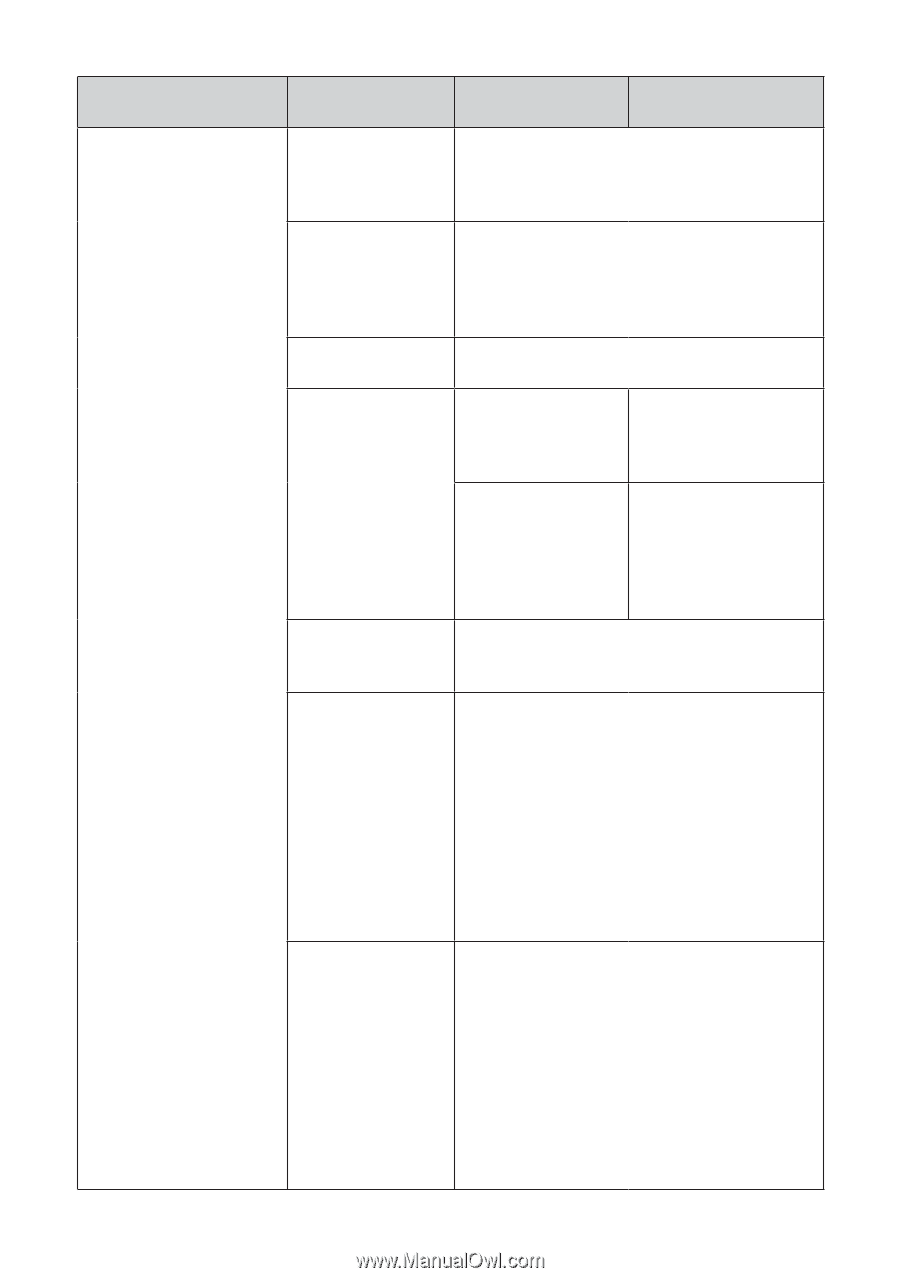
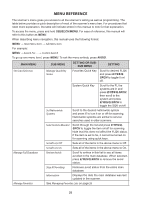
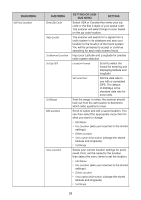
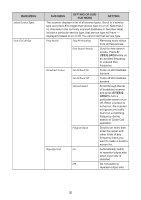
MAIN MENU Set Your Location SUB MENU Enter Zip Code Auto Locate Set Manual Location Set Up GPS Set Range Edit Location Save Location SETTING OR SUBSUB MENU SETTING Select USA or Canada then enter your zip code or the first 3 digits of your postal code. The scanner will select things to scan based on the zip code location. The scanner will search for a signal from a radio system in its database and sets your location to the location of the found system. You will be prompted to accept or continue searching for each radio system found. Input your Latitude and Longitude for precise radio system selection. Location Format Scroll to select the format for entering and displaying latitude and longitude Set Serial Port Set the data rate to use with a connected GPS. The default of 4800bps is the standard data rate for most units. Sets the range, in miles, the scanner should look out from the set location to determine which radio systems to scan. Scroll to select and edit a saved location. You can then select the appropriate menu item for what you want to change: • Edit Name • Use Location (sets your scanner to the stored settings) • Delete Location • Set Location Information (change the stored latitude and longitude) • Set Range Saves your current location settings for quick recall. First, set the name for the location, then select the menu items to set the location: • Edit Name • Use Location (sets your scanner to the stored settings) • Delete Location • Set Location Information (change the stored latitude and longitude) • Set Range 29
-
 1
1 -
2
-
3
-
4
-
5
-
6
-
7
-
8
-
9
-
10
-
11
-
12
-
13
-
14
-
15
-
16
-
17
-
18
-
19
-
20
-
21
-
22
-
23
-
24
-
25
-
26
-
27
-
28
-
29
-
 30
30 -
 31
31 -
 32
32 -
 33
33 -
 34
34 -
 35
35 -
 36
36 -
 37
37 -
 38
38 -
 39
39 -
 40
40 -
41
-
42
-
43
-
44
-
45
-
46
-
47
-
48
-
49
-
50
-
51
-
52
-
53
-
54
-
55
-
56
-
57
-
58
-
59
-
60
-
61
-
62
-
63
-
64
-
65
-
66
-
67
-
68
 |
 |