Xerox 3635MFP Systems Administrator Guide - Page 102
Insert the Feature Enablement Key, Enable the Server Fax from the Machine
 |
UPC - 095205741049
View all Xerox 3635MFP manuals
Add to My Manuals
Save this manual to your list of manuals |
Page 102 highlights
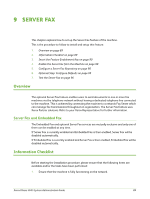
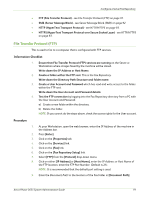
9 Server Fax 2. TCP/IP and HTTP protocols must be configured on the machine so that the machine web browser can be accessed. 3. Install and configure the Xerox Partner Enterprise Fax solution on your network. Refer to the manufacturer's documentation contained with the fax solution for instructions to complete this task. 4. If the Enterprise Fax solution uses the TCP/IP protocol to communicate, it is recommended that the server is assigned a static IP Address. However, dynamic IP Addressing may be used provided DNS settings are fully configured and the DHCP server has been configured with sufficient lease time so that the normal maintenance and service down times of the Fax Server does not result in a change in IP Address. Insert the Feature Enablement Key 1. Insert the Feature Enablement Key in the slot at the rear of the machine. 2. Follow the instructions included with the Feature Enablement Key to enable the Server Fax option. 3. Remove the Feature Enablement Key when instructed to do so and store it in a safe location. Enable the Server Fax from the Machine 1. Press the button on the machine to enter the Tools Pathway. 2. Enter the Administrator's Password. The default is 1111. 3. Touch [Enter]. 4. Press the button. 5. Touch [Tools]. 6. Touch [User Interface]. 7. Touch [Service Enablements]. 8. Touch [Server Fax]. 9. Touch [Enable]. 10. Press the button. 11. Touch [Confirm] to exit the Tools Pathway. Configure a Server Fax Repository When a User faxes a document from the machine the document is stored in a directory, known as the Fax Repository. The Fax Server monitors the Fax Repository for documents to be faxed. The machine can use 4 different ways to transfer a scanned fax to the repository: 90 Xerox Phaser 3635 System Administration Guide
-
 1
1 -
2
-
3
-
4
-
5
-
6
-
7
-
8
-
9
-
10
-
11
-
12
-
13
-
14
-
15
-
16
-
17
-
18
-
19
-
20
-
21
-
22
-
23
-
24
-
25
-
26
-
27
-
28
-
29
-
30
-
31
-
32
-
33
-
34
-
35
-
36
-
37
-
38
-
39
-
40
-
41
-
42
-
43
-
44
-
45
-
46
-
47
-
48
-
49
-
50
-
51
-
52
-
53
-
54
-
55
-
56
-
57
-
58
-
59
-
60
-
61
-
62
-
63
-
64
-
65
-
66
-
67
-
68
-
69
-
70
-
71
-
72
-
73
-
74
-
75
-
76
-
77
-
78
-
79
-
80
-
81
-
82
-
83
-
84
-
85
-
86
-
87
-
88
-
89
-
90
-
91
-
92
-
93
-
94
-
95
-
96
-
 97
97 -
 98
98 -
 99
99 -
 100
100 -
 101
101 -
 102
102 -
 103
103 -
 104
104 -
 105
105 -
 106
106 -
 107
107 -
108
-
109
-
110
-
111
-
112
-
113
-
114
-
115
-
116
-
117
-
118
-
119
-
120
-
121
-
122
-
123
-
124
-
125
-
126
-
127
-
128
-
129
-
130
-
131
-
132
-
133
-
134
-
135
-
136
-
137
-
138
-
139
-
140
-
141
-
142
-
143
-
144
-
145
-
146
-
147
-
148
-
149
-
150
-
151
-
152
-
153
-
154
-
155
-
156
-
157
-
158
-
159
-
160
-
161
-
162
-
163
-
164
-
165
-
166
-
167
-
168
-
169
-
170
-
171
-
172
-
173
-
174
-
175
-
176
-
177
-
178
-
179
-
180
-
181
-
182
-
183
-
184
-
185
-
186
-
187
-
188
-
189
-
190
-
191
-
192
-
193
-
194
-
195
-
196
-
197
-
198
-
199
-
200
-
201
-
202
-
203
-
204
-
205
-
206
-
207
-
208
-
209
-
210
-
211
-
212
 |
 |
