Adobe 26001360 Printing Guide - Page 18
Choose Window > Stroke.
 |
UPC - 718659321840
View all Adobe 26001360 manuals
Add to My Manuals
Save this manual to your list of manuals |
Page 18 highlights
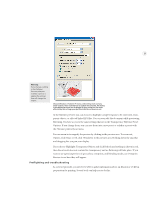
Note: 3. Choose Window > Stroke. If you have done trapping by overprinting, you can 4. For the Weight, enter a stroke width between 0.6 and 2.0 points. The trap size will be equal to half this value. use the Appearance palette to modify or 5. Choose Window > Attributes. remove the effect from 6. Select Overprint Stroke. your object. 16 Trapping type can present a unique set of challenges. To trap type, add the Stroke below the Fill in the Appearance palette (which shows the order the effects are applied) and set the stroke to overprint using the Attributes palette. Gradients, mesh objects, and color blends Raster effects, including drop shadows and feathering, are made using gradients and color blends and can be difficult for some output devices to print smoothly. To improve the printed results of gradients, mesh objects, and color blends, follow these general guidelines: • Recommend to the graphic artist the guidelines set out in the section, "Printing gradients, mesh objects, and color blends" in the User Guide. How these effects are defined up front can have a significant affect on how they are printed. • In Effect > Document Raster Effects Settings, set the resolution which determines the number of pixels per inch (ppi) in the rasterized image to a setting appropriate for the output device. This is important for print output of raster and transparency effects. • Use a line screen low enough for the resolution of the device to retain 256 levels of gray. If the resolution is 1270, a maximum screen frequency of 79 should be used. At 2400, 150 is the maximum. For details on setting this option, see "Ensuring your resolution/line screen produces 256 grays" in the User Guide. • Make sure that you have selected an appropriate Flatness setting in the Print dialog box. For details about ensuring your resolution/line screen produces 256 grays and calculating maximum blend length based on color change, see "Printing gradients, mesh objects, and color blends" in the User Guide. Note: When printing to a PostScript 3 device, ensure the PostScript option in the Print dialog box is set to Level 3 or printing may be slowed. Printing Mesh Objects: PostScript 3 devices optimally print all but the most complex mesh objects as vector objects. However, when printing to a PostScript Level 2 printer or printing transparent mesh objects, objects are printed as JPEG images. The resolution of these images is determined by the Gradient and Mesh Resolution option when you create a transparency flattener preset. A setting of 300 dpi is sufficient in most cases. It is not necessary to set it to output resolution. Viewing transparency Transparency refers to objects that are not 100% opaque, or those that use effects such as blending modes, soft drop shadows, or feathered edges. Transparency can be applied to an
-
 1
1 -
2
-
3
-
4
-
5
-
6
-
7
-
8
-
9
-
10
-
11
-
12
-
 13
13 -
 14
14 -
 15
15 -
 16
16 -
 17
17 -
 18
18 -
 19
19 -
 20
20 -
 21
21 -
 22
22 -
 23
23 -
24
-
25
-
26
-
27
-
28
-
29
-
30
-
31
-
32
-
33
-
34
-
35
-
36
 |
 |