Adobe 26001360 Printing Guide - Page 23
If you choose Highlight: Transparent Objects and click Refresh and nothing is shown in red
 |
UPC - 718659321840
View all Adobe 26001360 manuals
Add to My Manuals
Save this manual to your list of manuals |
Page 23 highlights
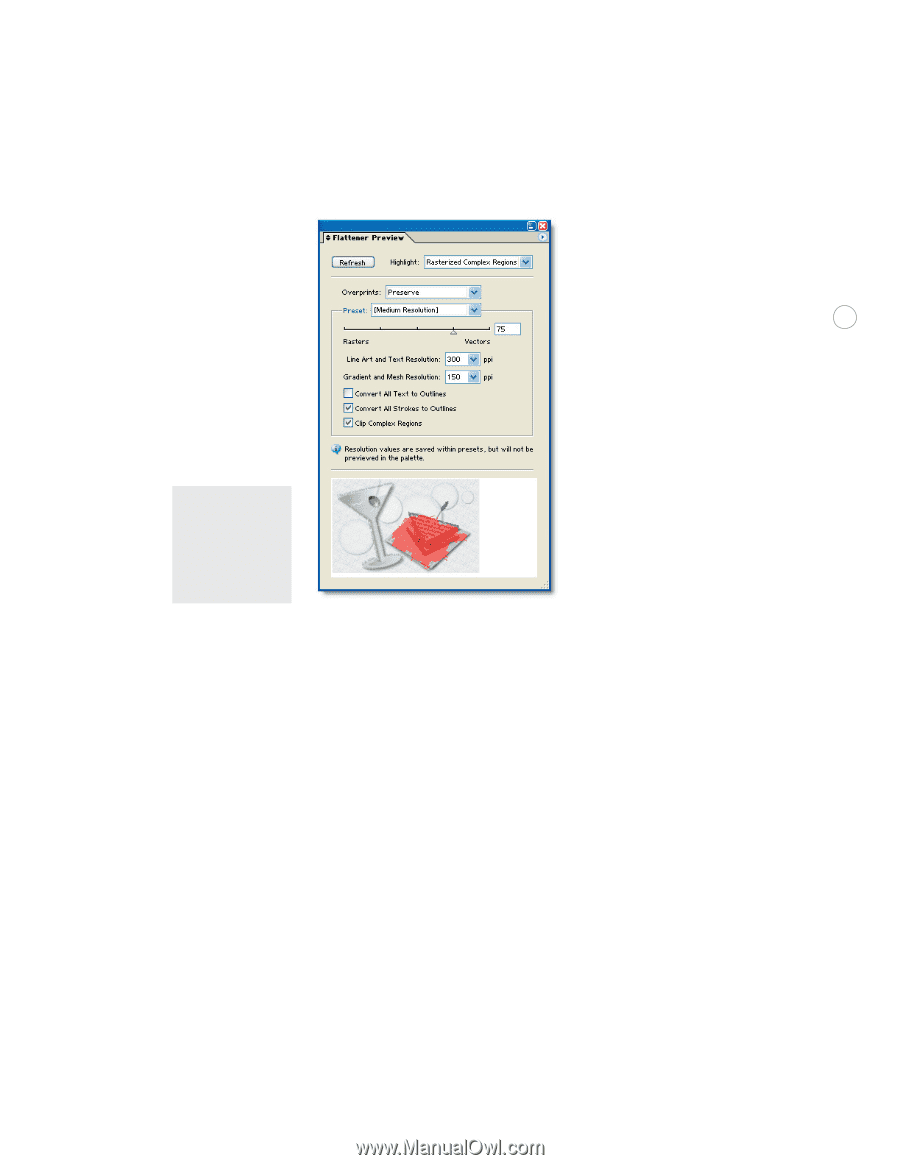
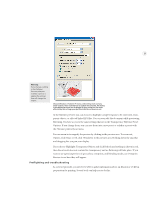
21 Warning: If you change a setting in the Flattener Preview palette or redefine a preset, it applies the settings that will change the output. Choose Window > Flattener Preview, select the preset and any other options, then click Refresh to update the preview. All objects in the palette preview are displayed as gray except for the areas affected by the settings you specified, which are shown in red. In the flattener preview, you can choose to highlight complex regions to be rasterized, transparent objects, or affected linked EPS files. You can even edit the document while previewing flattening. You have access to the same settings that are in the Transparency Flattener Preset Options. If you change them, you can save them into a new preset or redefine a preset with the Flattener palette flyout menu. You can zoom in to magnify the preview by clicking in the preview area. To zoom out, Option-click (Mac) or Alt-click (Windows) in the preview area. Holding down the spacebar and dragging lets you pan your display. If you choose Highlight: Transparent Objects and click Refresh and nothing is shown in red, then the artwork does not contain live transparency and no flattening will take place. If you want to see a precise preview of spot colors, overprints, and blending modes, use Overprint Preview to see how they will appear. Preflighting and troubleshooting As a service provider, you need to be able to gather information about an Illustrator CS file in preparation for printing. Several tools can help you to do this.
-
 1
1 -
2
-
3
-
4
-
5
-
6
-
7
-
8
-
9
-
10
-
11
-
12
-
13
-
14
-
15
-
16
-
17
-
 18
18 -
 19
19 -
 20
20 -
 21
21 -
 22
22 -
 23
23 -
 24
24 -
 25
25 -
 26
26 -
 27
27 -
 28
28 -
29
-
30
-
31
-
32
-
33
-
34
-
35
-
36
 |
 |