Brother International DCP-J140W Software Users Manual - English - Page 150
Scan to File, The Scan to OCR function is available for English, French, German, Dutch, Italian
 |
View all Brother International DCP-J140W manuals
Add to My Manuals
Save this manual to your list of manuals |
Page 150 highlights
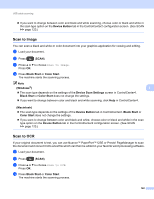
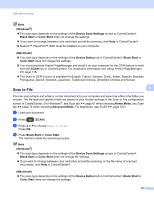
USB cable scanning Note (Windows®) 8 The scan type depends on the settings of the Device Scan Settings screen in ControlCenter4. Black Start or Color Start does not change the settings. If you want to change between color and black and white scanning, click Help in ControlCenter4. Nuance™ PaperPort™12SE must be installed on your computer. (Macintosh) 8 The scan type depends on the settings of the Device Button tab in ControlCenter2. Black Start or Color Start does not change the settings. You must download Presto! PageManager and install it on your computer for the OCR feature to work from the SCAN key or ControlCenter2. For installation information see Using Presto! PageManager uu page 118. The Scan to OCR function is available for English, French, German, Dutch, Italian, Spanish, Brazilian Portuguese, Danish, Swedish, Japanese, Traditional Chinese, Simplified Chinese and Korean. Scan to File 8 8 You can scan a black and white or a color document into your computer and save it as a file in the folder you choose. The file type and specific folder are based on your chosen settings in the Scan to File configuration screen of ControlCenter. (For Windows®, see Scan tab uu page 61 when choosing Home Mode, see Scan tab uu page 72 when choosing Advanced Mode. For Macintosh, see SCAN uu page 123.) a Load your document. b Press (SCAN). c Press a or b to choose Scan to File. Press OK. d Press Black Start or Color Start. The machine starts the scanning process. Note (Windows®) 8 The scan type depends on the settings of the Device Scan Settings screen in ControlCenter4. Black Start or Color Start does not change the settings. If you want to change between color and black and white scanning, or the file name of scanned documents, click Help in ControlCenter4. (Macintosh) 8 The scan type depends on the settings of the Device Button tab in ControlCenter2. Black Start or Color Start does not change the settings. 143
-
 1
1 -
2
-
3
-
4
-
5
-
6
-
7
-
8
-
9
-
10
-
11
-
12
-
13
-
14
-
15
-
16
-
17
-
18
-
19
-
20
-
21
-
22
-
23
-
24
-
25
-
26
-
27
-
28
-
29
-
30
-
31
-
32
-
33
-
34
-
35
-
36
-
37
-
38
-
39
-
40
-
41
-
42
-
43
-
44
-
45
-
46
-
47
-
48
-
49
-
50
-
51
-
52
-
53
-
54
-
55
-
56
-
57
-
58
-
59
-
60
-
61
-
62
-
63
-
64
-
65
-
66
-
67
-
68
-
69
-
70
-
71
-
72
-
73
-
74
-
75
-
76
-
77
-
78
-
79
-
80
-
81
-
82
-
83
-
84
-
85
-
86
-
87
-
88
-
89
-
90
-
91
-
92
-
93
-
94
-
95
-
96
-
97
-
98
-
99
-
100
-
101
-
102
-
103
-
104
-
105
-
106
-
107
-
108
-
109
-
110
-
111
-
112
-
113
-
114
-
115
-
116
-
117
-
118
-
119
-
120
-
121
-
122
-
123
-
124
-
125
-
126
-
127
-
128
-
129
-
130
-
131
-
132
-
133
-
134
-
135
-
136
-
137
-
138
-
139
-
140
-
141
-
142
-
143
-
144
-
 145
145 -
 146
146 -
 147
147 -
 148
148 -
 149
149 -
 150
150 -
 151
151 -
 152
152 -
 153
153 -
 154
154 -
 155
155 -
156
-
157
-
158
-
159
-
160
-
161
-
162
-
163
-
164
-
165
-
166
 |
 |
