Brother International HL 5030 Service Manual
Brother International HL 5030 - B/W Laser Printer Manual
 |
View all Brother International HL 5030 manuals
Add to My Manuals
Save this manual to your list of manuals |
Brother International HL 5030 manual content summary:
- Brother International HL 5030 | Service Manual - Page 1
Brother Laser Printer SERVICE MANUAL MODEL: HL-5030/5040/5050/5070N Read this manual thoroughly before maintenance work. Keep this manual in a convenient place for quick and easy reference at all times. January 2003 SM-PRN035 - Brother International HL 5030 | Service Manual - Page 2
are subject to change without notice. Trademarks: The brother logo is a registered trademark of Brother Industries, Ltd. Apple, the Apple Logo, and Macintosh MS-DOS are registered trademarks of Microsoft Corporation. Windows is a registered trademark of Microsoft Corporation in the U.S. and - Brother International HL 5030 | Service Manual - Page 3
of the laser printer (hereinafter referred to as "this machine" or "the printer"). This information is vital to the service technician to maintain the high printing quality and performance of the printer. This service manual covers the HL-5030/5040/5050/5070N printers. This manual consists of - Brother International HL 5030 | Service Manual - Page 4
Print a test page...2-6 3.2 For Windows® Users ...2-7 3.3 For Macintosh Users ...2-11 4. PRINTING METHODS 2-14 4.1 Printing from the Paper Tray 2-14 4.2 Printing from manual feed Tray (HL-5030/5040 only 2-14 4.3 Printing from Multi-purpose Tray (MP Tray) (HL-5050/5070N only 2-15 4.4 Printing on - Brother International HL 5030 | Service Manual - Page 5
HL-5030/5040/5050/5070N SERVICE MANUAL 4.6 Printing on Both Sides of the Paper (manual duplex printing 2-24 4.7 Guidelines for Interface ...3-7 1.3.5 ROM...3-8 1.3.6 Flash ROM ...3-9 1.3.7 SDRAM ...3-10 1.3.8 Optional RAM...3-11 1.3.9 EEPROM...3-13 1.3.10 Reset Circuit ...3-13 1.3.11 Engine - Brother International HL 5030 | Service Manual - Page 6
sensor / Paper empty sensor (HL-5040/5050/5070N only 3-24 2.3.4 Paper eject sensor ...3-24 2.3.5 MP PE sensor ...3-25 2.4 Drum Unit...3-26 2.4.1 Photosensitive drum ...3-26 2.4.2 Primary charger ...3-26 2.4.3 Transfer roller...3-26 2.4.4 Cleaner ...3-26 2.5 Toner Cartridge...3-26 2.6 Print Process - Brother International HL 5030 | Service Manual - Page 7
HL-5030/5040/5050/5070N SERVICE MANUAL 5. GUIDELINES FOR LEAD FREE SOLDER 4-62 CHAPTER 5 PERIODIC MAINTENANCE 5-1 1. CONSUMABLE PARTS 5-1 1.1 Drum Unit...5-1 1.2 Toner Cartridge...5-3 2. PERIODICAL REPLACEMENT PARTS 5-8 2.1 Fixing Unit ...5-9 2.2 Paper Feeding Kit...5-12 3. PERIODICAL CLEANING - Brother International HL 5030 | Service Manual - Page 8
SERVICE SUPPORT SOFTWARE 7-1 1. CONTROL PANEL 7-1 1.1 Test Print Mode ...7-1 1.2 Service Mode...7-2 1.3 Inspection Mode ...7-3 2. HOW TO KNOW DRUM UNIT LIFE & PAGE COUNTER 7-5 3. HOW TO USE THE SELF-DIAGNOSTICS TOOLS 7-8 4. NVRAM DEFAUT VALUE 7-12 5. HOW TO REWRITE HL-5030/5040/5050/5070N FLASH - Brother International HL 5030 | Service Manual - Page 9
HL-5030/5040/5050/5070N SERVICE MANUAL REGULATION LASER SAFETY (110 - 120V MODEL ONLY) This printer is certified as a Class I laser product under the US Department of Health and Human Services label for Chinese manufactured products MANUFACTURED: C BROTHER Corporation (Asia) Ltd. Shenzen Buji Nan - Brother International HL 5030 | Service Manual - Page 10
Å LASER DE CLASSE 1 LASER KLASSE 1 PRODUKT This printer has a laser diode which emits invisible laser radiation in the Laser Unit. The Laser Unit specified in this manual may result in hazardous radiation exposure. For Finland and Sweden LUOKAN 1 LASERLAITE KLASS 1 LASER APPARAT Varoitus! Laitteen - Brother International HL 5030 | Service Manual - Page 11
HL-5030/5040/5050/5070N SERVICE MANUAL SAFETY INFORMATION CAUTION FOR LASER PRODUCT (WARNHINWEIS FUR LASER DRUCKER) CAUTION: When the machine during servicing is operated with the cover open, the regulations of VBG 93 and the performance instructions for VBG 93 are valid. CAUTION: In case of - Brother International HL 5030 | Service Manual - Page 12
cautions that must be observed to service the printer properly or prevent damage to the printer. NOTE: Indicates notes and useful tips to remember when servicing the printer. **Listed below are the various kinds of "WARNING" messages included in this manual. WARNING Always turn off the power - Brother International HL 5030 | Service Manual - Page 13
HL-5030/5040/5050/5070N SERVICE MANUAL CHAPTER 1 GENERAL 1. FEATURES This printer has the following features; High Resolution and Fast Print Speed True 600 x 600 dots/ true 300 x 300 dots per inch (dpi) and HQ1200 (HL5040/5050/5070N only) for graphics with microfine toner and up to 16 pages per - Brother International HL 5030 | Service Manual - Page 14
Support (HL-5040/5050/5070N only) These printers support the following printer emulation modes; HP LaserJet (PCL6), PostScript Level 3 language emulation (Brother BR-Script Level 3), Epson FX-850 and IBM Proprinter XL. HL-5040:only HP LaserJet (PCL6) When you use DOS application software or Windows - Brother International HL 5030 | Service Manual - Page 15
Support Flap (Support Flap) Front Cover Release Button Support Flap S Face-down Output Tray (Top Output Tray) Front cover (HL-5030 and HL-5040) Manual Feed Tray (HL-5050 and HL-5070N) Multi-purpose Tray (MP Tray) Power Switch Paper Tray *The printer illustration is based on HL-5050 and HL-5070N - Brother International HL 5030 | Service Manual - Page 16
beam scanning Laser Wavelength: Output: 780 nm 5mW max Resolution (HL-5030) 600 dpi (for Windows® 98/Me, Windows®2000/XP, and Mac OS) 300 dpi (for Windows® 98/Me, Windows® 2000/XP, and Mac OS) (HL-5040/5050/5070N) HQ1200 (for Windows® 95/98/Me, WindowsNT® 4.0, Windows® 2000/XP, and Mac OS - Brother International HL 5030 | Service Manual - Page 17
133MHz GDI HP LaserJet (PCL level 6) Automatic emulation selection among HP LaserJet (PCL level 6), Brother BR-Script Level 3, EPSON FX-850 or IBM Proprinter XL Windows 95/98/Me, Windows NT 4.0, Windows® 2000/XP driver, supporting Brother Native - Brother International HL 5030 | Service Manual - Page 18
tray is installed, the total height (printer + lower tray) will be 353mm. Weight HL-5030/5040: Approx. 10.5 kg (Included Toner and Drum) Approx. 9.1 kg (Excluded Toner and Drum) HL-5050/5070N: Approx. 11.5 kg (Included Toner and Drum) Approx. 10.1 kg (Excluded Toner and Drum) *NOTE: • The power - Brother International HL 5030 | Service Manual - Page 19
HL-5030/5040/5050/5070N SERVICE MANUAL 3.4 Network Type / Speed Protocols Management Firmware update Supplied software 10/100 Base TX Ethernet Automatic negotiation TCP/IP (RARP, BOOTP, DHCP, APIPA, NetBIOS, WINS, SSDP, Rendezvous, LPR/LPD, Port9100, POP3/SMTP, SMB, IPP, FTP, - Brother International HL 5030 | Service Manual - Page 20
Paper Feedable paper (1) Paper type Paper type Tray1 Manual feed tray MP tray Plain paper 60 g/m2 Letter size Envelope O O Card O O Tray 2 Select the paper type from the printer driver O Plain paper O Plain paper Bond paper Thick paper or thicker paper Transparencies Thicker paper - Brother International HL 5030 | Service Manual - Page 21
HL-5030/5040/5050/5070N SERVICE MANUAL (3) Other paper specifications Basis weight Cut Xerox Recycled Supreme 3M CG3300 Avery laser label L7163 USA Xerox 4200DP 20 lb Hammermill Laser Paper 24 lb 3M CG 3300 Avery laser label #5160 *This printer can use recycled paper that meets - Brother International HL 5030 | Service Manual - Page 22
(80 g/m2 or 20 lbs.) * Manual feed tray: Single sheet 3.5.3 Print delivery (1) Face down output tray capacity: Maximum 150 sheets (80 g/m2) face down only (2) Face up output tray capacity: (HL-5050/5070N) Maximum 25 sheets (80 g/m2) face up only (HL-5030/5040) Single sheet NOTE: Face-down - Brother International HL 5030 | Service Manual - Page 23
HL-5030/5040/5050/5070N SERVICE MANUAL (3) We recommend the following print methods (output tray) for each paper media type. Media type Plain paper Thick paper Recycled paper Transparency Label Envelope Card Paper output Face down Face up O O O O O O O O O 1-11 - Brother International HL 5030 | Service Manual - Page 24
CHAPTER 1 GENERAL 3.6 3.6.1 Printable Area PCL5e/EPSON/IBM emulation The figure below shows the printable area each emulation guarantees when printing on Portrait and Landscape. 1-12 - Brother International HL 5030 | Service Manual - Page 25
HL-5030/5040/5050/5070N SERVICE MANUAL The table below shows the printable areas when printing on Portrait for each paper size. Size A B C D E F G Letter Legal Folio Executive A 4 A 5 A 6 B 5 (JIS specified by JIS except B5 (ISO). • The dot size is based on 300 dpi resolution. 1-13 - Brother International HL 5030 | Service Manual - Page 26
CHAPTER 1 GENERAL 1-14 - Brother International HL 5030 | Service Manual - Page 27
HL-5030/5040/5050/5070N SERVICE MANUAL The table below shows the printable areas when printing on Landscape for each paper size. Size A B C D E F except B5 (ISO). • The dot size is based on 300 dpi resolution. 3.6.2 PCL6/BR-Script3 emulation You can not print within 4.2 mm (50dots in 300 - Brother International HL 5030 | Service Manual - Page 28
CHAPTER 1 GENERAL 3.7 Print Speeds with Various Settings Print speed of the HL-5030/5040/5050/5070N printers is up to 16/17 ppm when loading A4 or Letter size paper from the paper tray in the plain paper mode. Actual print speed - Brother International HL 5030 | Service Manual - Page 29
HL-5030/5040/5050/5070N SERVICE MANUAL 3.8 Toner Cartridge Weight Information Toner Cartridge Weight (approx weight) TN7600/TN560 Brand new Toner Cartridge Weight 827.5g Toner Weight at Brand New Toner Cartridge 197.5±2.5g Toner Cartridge Weight at Toner Near Empty 720-725g Remain Toner - Brother International HL 5030 | Service Manual - Page 30
Mie Brother C: BIUK (1) Printer: Printed on the label attached on the rear of the main body < SERIAL NO. > U 5 2 6 8 2 A 3 J 1 1 1 1 0 1 SEQUENTIAL NO. FACTORY ID NO. YEAR MONTH (2) Process unit: Imprinted on the aluminum bag (Drum unit with toner cartridge) 3A11 - Brother International HL 5030 | Service Manual - Page 31
HL-5030/5040/5050/5070N SERVICE MANUAL (4) Toner cartridge: Imprinted on the aluminum bag 3A30 J YEAR MONTH DATE FACTORY ID NO. Printed on the bar code label attached on the toner cartridge CARTRIDGE PRODUCTION INFO. M 3 9 A 0 0 0 1 9 9 A MONTH YEAR SERIAL NO. TONER VOLUME FACTORY ID NO. - Brother International HL 5030 | Service Manual - Page 32
HL-5030/5040/5050/5070N SERVICE MANUAL CHAPTER 2 INSTALLATION AND BASIC OPERATION 1. CONDITIONS printer from direct sunlight when the printer is unavoidably set up near a window. • Do not place the printer near devices that contain magnets or generate magnetic fields. • Do not subject the printer - Brother International HL 5030 | Service Manual - Page 33
Check the following system requirements to setup and operate the printer using Brother Printing Solution for Windows: Operating system Windows 95, 98, 98SE Windows NT Workstation 4.0 Windows 2000 Professional Windows Me Windows XP Computer / Processor 486/ 66MHz Pentium 75MHz Pentium 133MHz - Brother International HL 5030 | Service Manual - Page 34
HL-5030/5040/5050/5070N SERVICE MANUAL 2. UNPACKING When unpacking the printer, check to see that all of the following components are included in the carton. Printer AC power cord CD-ROM Drum Unit Assembly (with Toner Cartridge included) Quick Setup Guide Fig. 2-1 NOTE: Components may vary - Brother International HL 5030 | Service Manual - Page 35
and driver installation to use the printer. Firstly, identify the Operating System on your computer. (Windows® 95/98/Me, Windows NT® 4.0, Windows® 2000/XP and Macintosh)Then, purchase the appropriate interface cable (Parallel, USB or Network) for your computer. Most existing parallel cables support - Brother International HL 5030 | Service Manual - Page 36
HL-5030/5040/5050/5070N SERVICE MANUAL 3.1.1 Install the drum unit assembly (1) Open the front cover by pressing the front cover release button. (2) Unpack the drum unit assembly. Remove the protective part. (3) Rock it from side to side several times to distribute the toner evenly inside the - Brother International HL 5030 | Service Manual - Page 37
of paper well to avoid paper jams and misfeeds. (4) Put paper in the paper tray. Check that the paper is flat in the tray and below the maximum paper mark. Fig. 2-5 (5) Put the paper tray firmly back in the printer. 3.1.3 Print a test page (1) Make sure the printer power switch is off. Connect - Brother International HL 5030 | Service Manual - Page 38
HL-5030/5040/5050/5070N SERVICE MANUAL Follows the instructions for your operating system and interface cable type. 3.2 For Windows Users Connect the printer to the PC & install the driver For parallel interface cable users (for HL-5040/5050/5070N only) (1) Click "Connect the interface cable & - Brother International HL 5030 | Service Manual - Page 39
: The setup is now complete. For Windows® 2000/XP users: Follow the instructions below for setting the PC printer port. For Windows® 2000/XP users only (1) Click Start, and then Printers and Faxes. Fig. 2-8 (2) Select the Brother HL-5000 series/ Brother HL-5070 series icon. (3) From the File menu - Brother International HL 5030 | Service Manual - Page 40
HL-5030/5040/5050/5070N SERVICE MANUAL NOTE: The default password for the print server is "access". You can use the BRAdmin Professional software or a web browser to change this password. Brother has also developed Web BRAdmin, an enterprise network software utility that enables management of - Brother International HL 5030 | Service Manual - Page 41
users (LPR-recommended Peer-toPeer printing method) Configuring the LPR port (1) Select Brother Peer-to-Peer Network Printer, and then click the Next button. (2) Select Search from a list of available printers or enter your printer's IP address. Click the Next button. Fig. 2-10 NOTE: Contact your - Brother International HL 5030 | Service Manual - Page 42
HL-5030/5040/5050/5070N SERVICE MANUAL (3) Select the IP address of your printer and LPR, and then click the Next button. (4) Click the Finish button. Fig.2-11 For WindowsNT® 4.0 and Windows® 2000/XP users: The setup is now complete. For Windows® 95/98/ME users: After your PC has restarted, setup - Brother International HL 5030 | Service Manual - Page 43
the Applications (Mac OS 9) folder. Open the Utilities folder. (7) Open the Desktop Printer Utility icon. (8) Select Printer (USB), and then click the OK button. (9) Click the Change......button in the PostScript Printer Description (PPD) file. Select Brother HL-5050 series/HL-5070N series, and then - Brother International HL 5030 | Service Manual - Page 44
HL-5030/5040/5050/5070N SERVICE MANUAL For network users (HL-5070N only) Connect the printer to the Macintosh & install the BR-Script PPD file (1) Click Connect the interface cable & Install the driver/utility from the Initial Setup menu. (2) Select the Network - Brother International HL 5030 | Service Manual - Page 45
tray' in this chapter and subsection 3.5 'Paper' in CHAPTER 1. 4.2 Printing from manual feed tray (HL-5030/5040 only) (1) Select the Paper Size, Media Type and paper Source etc. in the printer driver. (2) Send the print data to the printer. NOTE: A NO PAPER message is shown in the Status Monitor and - Brother International HL 5030 | Service Manual - Page 46
HL-5030/5040/5050/5070N SERVICE MANUAL (4) Using both hands to put paper in the manual feed tray until the front edge of the paper touches the paper feed roller. Hold the paper in this position until the printer automatically feeds the paper in for a short distance, and then let go of the printer. - Brother International HL 5030 | Service Manual - Page 47
support flap. Fig. 2-16 (4) When loading paper in the MP tray, make sure it touches the back of the tray and remains under the maximum paper height guides in a skewed printout or a paper jam. (5) While pressing the paper-guide release lever, slide the paper guide to fit the paper size. NOTE: - Brother International HL 5030 | Service Manual - Page 48
HL-5030/5040/5050/5070N SERVICE MANUAL 4.4 Printing on envelopes Use of any of the envelopes listed below may cause damage to the printer. Such damage is not covered under any warranty or service agreement. • Envelopes that are damaged, curled, wrinkled, or irregularly shaped • Envelopes that are - Brother International HL 5030 | Service Manual - Page 49
output tray. Fig.2-17 (3) Send the print data to the printer. NOTE: A NO PAPER status is shown by the control panel LEDs until you put a sheet of paper in the manual feed tray. Fig.2-18 (4) Open the manual feed tray. Slide the paper guides to fit the envelope size. Fig. 2-19 NOTE: - Brother International HL 5030 | Service Manual - Page 50
HL-5030/5040/5050/5070N SERVICE MANUAL (5) Using both hands put the envelope in the manual feed tray until the front edge of the envelope touches the paper feed roller. Hold the envelope in this position until the printer etc. in the printer driver. (2) Open the back output tray. (3) Open the MP - Brother International HL 5030 | Service Manual - Page 51
been printed> At the back of the printer, open the back output tray and push printing your envelopes, close the back output tray to reset the two blue tabs back to their original position resulting in a skewed printout or a jam. (6) Press and slide the paper-width guide to fit the envelope size. NOTE: - Brother International HL 5030 | Service Manual - Page 52
HL-5030/5040/5050/5070N SERVICE MANUAL NOTE: When you put envelopes in the MP tray, please remember the following; *During printing, the inside tray rises to feed envelopes into the printer may cause a jam. (5) Put the paper tray firmly back in the printer. NOTE: Pull out the support flap to prevent - Brother International HL 5030 | Service Manual - Page 53
from the manual feed tray (For HL-5030 and HL-5040) NOTE: When the back output tray is open, the printer has a straight paper path from the manual feed tray to the back output tray. (1) Select the Paper Size, Media Type, Paper Source, and other settings in the printer driver. (2) Send the - Brother International HL 5030 | Service Manual - Page 54
HL-5030/5040/5050/5070N SERVICE MANUAL Printing on transparencies from the MP tray (For HL-5050 and HL-5070N) NOTE: When the back output tray is open, the printer has a straight paper path from the MP tray to the back of the printer. (1) Select the Paper Size, Media Type, Paper Source, and other - Brother International HL 5030 | Service Manual - Page 55
printing) The supplied printer drivers for Windows® 95/98/Me, Windows® NT 4.0, Windows® 2000/XP, Mac OS 8.6 to 9.2 and Mac OS X 10.1 or later (except for Mac OSX 10.2) all enable manual duplex printing. NOTE: The PS driver does not support manual duplex printing. Manual duplex printing from the - Brother International HL 5030 | Service Manual - Page 56
HL-5030/5040/5050/5070N SERVICE MANUAL (3) Remove the printed even-numbered pages from the output tray and put them in the same order back into the manual feed tray. Place the paper with the side that is going to be printed on (the blank side) face up. Follow the instructions on the computer screen. - Brother International HL 5030 | Service Manual - Page 57
been printed on, and you cannot feed the paper for the second time from manual feed tray or MP tray to allow the other side of the paper to be printed on: At the back of the printer, open the back output tray and push down the blue tabs at the left - Brother International HL 5030 | Service Manual - Page 58
HL-5030/5040/5050/5070N SERVICE MANUAL 4.8 Paper orientation for printing on both sides of the paper The printer prints the second page first. If you print 10 pages on 5 sheets of paper, it will print page 2 then page 1 on the first sheet of - Brother International HL 5030 | Service Manual - Page 59
Buttons & LED functions LEDs 1) Toner LED indicates when the Toner is low or empty. 2) Drum LED indicates when the Drum is nearing end of life. 3) Paper LED indicates when there is a paper jam. 4) Status LED will flash and change color depending on the printer status. 5.1.2 Control Panel Buttons - Brother International HL 5030 | Service Manual - Page 60
HL-5030/5040/5050/5070N SERVICE MANUAL 5.2 LED Indications NOTE: When the power switch is off or the printer is in Sleep mode, all the LEDs are off. LED Toner Drum Paper Printer status Sleep mode The power switch is off or the printer is in Sleep mode. Pressing the Go button wakes up the printer - Brother International HL 5030 | Service Manual - Page 61
that you obtain a new drum unit to replace the current one. See 1.1 Drum unit in Chapter 5. The Drum LED alternates turning on for 2 seconds and off for 3 seconds alternately. Paper jam Clear the paper jam referring to 4. Paper Problems Chapter 6. If the printer does not start printing, press - Brother International HL 5030 | Service Manual - Page 62
Paper Status Fig.2-43 Cover open HL-5030/5040/5050/5070N SERVICE MANUAL 5.3 Service call indications If there is an error that can not be put right, the printer will show that a service call is needed by lighting up all the LEDs as shown in the figure below. Toner Drum Paper Status Fig.4-44 If - Brother International HL 5030 | Service Manual - Page 63
Fixing unit failure Laser unit failure Main motor failure Main PCB failure Engine PCB failure Toner DIMM failure Drum Paper Status 5.4 press the Go button to clear the error, and then continue to use the printer. Reprint If you want to reprint a document that has just been printed, you - Brother International HL 5030 | Service Manual - Page 64
HL-5030/5040/5050/5070N SERVICE MANUAL 5.5 5.5.1 Other Control Features The printer has the following useful features; Sleep mode When the printer blinks to indicate that the printer is warming up. • You can change the timeout for the sleep mode with the supplied printer driver (all models) . The - Brother International HL 5030 | Service Manual - Page 65
light up. Keep the Go button pressed down until all the LEDs except for Toner LED go off. When the Drum, Paper and Status LEDs go off, release the Go button. (4) Press the Go button again. The printer will print a test page. If you are using Brother's Windows PCL printer - Brother International HL 5030 | Service Manual - Page 66
the Go button again until the Drum LED comes on. (5) When the Drum LED comes on, release the Go button. The printer will print a list of the internal fonts. If you are using Brother's Windows PCL printer driver, you can print a list of - Brother International HL 5030 | Service Manual - Page 67
. NOTE: *If you wish to reset the printer and automatically disable the APIPA protocol, follow steps 1 to 4 above, however, hold down the Go button until the Status LED is green, not yellow. *For more information on APIPA, see the Network User's Guide or visit http://solutions.brother.com 2-36 - Brother International HL 5030 | Service Manual - Page 68
HL-5030/5040/5050/5070N SERVICE MANUAL 7. PAPER CASSETTE INFORMATION (FOR EUROPE ONLY) The paper cassette fitted to the printer is different from the service manual information for printers shipped to Europe as follows: (1) The paper cassette supplied with the HL- 5030/5040/5050/5070N printer does - Brother International HL 5030 | Service Manual - Page 69
(Control panel) Laser unit Drive block (DC motor) Drum unit Charging block Transfer block Drum Paper dust cleaner block Developing block Toner cartridge Image generation system Fig. 3-1 Paper tray unit Paper cassette MP tray (HL-5050/5070N only) Front cover ASSY (HL-5030/5040 only) Fixing - Brother International HL 5030 | Service Manual - Page 70
the main PCB. (HL-5030/5040/5050/5070N) A S I C Reset Circuit CPU Core (SPARClite 133MHz) BUS INT Oscillator 66.6MHz Program + Font ROM HL-5030:1MB HL-5040:4MB HL-5050/5070N:8MB Network Program (HL-5070N only)(1.5 MB) STORAGE (0.5 MB) RAM HL-5030:4MB HL-5040:8MB HL-5050/5070N:16MB RAM (DIMM - Brother International HL 5030 | Service Manual - Page 71
HL-5030/5040/5050/5070N SERVICE MANUAL 1.3 Main PCB For the entire circuit diagram of the main PCB, see APPENDIX 1. to 7. 'MAIN PCB CIRCUIT DIAGRAM' in this manual. 1.3.1 CPU A Fujitsu 32bit RISC CPU, SPARClite is built in the ASIC. While the CPU is driven with a clock frequency of 66.66 MHz in - Brother International HL 5030 | Service Manual - Page 72
CHAPTER 3 THEORY OF OPERATION 10k 10k R26 R27 DATA[15-0] 6F/8F/3-6A DATA[0] DATA[1] DATA[2] DATA[3] DATA[4] DATA[5] DATA[6] DATA[7] DATA[8] DATA[9] DATA[10] DATA[11] DATA[12] - Brother International HL 5030 | Service Manual - Page 73
HL-5030/5040/5050/5070N SERVICE MANUAL The functions of the interface block communication with external devices are described below; 1.3.2 USB Stores the data received from the PC into DRAM as controlled by the DMA controller. The transmission speed is 480Mbps or 12Mbps. 0V - Brother International HL 5030 | Service Manual - Page 74
pull-up resistance in signal wire at the connector side L PC Printer H Printer PC CDCC_DIR 3B CDCC_HD 3B 0V U8 48 18 DIR VCC 9 DI8 15 NC 33 NC 34 NC 35 NC 37 FG 38 FG C135 L PC Printer H Printer PC CDCC_DIR 2B CDCC_HD 2B 0V U11 48 18 DIR VCC 1 7 HD VCC - Brother International HL 5030 | Service Manual - Page 75
HL-5030/5040/5050/5070N SERVICE MANUAL 1.3.4 Network Interface The National Semiconductor brand 10 Base-T/100 Base-TX network controller DP83816 is connected with the ASIC through the PCI bus. The pulse transformer and the Link/Active LED are built in the RJ-45 connector. TP69 PAD[ - Brother International HL 5030 | Service Manual - Page 76
HL-5030) A 32Mbit ROM (x 16bit) is fitted. (HL-5040) A 64Mbit ROM (x 16bit) is fitted. (HL-5050) FLASH 64Mbit ROM (x 16bit) is fitted. (HL-5070N) FLASH PIN PIN TOSHIBA FUJITSU FUJITSU LV type BY VSS-46 C110 C103 0V BYTE RESET @R109 0 TP50 13 @R108 0 - Brother International HL 5030 | Service Manual - Page 77
HL-5030/5040/5050/5070N SERVICE MANUAL 1.3.6 Flash ROM A 16Mbit flash ROM (x 16bit) is fitted. (HL-5070N) FLASH PIN PIN 9 13 14 15 R135 0 U12 37 CE VCC VDD3 WE OE RY/BY 27 VSS27 46 VSS46 @C134 C103 0V BYTE RESET A0 A1 NC13 @R133 0 TP152 13 @R134 0 14 NC14 VDD3 A2 A3 29 A4 DQ0 31 - Brother International HL 5030 | Service Manual - Page 78
16bit) is used as the RAM. (HL-5030/5040) A 128Mbit SDRAM (x 16bit) is used as the RAM. (HL-5050) SDRAM SDCSN0 5C RASN ADR[17] 7D Fig. 3-13 A 128Mbit SDRAM (x 16bit) is used as the RAM. (HL-5070N) SDRAM SDCSN0 4C ADR[17] RASN 5F/6A/6C/7F/3-2E/3-3C/4-6E ADR - Brother International HL 5030 | Service Manual - Page 79
HL-5030/5040/5050/5070N SERVICE MANUAL 1.3.8 Optional RAM A 32bit (100 pin) DIMM can be fitted as optional RAM. The main PCB has one slot and the capacity of DIMM can be from 16MB to 128MB. DQ[31-0] DQ[31-0] 7D/1-8C DQ[0] DQ[1] DQ[2] DQ[3] DQ[4] DQ[5] DQ[6] DQ[7] DQ[8] DQ[9] DQ[10 - Brother International HL 5030 | Service Manual - Page 80
CHAPTER 3 THEORY OF OPERATION DQ[31-0] 1-8C/7D/4-7E DQ[0] DQ[1] DQ[2] DQ[3] DQ[4] DQ[5] DQ[6] DQ[7] DQ[8] DQ[9] DQ[10] DQ[11] DQ[12] DQ[13] DQ[14] - Brother International HL 5030 | Service Manual - Page 81
voltage is 2.8V (typ.) and the LOW period of reset is 22.4ms (typ.) VDD3 C33 C40 U3 5 CD C103 4 TP310 NC C103 2 VCC 3 1 0V GND VOUT R3112N281C TP4 R43 68 C43 0V C101 Fig. 3-19 VDD3 C71 C75 U5 5 CD C103 4 TP310 NC C103 2 VCC 3 1 0V GND VOUT - Brother International HL 5030 | Service Manual - Page 82
RESET 0 3 TXD 0 4 RXD 0 6 5V C143 C102 R140 4.7k C154 C103 C103 C101 C101 C152 C153 C142 0V Fig. 3-22 L11 0 2 0V B6B-PH-K-S 1.3.12 Panel I/O The interface with the panel PCB is by full-duplex synchronous serial method. - Brother International HL 5030 | Service Manual - Page 83
HL-5030/5040/5050/5070N SERVICE MANUAL 1.3.13 Video I/O The video signal output from the ASIC is reversed through a transistor and output after being corrected by the buffer IC. VDON0 3D BDN 2D ENBN0 3D VDD3 R22 680 TP230 VDD5 1/10W 330 R13 C14 C471 Q1 TP231 R21 C 680 - Brother International HL 5030 | Service Manual - Page 84
the LVPS. +1.9V is used for the CPU within the ASIC and the logic circuit. OT1 + + C101 6.3V 6V C220 VDD7 C114 C22 16V + + C100 Q2 CN7 2 +7V C220 6.3V 6V 3 0V 1 +3V B3B-EH FG1 Fig. 3-27 OT1 + + VDD3 C138 6.3V 6V C220 + C137 C104 Q5 VCC 2 3 GND OUT - Brother International HL 5030 | Service Manual - Page 85
exit sensor • Toner sensor • Lower cassette manual. Sensor configuration varies according to machine types. Upper cassette sensor Upper paper exit sensor Lower cassette sensor Lower paper exit sensor Lower cassette exit sensor Multi-purpose tray paper exit sensor HL-5030 HL-5040 HL-5050/5070N - Brother International HL 5030 | Service Manual - Page 86
diagram of the low-voltage power supply PCB, see APPENDIX 11. or 12. 'LOWVOLTAGE POWER SUPPLY PCB CIRCUIT DIAGRAM' in this manual. Fuse Lightning Surge Absorber Fuse Heater Circuit (Heater) Thermal Fuse Lamp Feedback Line Filter Rectifier Oscillator 24V Regulation Circuit 3.3V Regulation - Brother International HL 5030 | Service Manual - Page 87
HL-5030/5040/5050/5070N SERVICE MANUAL 1.5.2 High-voltage power supply The high-voltage power supply supply PCB, see APPENDIX 13. 'HIGHVOLTAGE POWER SUPPLY PCB CIRCUIT DIAGRAM' in this manual. 24VI GND Current Regulator B1 Voltage Regulator VR52 Current Regulator B201 Q205 Voltage Regulator B251 - Brother International HL 5030 | Service Manual - Page 88
of Printing Mechanism Heat roller Second Eject roller Corona wire LASER UNIT Scanner motor Blade Outer chute MP DRUM UNIT Rear cover First Eject roller FIXING UNIT Pressure roller PAPER CASSETTE Paper Cleaner Photosensitive drum Transfer roller Fig. 3-31 Regist rear Paper Feed roller - Brother International HL 5030 | Service Manual - Page 89
HL-5030/5040/5050/5070N SERVICE MANUAL 2.2 2.2.1 Paper Transfer Paper supply The paper pick feed roller starts turning, and the paper is fed to the transfer block in the drum unit. Photosensitive drum Transfer roller Regist rear actuator Regist front actuator Paper feed roller Fig. 3-33 The - Brother International HL 5030 | Service Manual - Page 90
the printing image on the photosensitive drum is transferred onto the paper, the paper is fed to the fixing unit to fix unfixed toner onto the paper. Afterwards, the paper is ejected face up straight to the printer rear (straight paper path). Second eject roller Rear cover Paper eject actuator First eject - Brother International HL 5030 | Service Manual - Page 91
the front cover. HL-5030/5040/5050/5070N SERVICE MANUAL Fig. 3-35 Front cover sensor 2.3.2 Toner sensors Detects if there is toner in the toner cartridge. The toner sensor at the left side emits light through the window on the left side of the toner cartridge, then the toner sensor at the right - Brother International HL 5030 | Service Manual - Page 92
CHAPTER 3 THEORY OF OPERATION 2.3.3 Cassette sensor / Paper empty sensor (HL-5040/5050/5070N) Detect if the paper cassette is installed. They also detect if there is paper in the paper cassette. Cassette sensor PCB ASSY Fig. 3-37 2.3.4 Paper - Brother International HL 5030 | Service Manual - Page 93
2.3.5 MP-PE sensor Detects if there is paper in the MP tray. HL-5030/5040/5050/5070N SERVICE MANUAL Fig. 3-39 MP-PE sensor PCB ASSY Feed MP unit 3-25 - Brother International HL 5030 | Service Manual - Page 94
the paper dust or dirt on the surface of the photosensitive drum. 2.5 Toner Cartridge Develops the electrostatic latent image on the photosensitive drum with toner and forms the visible image. 2.6 2.6.1 Print Process Charging The drum is charged to approximately 870V by an ion charge which is - Brother International HL 5030 | Service Manual - Page 95
HL-5030/5040/5050/5070N SERVICE MANUAL 2.6.2 Exposure stage After the drum is positively charged, it is exposed to the light emitted from the laser unit. Laser detector Laser diode Drum Paper Laser beam f θ lens Polygon mirror Lens Motor Fig. 3-41 Laser beam The area exposed to the laser beam - Brother International HL 5030 | Service Manual - Page 96
transferred onto the paper by applying a negative charge to the back of the paper. The negative charge applied to the paper causes the positively charged toner to leave the drum, and adhere to the paper. As a result, the image is visible on the paper. (2) Cleaning process of transfer roller If the - Brother International HL 5030 | Service Manual - Page 97
HL-5030/5040/5050/5070N SERVICE MANUAL 2.6.5 Fixing stage The image transferred to the paper by static electricity is fixed by heat and pressure when passing through the heat roller and the - Brother International HL 5030 | Service Manual - Page 98
HL-5030/5040/5050/5070N SERVICE MANUAL CHAPTER 4 DISASSEMBLY AND RE-ASSEMBLY 1. SAFETY PRECAUTIONS To avoid creating secondary problems by before accessing any parts inside the printer. (2) Some parts inside the printer are extremely hot immediately after the printer is used. When opening the front - Brother International HL 5030 | Service Manual - Page 99
DRUM UNIT 3 PAPER CASSETTE 4 ACCESS COVER 5 OUTER CHUTE 15 MAIN PCB 6 REAR COVER C (FOR HL-5030/5040 ONLY) 7 REAR COVER MP ASSY / OUTER CHUTE MP ASSY (FOR HL-5050/5070N UNIT 11 FRONT COVER ASSY (FOR HL-5030/5040 ONLY) 12 MP UNIT (FOR HL-5050/5070N ONLY) 14 LASER UNIT 16 BASE PLATE / LV INSULATION - Brother International HL 5030 | Service Manual - Page 100
3. DISASSEMBLY PROCEDURE 3.1 AC Cord (1) Disconnect the AC cord from the printer. Printer AC cord HL-5030/5040/5050/5070N SERVICE MANUAL Fig. 4-1 3.2 Drum Unit (1) Open the front cover and remove the drum unit. Drum unit Front cover Fig. 4-2 4-3 - Brother International HL 5030 | Service Manual - Page 101
CHAPTER 4 DISASSEMBLY AND RE-ASSEMBLY 3.3 Paper Tray (1) Close the front cover and pull out the paper tray (2) Remove the paper from the paper tray Front cover Paper tray Fig. 4-3 (3) Remove the pad holder and the separation pad spring from the paper tray Pad holder Separation pad spring Paper tray - Brother International HL 5030 | Service Manual - Page 102
HL-5030/5040/5050/5070N SERVICE MANUAL NOTE: When replacing/re-assembling the pad holder ZL2 ASSY, remove the old grease and apply a suitable amount of grease referring to the figure below; - Brother International HL 5030 | Service Manual - Page 103
CHAPTER 4 DISASSEMBLY AND RE-ASSEMBLY (5) Remove the two Taptite, cup B M3x10, and then remove the paper tray cover. Paper tray Tpatite, cup B M3x10 Fig. 4-7 Paper tray cover Tpatite, cup B M3x10 (6) Remove the pressure roller holder ASSY. Pressure roller holder ASSY Paper tray Fig. 4-8 4-6 - Brother International HL 5030 | Service Manual - Page 104
(7) Remove the pressure roller collar. (8) Remove the pressure roller shaft. Pressure roller shaft 2 HL-5030/5040/5050/5070N SERVICE MANUAL Pressure roller collar 1 Pressure roller holder ASSY Fig. 4-9 (9) Remove the scratch spongy holder ASSY from the pressure roller holder ASSY. (10) Remove the - Brother International HL 5030 | Service Manual - Page 105
the lock lever, and then unhook the catches of the two side guide racks. Side guide L Taptite, cup M2.6x5 2 Taptite, cup M2.6x5 2 Side guide rack 1 Catches Paper tray Side guide rack Lock lever Side guide L Fig. 4-11 (14) Remove the side guides right and left from the paper tray Side - Brother International HL 5030 | Service Manual - Page 106
HL-5030/5040/5050/5070N SERVICE MANUAL (15) Unhook the two catches (A) of the pressure plate while pulling the plastic frame outwards, then unhook the other two catches (B) of the plate while - Brother International HL 5030 | Service Manual - Page 107
to remove the pressure plate, do not bend the pressure plate, gently ease the plastic cover. If the pressure plate is deformed, paper feeding problems may occur. (17) Remove the herical extension spring. (18) Remove the lock lever. Paper tray Herical extension spring 1 2 Lock lever Lock lever - Brother International HL 5030 | Service Manual - Page 108
HL-5030/5040/5050/5070N SERVICE MANUAL (19) Remove the cup B M3x8 Taptite screw, and then remove the side guide gear and the friction spring. (20) Remove the two side guide racks. Taptite, cup B M3x8 Side guide gear Friction spring Side guide rack Side guide rack Fig. 4-16 (21) Remove the - Brother International HL 5030 | Service Manual - Page 109
, they should both be aligned so that the wide end of the racks are in line with the inside edge of the paper guide release slots in the tray before refitting the spring and gear. • When replacing/re-assembling the paper cassette, remove the old grease and apply a suitable - Brother International HL 5030 | Service Manual - Page 110
(24) Remove the paper rear guide. HL-5030/5040/5050/5070N SERVICE MANUAL Paper tray 1 Fig. 4-20 1 Paper rear guide 2 4-13 - Brother International HL 5030 | Service Manual - Page 111
CHAPTER 4 DISASSEMBLY AND RE-ASSEMBLY 3.4 Access Cover (1) Remove the access cover. Access cover Fig. 4-21 3.5 Rear Cover C (1) Remove the bind B M4x12 Taptite screw, and then remove the rear cover C. Rear cover C Taptite, bind B M4x12 Fig. 4-22 4-14 - Brother International HL 5030 | Service Manual - Page 112
3.6 Outer Chute (for HL-5030/5040 only) (1) Remove the outer chute. HL-5030/5040/5050/5070N SERVICE MANUAL Hook Outer Chute (2) Remove the outer chute tray. Fig. 4-23 Outer Chute Outer chute tray Fig. 4-24 4-15 - Brother International HL 5030 | Service Manual - Page 113
CHAPTER 4 DISASSEMBLY AND RE-ASSEMBLY 3.7 Rear Cover MP ASSY / Outer Chute MP ASSY (for HL-5050/5070N only) (1) Remove the rear cover MP ASSY. Hook Rear cover MP ASSY Fig. 4-25 (2) Remove the outer chute MP ASSY. Outer chute MP ASSY Hook Fig. 4-26 4-16 - Brother International HL 5030 | Service Manual - Page 114
(3) Remove the rear cover MP tray. HL-5030/5040/5050/5070N SERVICE MANUAL Rear cover MP ASSY Rear cover MP tray Fig. 4-27 3.8 Rear Cover L/R (1) Remove the two bind B M4x12 Taptite screws, and then remove the rear cover L. (2) - Brother International HL 5030 | Service Manual - Page 115
CHAPTER 4 DISASSEMBLY AND RE-ASSEMBLY 3.9 Side Cover L/R (1) Remove the three bind B M4x12 Taptite screws, and then remove the side cover R. Taptite, bind B M4x12 Hook Hooks Side cover R Hook Hooks Taptite, bind B M4x12 Fig. 4-29 (2) Remove the four bind B M4x12 Taptite screws, and then - Brother International HL 5030 | Service Manual - Page 116
HL-5030/5040/5050/5070N SERVICE MANUAL 3.10 Top Cover (1) Remove the two bind B M4x12 Taptite screws, and then remove the harness Hook Panel PCB ASSY Fig. 4-31 (3) Remove the paper stopper and the support flap S from the top cover ASSY. Paper stopper Support flap S Top cover ASSY Fig. 4-32 4-19 - Brother International HL 5030 | Service Manual - Page 117
and the panel light guide from the top cover ASSY. SW key B Top cover ASSY Panel light guide SW key A Panel PCB ASSY Taptite, cup B M3x8 Fig. 4-33 (6) Remove the panel light guide 2 and the diffusion film from the panel guide. Panel light guide 2 Diffusion film Panel light guide Fig. 4-34 - Brother International HL 5030 | Service Manual - Page 118
HL-5030/5040/5050/5070N SERVICE MANUAL (7) Remove the five bind B M4x12 Taptite screws, and then remove the inner chute. Taptite, bind B M4x12 Inner chute Taptite, bind B M4x12 Hooks Top cover printed - Brother International HL 5030 | Service Manual - Page 119
CHAPTER 4 DISASSEMBLY AND RE-ASSEMBLY 3.11 Front Cover ASSY (for HL-5030/5040 only) (1) Release the link. (2) Remove the front cover ASSY. Frame Link Front cover ASSY Fig. 4-37 4-22 - Brother International HL 5030 | Service Manual - Page 120
HL-5030/5040/5050/5070N SERVICE MANUAL 3.12 MP Unit (for HL-5050/5070N only) (1) Disconnect the two connectors. (2) Remove the MP ground spring. (3) Remove the two bind B M3x10 and cup S M3x6 Taptite screws. (4) Remove the MP solenoid holder - Brother International HL 5030 | Service Manual - Page 121
CHAPTER 4 DISASSEMBLY AND RE-ASSEMBLY (7) While pushing the MP pressure plate, remove the separation plate ASSY. Separation plate ASSY MP chute ASSY MP pressure plate Fig. 4-40 NOTE: When replacing with the new separation plate ASSY, attach it after peeling the cover paper of double-faced tape. - Brother International HL 5030 | Service Manual - Page 122
HL-5030/5040/5050/5070N SERVICE MANUAL (8) Remove the shaft of the MP front cover ASSY from the drive release link, and then remove the MP front cover ASSY from the MP chute ASSY. MP chute ASSY Drive release link Shaft MP front cover ASSY Shaft Fig. 4-42 (9) Remove the bosses from the guide at 2 - Brother International HL 5030 | Service Manual - Page 123
CHAPTER 4 DISASSEMBLY AND RE-ASSEMBLY (10) Remove the MP tray ASSY. MP chute ASSY MP tray ASSY Fig. 4-44 (11) Remove the MP paper guide 2 and the MP paper guide 3 from the MP tray ASSY. MP paper guide 3 MP paper guide 2 MP tray ASSY Fig. 4-45 4-26 - Brother International HL 5030 | Service Manual - Page 124
(12) Open the MP chute ASSY cover. (13) Remove the MP-PE actuator. HL-5030/5040/5050/5070N SERVICE MANUAL MP-PE actuator MP chute ASSY Fig. 4-46 (14) Remove the four bind B M4x12 Taptite screws, and then remove the MP chute ASSY. Taptite, bind B - Brother International HL 5030 | Service Manual - Page 125
CHAPTER 4 DISASSEMBLY AND RE-ASSEMBLY (15) Remove the MP-PE sensor PCB ASSY. MP-PE sensor PCB ASSY MP chute ASSY Hook Hooks Hooks Fig. 4-48 4-28 - Brother International HL 5030 | Service Manual - Page 126
HL-5030/5040/5050/5070N SERVICE MANUAL 3.13 Fixing Unit (1) Disconnect the heater harness and thermistor harness. (2) Remove the bind (3) Remove the three cup B M3x10 Taptite screws, and then remove the FU paper guide. Pin Fixing unit Pins FU paper guide Fig. 4-50 4-29 Taptite, cup B M3x10 - Brother International HL 5030 | Service Manual - Page 127
CHAPTER 4 DISASSEMBLY AND RE-ASSEMBLY (4) Remove the three cup B M3x10 Taptite screws, and then remove the star wheel holder. Fixing unit Pin Pins Taptite, cup B M3x10 Star wheel holder Fig. 4-51 (5) Remove the cup B M3x12 Taptite screw. (6) Release the thermistor ASSY harness from the four hooks. - Brother International HL 5030 | Service Manual - Page 128
HL-5030/5040/5050/5070N SERVICE MANUAL NOTE: When re-assembling the thermistor to the FU frame upper, ensure the direction of the thermistor is correct referring to the figure below; FU - Brother International HL 5030 | Service Manual - Page 129
CHAPTER 4 DISASSEMBLY AND RE-ASSEMBLY (10) Remove the two pan (washer) M2.6x6 Taptite screws. (11) Remove the heat roller 25. (12) Remove the halogen lamp. Screw, pan (washer) M2.6x6 Heat roller 25 FU frame upper Heat roller 25 Halogen lamp Screw, pan (washer) M2.6x6 Colored side 115V:Orange - Brother International HL 5030 | Service Manual - Page 130
34. (15) Remove the HR retaining ring 25. (16) Remove the heat roller washer 25. (17) Remove the HR bearing 25. HR bearing 25 HL-5030/5040/5050/5070N SERVICE MANUAL Heat roller 25 HR bearing 25 Heat roller washer 25 HR retaining ring 25 Fig. 4-57 HR gear 34 ! CAUTION: Never touch the surface - Brother International HL 5030 | Service Manual - Page 131
25 Separate claw ASSY Separate claw ASSY FU frame upper Fig. 4-59 (18) Remove the pressure roller 25. Pressure roller 25 3 2 FU frame lower 1 FU jam remove cover Fig. 4-60 4-34 - Brother International HL 5030 | Service Manual - Page 132
HL-5030/5040/5050/5070N SERVICE MANUAL (19) Remove the three cleaner spring S. (20) Remove the three cleaner pinch roller ASSY S. (21) Remove the cleaner spring L. (22) Remove the cleaner pinch roller - Brother International HL 5030 | Service Manual - Page 133
CHAPTER 4 DISASSEMBLY AND RE-ASSEMBLY (23) Disconnect the connector for the eject sensor harness from the thermistor relay PCB ASSY. (24) Release the eject sensor harness from the three hooks. (25) Remove the bind B M3x10 Taptite screw, and then remove the eject sensor PCB ASSY. (26) Remove the - Brother International HL 5030 | Service Manual - Page 134
HL-5030/5040/5050/5070N SERVICE MANUAL NOTE: When re-assembling the paper eject actuator and the eject actuator spring to the FU frame lower, ensure the paper eject actuator is seated - Brother International HL 5030 | Service Manual - Page 135
Fig. 4-67 (2) Disconnect the LD harness 5P from the laser unit. (3) Disconnect the polygon motor harness and remove the spongy from the laser unit. (4) Remove the six cup S M3x8 Taptite screws, and then remove the laser unit. Laser unit Spongy Polygon motor harness LD harness 5P Taptite, cup - Brother International HL 5030 | Service Manual - Page 136
(5) Remove the shutter arm C. HL-5030/5040/5050/5070N SERVICE MANUAL Shutter arm C Fig. 4-69 Frame L 4-39 - Brother International HL 5030 | Service Manual - Page 137
CHAPTER 4 DISASSEMBLY AND RE-ASSEMBLY 3.15 Main PCB (1) Loosen the two access plate screws. (2) Remove the access plate. Hooks 1 2 Access plate screws Hooks Access plate Hook Fig. 4-70 Hook (3) Disconnect the LD harness 5P from the Main PCB ASSY. (4) Disconnect the three connectors from the - Brother International HL 5030 | Service Manual - Page 138
HL-5030/5040/5050/5070N SERVICE MANUAL (5) Remove the three pan M3x6 screws. (6) Remove the four cup S M3x6 Taptite screws, and then remove the main PCB ASSY. Screw, pan M3x6 Taptite, cup S M3x6 Taptite, cup S M3x6 Main PCB ASSY Fig. 4-72 4-41 - Brother International HL 5030 | Service Manual - Page 139
CHAPTER 4 DISASSEMBLY AND RE-ASSEMBLY 3.16 Base Plate / LV Insulation Sheet (1) Remove the eight bind B M4x12 Taptite screws. (2) Remove the four cup S M3x6 Taptite screws. (3) Remove the pan (washer) M3.5x6 Taptite screw, and then remove the ground wire. (4) Remove the base plate. Taptite, bind - Brother International HL 5030 | Service Manual - Page 140
HL-5030/5040/5050/5070N SERVICE MANUAL 3.17 Engine PCB (1) Disconnect the fifteen connectors. Fan motor 60 unit connector LT connector Polygon motor connector Fan motor 60 connector LVPS connector HVPS connector Engine PCB ASSY Cassette sensor PCB connector Toner sensor (light reception) connector - Brother International HL 5030 | Service Manual - Page 141
CHAPTER 4 DISASSEMBLY AND RE-ASSEMBLY 3.18 High-voltage PS PCB ASSY (1) Remove the bind B M4x12 Taptite screw, and then remove the high-voltage PS PCB ASSY. (2) Disconnect the flat cable from the high-voltage PS PCB ASSY. Taptite, bind B M4x12 High-voltage PS PCB ASSY Flat cable Fig. 4-77 4- - Brother International HL 5030 | Service Manual - Page 142
HL-5030/5040/5050/5070N SERVICE MANUAL 3.19 Low-voltage PS PCB ASSY (1) Remove the bind B M4x12 Taptite screw. (2) Disconnect the two connectors from the low-voltage PS PCB, and then remove - Brother International HL 5030 | Service Manual - Page 143
CHAPTER 4 DISASSEMBLY AND RE-ASSEMBLY 3.20 Paper Feeder (1) Remove the bearing R. (2) Remove the paper pick-up roller ASSY. (3) Remove the two roller collars from the paper pick-up roller ASSY. Roller collar Paper pick-up roller ASSY Roller collar Bearing R 1 2 Fig. 4-80 (4) Remove the bind B - Brother International HL 5030 | Service Manual - Page 144
HL-5030/5040/5050/5070N SERVICE MANUAL (6) Remove the PE actuator and the CA actuator from the frame. CA actuator PE actuator Frame Fig. 4-82 (7) Remove the spring, extension P/R from the gear - Brother International HL 5030 | Service Manual - Page 145
CHAPTER 4 DISASSEMBLY AND RE-ASSEMBLY (10) Remove the bearing L from the P/R shaft. (11) Remove the P/R shaft from the frame. Bearing L P/R shaft 1 2 Fig. 4-84 (12) Remove the idle gear 22. (13) Remove the middle roller gear. (14) Remove the bind B M3x10 taptite screw and the conductor bearing. ( - Brother International HL 5030 | Service Manual - Page 146
HL-5030/5040/5050/5070N SERVICE MANUAL (16) Remove the two cup S M3x6 Taptite screws and the four bind B M4x12 Taptite screws. (17) Remove the front chute ASSY. Taptite, bind B M4x12 Front - Brother International HL 5030 | Service Manual - Page 147
CHAPTER 4 DISASSEMBLY AND RE-ASSEMBLY (19) Remove the feed roller gear. (20) Remove the bearing F/R. (21) Remove the feed roller gear shaft from the frame. Bearing F/R Hook Feed roller gear shaft Bearing F/R Feed roller gear Fig. 4-88 Frame 4-50 - Brother International HL 5030 | Service Manual - Page 148
HL-5030/5040/5050/5070N SERVICE MANUAL (22) Remove the hook of the bearing 5, and then slide the feed roller ASSY in the 5 Joint 5 4 3 Bearing 5 2 1 Hook Bearing 5 Fig. 4-89 NOTE: Be careful that the different direction installation causes jam when you install joint 5. Joint 5 Fig. 4-90 4-51 - Brother International HL 5030 | Service Manual - Page 149
CHAPTER 4 DISASSEMBLY AND RE-ASSEMBLY (25) Remove the chute cover. Chute cover Hook Hook Fig. 4-91 (26) Remove the regist front actuator and regist front actuator spring. (27) Remove the regist rear actuator and regist rear actuator spring. Regist front actuator spring Regist rear actuator - Brother International HL 5030 | Service Manual - Page 150
HL-5030/5040/5050/5070N SERVICE MANUAL NOTE: When assembling the regist front actuator and the regist rear actuator, set the spring as shown in the figure. Regist rear actuator spring Regist rear actuator Hole Hole Regist front actuator Regist front actuator spring Fig. 4-93 4-53 - Brother International HL 5030 | Service Manual - Page 151
frame L. Frame L Main PCB sheet Under bar Taptite, bind B M4x12 Taptite, bind B M3x10 Taptite, bind B M3x10 Fig. 4-94 (4) Remove the back up plate ground spring. (HL-5030/5040 only) Under bar Drive unit Back up plate ground spring Fig. 4-95 4-54 Frame L - Brother International HL 5030 | Service Manual - Page 152
HL-5030/5040/5050/5070N SERVICE MANUAL (5) Remove the cup S M3x6 Taptite screw. (6) Remove the ground spring. (7) Remove the six bind B M4x12 Taptite screws. (8) Remove the cup S M3x10 Taptite screw. (9) Remove the - Brother International HL 5030 | Service Manual - Page 153
CHAPTER 4 DISASSEMBLY AND RE-ASSEMBLY (13) Remove the four cup S M3x6 Taptite screws, and then remove the main motor ASSY. Taptite, cup S M3x6 Main motor ASSY Drive unit Taptite, cup S M3x6 Fig. 4-97 (14) Remove the bind B M3x10 Taptite screw. (15) Remove the P/R solenoid ASSY, the P/R solenoid - Brother International HL 5030 | Service Manual - Page 154
HL-5030/5040/5050/5070N SERVICE MANUAL (18) Disconnect the connector from the front cover sensor. (19) Remove the bind B M3x10 Taptite screw. (20) Remove the toner LED PCB unit ASSY. (21) Remove the sensor clip. (22) Remove the front cover sensor from the main frame R. Front cover sensor Connector - Brother International HL 5030 | Service Manual - Page 155
CHAPTER 4 DISASSEMBLY AND RE-ASSEMBLY 3.22 Fan Motor 60 Unit LV / Fan Motor 60 Unit (1) Remove the fan motor 60 unit LV and the fan motor 60 unit from the main frame R. Main frame R Fan motor 60 unit Fig. 4-100 Fan motor 60 unit LV 4-58 - Brother International HL 5030 | Service Manual - Page 156
screws. (2) Remove the two cup S M3x6 Taptite screws. (3) Remove the cup S M3x16 Taptite screw. (4) Remove the main frame R unit. HL-5030/5040/5050/5070N SERVICE MANUAL Main frame R unit Under bar Taptite, cup S M3x6 Taptite, bind B M4x12 Under bar Taptite, cup S M3x6 Taptite, bind B M4x12 - Brother International HL 5030 | Service Manual - Page 157
Remove the cup S M3x6 Taptite screw. (7) Remove the drum spring R. (8) Remove the FG plate. Main frame R Taptite, cup S M3x6 FG plate Taptite, bind B M4x12 Drum spring R Fig. 4-102 Taptite, bind B M4x12 (9) Remove the toner sensor PCB unit (Light reception). Main frame R Pin Fig. 4-103 4-60 - Brother International HL 5030 | Service Manual - Page 158
4. PACKING AC cords Pad HL-5030/5040/5050/5070N SERVICE MANUAL Accessory bag Accessory carton Drum unit Pad Printer Pad Carton Fig. 4-104 4-61 - Brother International HL 5030 | Service Manual - Page 159
gear 16 Flame L PG4 Idle gear 16A Drive unit Gear 58/88 * PG4: Grease PG662 4 mm dia. ball PG4 Gear 58/88 PG4 4-62 HL-5030/5040/5050/5070N SERVICE MANUAL PG4 PG4 Pendulum gear 22 PG4 Gear 20 center F/R Gear 17 planetary Gear 45 arm F/R PG4 PG4 PG4 Gear, 40/54Y PG4 PG4 Pendulum gear - Brother International HL 5030 | Service Manual - Page 160
thermal conductivity and heat resistant (difficult to melt) 2. Metal composition & wire solder The metal composition of lead-free solder allowed for use on PCBs for Brother's products is following. LF Compositon Manufacture Origin Name Indication r 1 Sn/Ag/Cu Nihon Genma H only Sn/Ag - Brother International HL 5030 | Service Manual - Page 161
HL-5030/5040/5050/5070N SERVICE MANUAL 5. Precautions for hand soldering operations 1) Soldering operations using lead-free solder are basically the same as those using tinlead solder, however, due to the lead-free though the melting point of the lead-free solder is higher. The temperature of the - Brother International HL 5030 | Service Manual - Page 162
conventional solder. 6. Soldering irons When soldering is performed manually using lead-free solder, a soldering iron that has little reduction in HAKKO and M6SIC-40 manufactured by BONKOTE. The prices of these soldering irons for use with lead-free solder are three to four times higher than those - Brother International HL 5030 | Service Manual - Page 163
HL-5030/5040/5050/5070N SERVICE MANUAL CHAPTER 5 PERIODIC MAINTENANCE To avoid creating secondary problems by drum. *For best performance, use only genuine Brother toner. The printer should be used only in a clean, dust-free environment with adequate ventilation. *Printing with a third-party drum - Brother International HL 5030 | Service Manual - Page 164
unit assembly. (Fig.5-2) Fig. 5-2 ! CAUTION: *We recommend that you place the drum unit assembly on a piece of disposable paper or cloth in case you accidentally spill or scatter toner. *To prevent damage to the printer from static electricity, do not touch the electrodes shown in the figure below - Brother International HL 5030 | Service Manual - Page 165
lock lever, take the toner cartridge out of the drum unit assembly. (Fig.5-4) HL-5030/5040/5050/5070N SERVICE MANUAL (4) Unpack the new drum unit. (5) Put the toner cartridge in the new drum unit until you hear it lock into place with a click. When the toner cartridge is installed correctly, the - Brother International HL 5030 | Service Manual - Page 166
before you install it in the printer. The Toner LED alternates turning on for 2 seconds and off for 3 seconds. Toner Drum Paper Status Fig.5-6 If the LED shows this message, the toner cartridge has nearly run out of toner. Buy a new toner cartridge and have it ready before you - Brother International HL 5030 | Service Manual - Page 167
HL-5030/5040/5050/5070N SERVICE MANUAL ! CAUTION: *It is recommended to place the drum unit assembly on a piece of disposable paper or cloth in case you accidentally spill or scatter toner. *To prevent damage to the printer from static electricity, do not touch the electrodes shown in the figure - Brother International HL 5030 | Service Manual - Page 168
to the performance and life of a genuine Brother drum unit. Warranty cover is not applied to problems caused by the use of 3rd party toner or toner cartridges. • Brother strongly recommends that you do not refill the toner cartridge provided with the printer. We also strongly recommend that you - Brother International HL 5030 | Service Manual - Page 169
HL-5030/5040/5050/5070N SERVICE MANUAL NOTE: It is recommended to clean the printer when you replace the toner cartridge. Refer to subsection 3. 'PERIODICAL CLEANING' in this Chapter. 5-7 - Brother International HL 5030 | Service Manual - Page 170
230V) Fixing Unit (115V) Paper Feeding Kit (Pad holder ZL2 / Paper pick-up roller ASSY ZL2) Part No. Qty LJ7898001 1 LJ7897001 1 LJ7920001 1 Service life (number of prints) 80,000 pages 80,000 pages Replacement Procedure See subsection 3.11 in CHAPTER 4. 50,000 pages See subsection 3.3 and 3.18 - Brother International HL 5030 | Service Manual - Page 171
2.1 Fixing Unit 1) Disconnect the AC cord from the printer. HL-5030/5040/5050/5070N SERVICE MANUAL Printer AC cord Fig.5-15 2) Close the front cover and pull out the paper tray. Front cover Paper Tray Fig.5-16 5-9 - Brother International HL 5030 | Service Manual - Page 172
CHAPTER 5 PERIODIC MAINTENANCE 3) Remove the bind B M4x12 Taptite screw, and then remove the outer chute. Outer Chute Taptite, bind B M4x12 4) Remove the rear cover C. Fig.5-17 Rear cover C Fig.5-18 Hook 5-10 - Brother International HL 5030 | Service Manual - Page 173
HL-5030/5040/5050/5070N SERVICE MANUAL 5) Remove the two bind B M4x12 Taptite screws, and then remove the rear cover L. 6) Remove the two bind B M4x12 Taptite screws, and then remove the rear - Brother International HL 5030 | Service Manual - Page 174
CHAPTER 5 PERIODIC MAINTENANCE 2.2 Paper Feeding Kit 1) Disconnect the AC cord from the printer. Printer AC cord Fig.5-21 2) Close the front cover and pull out the paper tray. Front cover Paper tray Fig.5-22 5-12 - Brother International HL 5030 | Service Manual - Page 175
HL-5030/5040/5050/5070N SERVICE MANUAL 3) Remove the pad holder and the separation pad spring from the paper tray. Pad holder Separation pad spring Fig.5-23 4) Remove the bearing R. 5) Remove the - Brother International HL 5030 | Service Manual - Page 176
periodically to avoid any printer problems or print image defects. ! CAUTION: While drum unit and scanner window cleaning basically can be implemented by the end user, the electrical terminals inside the printer and on the drum unit should be cleaned by a service technician. Instruct the users not - Brother International HL 5030 | Service Manual - Page 177
HL-5030/5040/5050/5070N SERVICE MANUAL 4) Clean the primary corona wire inside the drum unit by gently sliding the blue tab from right to left several times. Return the tab to the home position before re-install the drum unit assembly. Home position Fig. 5-25 ! CAUTION: Make sure that the blue tab - Brother International HL 5030 | Service Manual - Page 178
power cord, and then turn on the power switch. ! CAUTION: • Handle the drum unit carefully since it contains toner. If toner scatters and your hands or cloths get dirty, immediately wipe or wash it off with cold water. • Do not touch the scanner window with your fingers. • Do not wipe the scanner - Brother International HL 5030 | Service Manual - Page 179
HL-5030/5040/5050/5070N SERVICE MANUAL 4. MTBF / MTTR The meantime between failure (MTBF and the meantime to repair (MTTR) for this printer are as follows; MTBF: Up to 4,000 hours MTTR: Average 30 minutes except the periodical maintenance parts (the Paper Feeding Kit) and the printer control boards - Brother International HL 5030 | Service Manual - Page 180
HL-5030/5040/5050/5070N SERVICE MANUAL CHAPTER 6 TROUBLESHOOTING 1. INTRODUCTION 1.1 Initial Check (1) Operating environment Check if : • The source voltage stays within ±10% from the rated voltage shown on the rating plate. • The printer is installed on a solid, level surface. • The room - Brother International HL 5030 | Service Manual - Page 181
troubles. If condensation has occurred, print several pages or leave the printer for 2 hours to allow it to reach room temperature. If the drum unit is unpacked soon after it is moved from a cold room to a warm room, condensation may occur inside the unit, which may cause incorrect images. Instruct - Brother International HL 5030 | Service Manual - Page 182
HL-5030/5040/5050/5070N SERVICE MANUAL 1.3 Identify the Problem If you encounter any printer error or problem, first identify it referring to the chart below, then see the appropriate section. NOTE: The following troubleshooting sections contain both the actions which users should take or check and - Brother International HL 5030 | Service Manual - Page 183
reset the printer with the control panel button. Type of error Toner empty Cover open (Front cover) Cover open (Jam clear cover) Paper jam No paper (HL-5030) No paper (HL5040/5050/5070N) No tray 1 Manual feed Memory full Print overrun Clean drum unit Toner (Yellow light) LED Drum (Yellow light - Brother International HL 5030 | Service Manual - Page 184
HL-5030/5040/5050/5070N SERVICE MANUAL 2.2 Service Calls If service calls occur, all four LEDs (Status LED: Red) flash on and off to show the service call type by the LED combination. Type of service call Toner LED Drum Paper Status Remedy Fixing unit failure (Red) Laser unit failure (Red - Brother International HL 5030 | Service Manual - Page 185
button. Toner Drum Paper Status Laser Unit Failure Toner Drum Paper Status Laser BD Malf Toner Drum Paper Status Scanner Malf Toner Drum Paper Status Service A Toner Drum Paper Status Service B Toner Drum Paper Status Main PCB Failure Toner Drum Paper Status CPU Runtime Error Toner Drum Paper - Brother International HL 5030 | Service Manual - Page 186
Reduce the print resolution or reduce the complexity of your document. • Expand the printer memory by adding a commercially available DIMM memory module. • The paper tray may be out of paper or not properly installed. If it is empty, put a new stack of paper in the paper tray. For HL-5030, put paper - Brother International HL 5030 | Service Manual - Page 187
HL-5030/5040/5050/5070N SERVICE MANUAL Error message Resolution Reduced to Enable Printing (The printer has printed the document at a reduced resolution) Toner Empty Toner Low Remedy • Reduce the complexity of your document before you print to prevent automatic reduction of the resolution. • - Brother International HL 5030 | Service Manual - Page 188
paper jam instructional video on the CD-ROM. The printer does not print into • Close the back output tray. the top output tray. The printer does not print on • the specified paper. (For HL-5040, HL-5050 and HL-5070N with optional lower tray unit) Make sure that the appropriate printer driver is - Brother International HL 5030 | Service Manual - Page 189
HL-5030/5040/5050/5070N SERVICE MANUAL 4.2 4.2.1 Paper Jams Clearing jammed paper Clear the jammed paper following the procedures below; (1) Pull the paper tray completely out of the printer. Fig. 6-1 (2) Pull the jammed paper up and out of the printer. Fig. 6-2 (3) Press the cover release - Brother International HL 5030 | Service Manual - Page 190
CHAPTER 6 TROUBLESHOOTING (4) Pull out the drum unit assembly. Pull the jammed paper up and out of the printer. If you cannot remove the drum unit assembly easily at this time, do not use extra force. Instead, pull the edge of the jammed paper from the paper tray. Fig. 6-4 ! CAUTION: To prevent - Brother International HL 5030 | Service Manual - Page 191
HL-5030/5040/5050/5070N SERVICE MANUAL (5) Open the back output tray. Pull the jammed paper out of the fuser unit. If the paper jam can be cleared, go to Step 7. Fig. 6-6 NOTE: If you have to pull the paper toward the back of the printer, the fuser may get dirty with toner powder and it may scatter - Brother International HL 5030 | Service Manual - Page 192
CHAPTER 6 TROUBLESHOOTING (7) Close the jam clear cover. Close the back output tray. (8) Push the lock lever down and take the toner cartridge out of the drum unit assembly. Take out the jammed paper if there is any inside the drum unit. Fig. 6-9 (9) Put the drum unit assembly back in the printer. ( - Brother International HL 5030 | Service Manual - Page 193
HL-5030/5040/5050/5070N SERVICE MANUAL 4.2.2 Causes & countermeasures The causes for paper jam problems vary depending on the location of the paper jam. When a paper jam occurs inside the printer, you have to find the location of the paper jam first, remove the jammed paper and then take the - Brother International HL 5030 | Service Manual - Page 194
paper 180° in the cassette. Possible cause Paper Step 1 Check Is the problem solved if new paper is used? Fixing unit entrance guide Fixing unit 2 Is the entrance guide dirty? 3 Is the pressure roller dirty? Result Yes Yes Remedy Instruct the user how to store paper so that it does not absorb - Brother International HL 5030 | Service Manual - Page 195
HL-5030/5040/5050/5070N SERVICE MANUAL F-4 Curl or Wave User Check (1) Check the paper used meets the recommended paper specifications. Both high temperature and humidity will cause paper to curl. (2) If the printer is used infrequently, the paper may have sat for too long in the paper cassette. - Brother International HL 5030 | Service Manual - Page 196
CHAPTER 6 TROUBLESHOOTING 5. SOFTWARE SETTING PROBLEMS The printer may not print the data correctly if there are incorrect software settings. S-1 "There was an error writing to LPT1: (or BRUSB) for the printer" error message appears. User Check (1) Check that the printer cable is not damaged or - Brother International HL 5030 | Service Manual - Page 197
HL-5030/5040/5050/5070N SERVICE MANUAL S-3 Although the USB driver is installed, it is unable to find the BRUSB: port. (Windows98/Me only) User Check (1) Re-install the USB driver by following the steps below; i) Turn the printer off. ii) Double-click the file "Deins USB.exe" in the USB - Brother International HL 5030 | Service Manual - Page 198
CHAPTER 6 TROUBLESHOOTING S-4 This printer does not appear in Chooser with iMac and Power Macintosh G3 with USB. (HL-5030/5040) User Check (1) Check the printer is turned on. (2) Check the USB interface cable is connected correctly. (3) Check the printer driver is installed correctly. Possible - Brother International HL 5030 | Service Manual - Page 199
HL-5030/5040/5050/5070N SERVICE MANUAL 6. MALFUNCTIONS When taking countermeasures for malfunctions as described in this section, check connectors for contact failure before measuring the voltage at the specified connector pins. M-1 - Brother International HL 5030 | Service Manual - Page 200
TROUBLESHOOTING Is the contact of the solenoid connector on the engine PCB good? Set paper in the manual paper slot and make a test print by pressing the control panel button. Does the or the pick-up roller dirty or worn out? Is the problem solved by replacing the main PCB? Result No Yes No Yes Yes - Brother International HL 5030 | Service Manual - Page 201
HL-5030/5040/5050/5070N SERVICE MANUAL M-5 Insufficient output from high-voltage power supply unit Possible heater lamp. M-7 Laser Unit failure Possible cause Harness connection failure (1) Harness connection failure (2) Step 1 Check Is connector CN3: 5030/5040/5050, or CN1: 5070N on the main - Brother International HL 5030 | Service Manual - Page 202
CHAPTER 6 TROUBLESHOOTING M-9 Fixing Unit failure problem may be cleared by turning on the printer power switch while pressing the Job Cancel button. Be warned, however, that this operation will melt the fixing unit if the heater is hot. M-10 Main PCB failure Possible cause Main PCB Software - Brother International HL 5030 | Service Manual - Page 203
HL-5030/5040/5050/5070N SERVICE MANUAL 5040/5050), CN9(HL5070N) on the main PCB and connector CN10 on the engine PCB secure? Is the problem solved by replacing the engine PCB? Is the problem failure Step 1 Check Try installing DIMM into another printer, then check the memory size in Print Settings. - Brother International HL 5030 | Service Manual - Page 204
CHAPTER 6 TROUBLESHOOTING 7. IMAGE DEFECTS 7.1 Image Defect Examples I-1 Light I-2 Dark I-3 Completely blank I-4 All black Downward fogging of solid black I-21 Horizontal lines I-22 Light rain I-23 Ghost Fig. 6-1 I-24 Toner specks 7.2 Diameter of Rollers The diameter of each roller and - Brother International HL 5030 | Service Manual - Page 205
HL-5030/5040/5050/5070N SERVICE MANUAL 7.3 Troubleshooting Image Defect Several types of the image defects can be cleared by end users. For those defects, instruct the user to check the 'User Check' items described in each table. Even if the same image defect appears, the following procedures - Brother International HL 5030 | Service Manual - Page 206
6 TROUBLESHOOTING I-2 Dark User Check (1) Check the paper used meets the recommended paper specifications. (2) Check the printer's environment printer body and the drum unit dirty? 2 Is the problem solved after replacing the drum unit? 3 Is the problem solved after replacing the toner cartridge - Brother International HL 5030 | Service Manual - Page 207
blank HL-5030/5040/5050/5070N SERVICE MANUAL Possible cause Developing bias contact failure Drum unit Drum unit failure Toner cartridge failure Scanner harness connection failure Main PCB failure Laser unit failure Step 1 2 3 4 5 6 7 Check Are the developing bias contacts between the printer - Brother International HL 5030 | Service Manual - Page 208
broken? Harness connection 3 Are the charge electrodes between the printer body and the drum unit dirty? 4 Is the laser unit connected to the main PCB correctly? High-voltage power supply PCB failure Main PCB failure 5 Is the problem solved after replacing the high-voltage power supply PCB? 6 Is - Brother International HL 5030 | Service Manual - Page 209
the back of paper HL-5030/5040/5050/5070N SERVICE MANUAL Possible cause Fixing unit dirty Dirt in the drum unit Step Check 1 Is the pressure roller dirty? Is any other area in the printer dirty? 2 Is the transfer roller dirty? Is the problem solved after replacing the drum unit? Result Yes - Brother International HL 5030 | Service Manual - Page 210
6 TROUBLESHOOTING I-6 Black and blurred vertical streaks User Check (1) Clean the corona wire in the drum unit. (2) Check that the corona wire cleaner is at the home position. (3) Check that the toner cartridge is not empty. (4) The drum unit may be damaged. Install a new drum unit. (5) The toner - Brother International HL 5030 | Service Manual - Page 211
HL-5030/5040/5050/5070N SERVICE MANUAL I-7 Black and blurred horizontal stripes User Check (1) The drum unit may be damaged. Install a new drum unit. (2) Check the paper used meets the recommended paper specifications. (3) Clean the printer interior and the corona wire in the drum unit. Possible - Brother International HL 5030 | Service Manual - Page 212
CHAPTER 6 TROUBLESHOOTING I-9 White vertical streaks User Check (1) Try to wipe the scanner window with a soft cloth. (2) The toner cartridge may be damaged. Install a new toner cartridge. (3) Check the printer's environment. High temperature and high humidity conditions can cause this problem. - Brother International HL 5030 | Service Manual - Page 213
I-11 Faulty registration HL-5030/5040/5050/5070N SERVICE MANUAL Possible cause Excessive paper load Print paper Rear regist sensor position incorrect Step 1 2 3 4 Check Is the paper loaded in the paper cassette more than 27mm - Brother International HL 5030 | Service Manual - Page 214
Printer installation Toner cartridge Scanner window dirty Laser unit failure Step 1 2 3 4 Check Is the printer placed horizontally? Does the problem happen immediately after replacing the toner cartridge with a new one? Is the scanner window dirty? Is the problem solved by replacing the laser - Brother International HL 5030 | Service Manual - Page 215
HL-5030/5040/5050/5070N SERVICE MANUAL I-15 White spots User Check (1) If the problem is not solved after printing a few pages, the drum unit may have glue from label stock on the photosensitive drum surface. Refer to Step 1 in the table below and NOTE in the next page. (2) The drum unit may be - Brother International HL 5030 | Service Manual - Page 216
CHAPTER 6 TROUBLESHOOTING NOTE: Clean the drum unit as follows: (1) Remove the toner cartridge from the drum unit. Place the printing samples in front of the drum unit, and find the exact position of the image defect. Drum unit Position of smudge on the drum 94mm interval Printing sample Fig. 6-2 - Brother International HL 5030 | Service Manual - Page 217
HL-5030/5040/5050/5070N SERVICE MANUAL I-16 Black spots User Check (1) If the problem is not solved after printing a few pages, the drum unit may have glue from label stock on the photosensitive drum surface. Refer to Step 1 in the table below and NOTE in the previous page. (2) The drum unit may be - Brother International HL 5030 | Service Manual - Page 218
CHAPTER 6 TROUBLESHOOTING I-17 Black band Possible cause Step Check Result Remedy Corona failure Corona failure 1 Is the wire cleaner at its home position? 2 Is the corona wire dirty? No Return the wire cleaner to its home position. Yes 1) Clean the corona wire. 2) If the problem still - Brother International HL 5030 | Service Manual - Page 219
background HL-5030/5040/5050/5070N SERVICE MANUAL Possible cause Step Check Result Remedy Print paper 1 Does the paper being used meet the paper specification (weight, etc.). No Recommend to use the specified types of paper. Yes Recommend to change to freshly unpacked paper. Toner sensing - Brother International HL 5030 | Service Manual - Page 220
with I-15. I-20 Downward fogging of solid black Possible cause Toner cartridge failure High-voltage power supply PCB failure Step Check 1 Is the problem solved after replacing the toner cartridge? 2 Is the problem solved after replacing the high-voltage power supply PCB? Result Remedy - Brother International HL 5030 | Service Manual - Page 221
I-21 Horizontal lines HL-5030/5040/5050/5070N SERVICE MANUAL Possible cause Paper feed roller Paper cassette contacts Step 1 2 Check Are the feed roller shaft and the ground contact connected correctly? Are the ground contacts - Brother International HL 5030 | Service Manual - Page 222
6 TROUBLESHOOTING I-22 Light rain Possible cause Step Check Drum unit failure 1 Is the problem solved after replacing the drum unit? Drum connection failure 2 Is the contact between the drum unit and printer body connected correctly? High-voltage power supply PCB failure 3 Is the problem - Brother International HL 5030 | Service Manual - Page 223
HL-5030/5040/5050/5070N SERVICE MANUAL I-24 Toner specks User Check (1) Check the paper used meets the recommended paper specifications. A rough surfaced paper may cause the problem. (2) The toner cartridge may be damaged. Install a new toner cartridge. (3) The drum unit may be damaged, or may be - Brother International HL 5030 | Service Manual - Page 224
TROUBLESHOOTING 7.4 Location of Grounding Contacts 7.4.1 Drum unit Drum Unit (5) Grid (8) Cleaner (2) Wire cleaner (4) Development roller (1) Photosensitive drum (3) Charge (6) Transfer roller 7.4.2 Printer body & Paper cassette Fig. 6-5 (5) Grid (3) Charge (8) Cleaner (1) Photosensitive drum - Brother International HL 5030 | Service Manual - Page 225
HL-5030/5040/5050/5070N SERVICE MANUAL 8. INCORRECT PRINTOUT When the data is not printed correctly as it is seen on the PC screen, follow the procedures below in the event of a specific error. P-1 The printer prints unexpectedly or it prints garbage. User Check (1) Check if the printer cable is - Brother International HL 5030 | Service Manual - Page 226
clear the error, reduce the complexity of your document or reduce the printer resolution. (3) Expand the printer memory by adding a commercially available DIMM. (except for HL-5030) (4) Change the following setting in the printer driver and try again. The best combination of settings below will vary - Brother International HL 5030 | Service Manual - Page 227
HL-5030/5040/5050/5070N SERVICE MANUAL P-4 Headers or footers are not printed out even though they are viewed on PC screen. User Check Most laser printers have a restricted area that cannot be printed on. Usually the first two lines and last two lines of text cannot print (leaving 62 printable - Brother International HL 5030 | Service Manual - Page 228
6 TROUBLESHOOTING 9. NETWORK PROBLEM If the error related to network occurs, refer to the following sections; 9.1 Installation Problem If you cannot print over the network, check the following: (1) Make sure that the printer is powered on, is on-line and ready to print. Verify that the printer and - Brother International HL 5030 | Service Manual - Page 229
HL-5030/5040/5050/5070N SERVICE MANUAL (3) If you cannot make any of the connections in step (2), check the following: a) Make sure the printer is turned on and on-line. b) Check the cabling, network connection, and print out a configuration page in the Network STATISTICS information to see if bytes - Brother International HL 5030 | Service Manual - Page 230
of setup errors. • Turn off the printer and then on again, • Delete and BIGGEST CAUSE OF TCP/IP PRINTING PROBLEMS). (2) If you used BRCONFIG to make the APIPA OFF.) 9.4 UNIX Troubleshooting (1) Make sure that the /etc/printcap a Linux operating system, the X-Window Print tool program that is included - Brother International HL 5030 | Service Manual - Page 231
HL-5030/5040/5050/5070N SERVICE MANUAL (4) If you are using an AT&T-based UNIX, make sure the printer is enabled (enable printer, where printer is the name of the local print queue). (5) Make sure that the lpr/lpd remote line printer service are running on the host computer (refer to your host - Brother International HL 5030 | Service Manual - Page 232
driver. • Install the Latest HP JetAdmin software • Restart the system, and then add the HP JetAdmin service. 9.8 Windows 95/98/Me/NT 4.0 (or later) Peer to Peer Print (NetBIOS) Troubleshooting If you are having trouble printing on a Windows destination intact, then the problem is with the E-mail - Brother International HL 5030 | Service Manual - Page 233
HL-5030/5040/5050/5070N SERVICE MANUAL 9.10 Windows 95/98/Me/2000/XP IPP Troubleshooting Want to use a different Port number other than 631 If you are using Port 631 for IPP printing, you may find that your firewall may - Brother International HL 5030 | Service Manual - Page 234
If you have a large network, make sure that you have the Laser Writer V8.xx or equivalent driver, since earlier versions may cause PostScript errors. Also, verify that you get the correct printer information when you select Printer Info from the Setup button in the Chooser. (4) Make sure that you - Brother International HL 5030 | Service Manual - Page 235
HL-5030/5040/5050/5070N SERVICE MANUAL CHAPTER 7 SERVICE SUPPORT SOFTWARE 1. CONTROL PANEL 1.1 Test Print Mode The printer incorporates various test print modes. Select the test mode you want to use following the steps below; (1) Turn off the power switch of the printer and check that the front - Brother International HL 5030 | Service Manual - Page 236
CHAPTER 7 SOFTWARE SERVICE SUPPORT 1.2 Service Mode The printer incorporates various service modes. Select the service mode you want to use according to the steps shown below; (1) Turn off the power switch of the printer and check that the front cover is closed. (2) Turn on the power switch while - Brother International HL 5030 | Service Manual - Page 237
HL-5030/5040/5050/5070N SERVICE MANUAL 1.3 Inspection Mode The printer incorporates various inspection modes such as the factory inspection mode and the test print mode. The printer supports a factory inspection mode, continuous grid pattern print mode, 3 patterns print mode and NV-RAM value dump - Brother International HL 5030 | Service Manual - Page 238
7 SOFTWARE SERVICE SUPPORT After checking of all 6 sensors, Toner LED is lit if no unusual states are detected. * Front registration sensor * Rear registration sensor * Paper eject sensor * Front cover sensor * Fixing unit cover sensor * Toner sensor After checking of all 5 sensors, Drum - Brother International HL 5030 | Service Manual - Page 239
HL-5030/5040/5050/5070N SERVICE MANUAL 2. HOW TO KNOW DRUM UNIT LIFE & PAGE COUNTER If you want to know the drum unit life or the number of printed pages, you should print out the Print Settings. 1. Printing out the Print Settings (1) Press the Set switch three - Brother International HL 5030 | Service Manual - Page 240
CHAPTER 7 SOFTWARE SERVICE SUPPORT **Printing time for 1 page/job in discontinuous printing = 12 seconds (Page counter reduced by the number of drum rotations) = (Time of motor rotation) ÷ (12 sec.) Example: Cold start (Idling for 5 sec.) 1 page/job 2 pages/job - Brother International HL 5030 | Service Manual - Page 241
HL-5030/5040/5050/5070N SERVICE MANUAL 3. How to Read the Maintenance Information The maintenance information such as the frequency of consumable parts replacement or paper jam box will appear and show the frequencies of drum unit change, toner cartridge change and paper jam. Fig. 7-4 Fig. 7-5 7-7 - Brother International HL 5030 | Service Manual - Page 242
CHAPTER 7 SOFTWARE SERVICE SUPPORT 3. HOW TO USE THE SELF-DIAGNOSTICS TOOLS Three self-diagnostics tools below are automatically installed when the printer driver is installed; 1) Troubleshooting for Printer won't print 2) Diagnostics 3) Printer Information The following sections describe the - Brother International HL 5030 | Service Manual - Page 243
HL-5030/5040/5050/5070N SERVICE MANUAL 2. Diagnostics This tool helps you to report your PC environment to investigate the cause of problem such as 'Printer won't print' or 'Printer prints garbage or incorrect fonts'. Before using this tool, however, you have to check if you can clear the problem - Brother International HL 5030 | Service Manual - Page 244
CHAPTER 7 SOFTWARE SERVICE SUPPORT (3) If you click the OK button in Step 2, the dialog box below appears. Fig. 7-9 (4) Check the result that the printer reported and click the A, B or C button depending on the result. (5) The created log file is shown on the PC screen. (The software will ask - Brother International HL 5030 | Service Manual - Page 245
HL-5030/5040/5050/5070N SERVICE MANUAL 3. Printer Information The drum unit life or page counter is printed on Print Configuration in some countries as described in 3. 'HOW TO KNOW DRUM UNIT LIFE & PAGE COUNTER'. This tool also shows the printer information such as printer version or page counter - Brother International HL 5030 | Service Manual - Page 246
CHAPTER 7 SOFTWARE SERVICE SUPPORT 4. NVRAM DEFAULT VALUE The default values for the main items to be set in NVRAM are as follows; Items Timing of Drum LED ON Development switching timing Fixing temperature Smaller size mode Descriptions 18,000 page (Counted from the drum unit life.) The - Brother International HL 5030 | Service Manual - Page 247
HL-5030/5040/5050/5070N SERVICE MANUAL 5. HOW TO REWRITE HL-5030/5040/5050/5070N FLASH ROM The ROM composition of each PCB is as follows. MODEL MAIN PCB ROM 0 HL-5030 Production 8 Mbit MASK ROM x 1 Spares 8 Mbit FLASH ROM x 1 HL-5040 Production 32 Mbit MASK ROM x 1 Spares 32 Mbit FLASH - Brother International HL 5030 | Service Manual - Page 248
CHAPTER 7 SOFTWARE SERVICE SUPPORT Preparation tool 1) PC (Windows® 2000) Create the folder "ZL2" in C drive. 2) 1 HL-5030/5040/5050/5070N printer 3) 1 USB cable 4) FILEDG32.EXE, WAITSEC.EXE and FLW_MAIN.CMD Download "FILEDG32.EXE", "WAITSEC.EXE" and "FLW_MAIN.CMD" from Utility DB, then copy them - Brother International HL 5030 | Service Manual - Page 249
HL-5030/5040/5050/5070N SERVICE MANUAL 1. Controller Firmware (ROM 0) Rewriting procedure (For AVA file) *Before you start the rewriting procedure, uninstall all the printer drivers for HL-5000 series. 1) Choose Start...>Program...>Accessory...>Command prompt Since the DOS window is opened, move the - Brother International HL 5030 | Service Manual - Page 250
to other printers, repeat from the step 2. To finish working, Input "quit" in the PIT3 control window, then press ENTER key. *3 MODEL Input Message HL-5030 /CS5030 CS5030 (SCRPT:Y.YY) HL-5040 /CS5040 CS5040 (SCRPT:Y.YY) HL-5050 /CS5050 CS5050 (SCRPT:Y.YY) HL-5070N /CS5070N CS5070N - Brother International HL 5030 | Service Manual - Page 251
HL-5030/5040/5050/5070N SERVICE MANUAL . window is opened, move the ZL2 folder. Type c:+ ENTER, CD \ZL2 + ENTER. 2) Connect the USB cable to the printer, then turn the printer power switch ON while holding down the Go and Job Cnacel buttons. All the LEDs light driver which corresponds the printer - Brother International HL 5030 | Service Manual - Page 252
Main PCB Circuit Diagram, HL-5030/5040/5050 (1/3) 1 2 3 R58 4.7k 0V SDCKE R53 4.7k VDD3 SDSDA 3-2C SDSCL 3-2C ADR[22] FLASH for MAIN PROGRAM ADR[22] ADR[23] R77 TP1 0 R96 TP2 0 MASK CE VCC WE OE VSS-27 RY/BY VSS-46 BYTE RESET NC A0 A1 WR/ACC A2 A3 A4 DQ0 A5 DQ1 - Brother International HL 5030 | Service Manual - Page 253
APPENDIX Appendix 2. Main PCB Circuit Diagram, HL-5030/5040/5050 (2/3) 1 2 3 4 L PC Printer H Printer PC CDCC_DIR 3B CDCC_HD 3B U8 48 2D VDD5 VDD3 R101 4.7k TP202 TP203 TP204 R103 100 TP205 ENGINE CN8 1 3.3V 5 RESET 3 TXD 4 RXD 6 5V R102 4.7k C106 C102 C119 C103 C103 C101 C101 C117 - Brother International HL 5030 | Service Manual - Page 254
Appendix 3. Main PCB Circuit Diagram, HL-5030/5040/5050 (3/3) 1 2 3 4 A DQ[31-0] DQ[31-0] 7D/1-8C DIMM CN5 CN5 1 8 33 DQ[31] DQ[31-0] 2A/1-8C D DATA BUS Aurora DATA[15-0] R MASK ROM OR FLASH DIMM DQ[15-0] R DQ[15-0] SDRAM DQ[31-16] R DIMM DQ[31-16] E 5 6 A-3 F CODE LJ9325001 NAME - Brother International HL 5030 | Service Manual - Page 255
4. Main PCB Circuit Diagram, HL-5070N (1/4) 1 2 3 4 S1 0 TP3 4 S0 7 VDD 2 VSS CY25814 VDD3 @C83 C103 0V FLASH PIN PIN TOSHIBA FUJITSU FUJITSU LV type DL type Mirror 64M 64M 32M 16M VSS-27 46 RY/BY VSS-46 C110 C103 0V BYTE RESET @R109 0 TP50 13 NC @R108 0 A0 14 A1 WR - Brother International HL 5030 | Service Manual - Page 256
5. Main PCB Circuit Diagram, HL-5070N (2/4) 1 2 3 4 5 6 7 A B C D VDD3 E F L PC Printer H Printer PC CDCC_DIR 2B CDCC_HD 2B TP998 25 0V R139 4.7k VDD3 L10 L14 L12 TP205 L13 L15 ENGINE CN9 0 1 3.3V 0 5 RESET 0 3 TXD 0 4 RXD 0 6 5V L11 0 2 0V B6B-PH-K-S C120 C103 C136 C103 - Brother International HL 5030 | Service Manual - Page 257
APPENDIX Appendix 6. Main PCB Circuit Diagram, HL-5070N (3/4) 1 2 3 4 A DQ[31-0] 1-8C/7D/4-7E DIMM CN4 CN4 DQ /4-7E D DATA BUS Aurora DATA[15-0] R MASK ROM OR FLASH DIMM DQ[15-0] R DQ[15-0] SDRAM DQ[31-16] R NETWORK FLASH DIMM DQ[31-16] E 5 6 A-6 F CODE LJ9247001 NAME B512155CIR (3/4) - Brother International HL 5030 | Service Manual - Page 258
Appendix 7. Main PCB Circuit Diagram, HL-5070N (4/4) 1 2 3 4 5 6 7 MA6 15 TP175 RXDV/MA11 MD7 TP186 140 MD6 TP187 FLASH for NETWORK PROGRAM VDD3 PREQ1 4A PINTAN 3C R36 10k MRDN 131 TP193 130 TP194 ADR[1] VDD3 0V @C122 C103 12 RESET 25 A0 NC13 @R133 0 TP152 13 @R134 0 VDD3 D - Brother International HL 5030 | Service Manual - Page 259
PANEL PCB -5 SW0-GO_n -4 LED2-DRUM -3 LED1-TONER B -2 GND CN1-1 (+5V) -5 DATA1_n -5 BD_n -4 ENB_n -3 +5V -2 GND CN1-1 DATA_n LASER SCANNER MOTOR SCANNER UNIT CN2-1 AC(LIVE) -3 AC(NEUTRAL) CN101-3 LVPS NEUTRAL OPTION : LT except 30 JAM SENSOR EJECT SENSOR EJECT SENSOR PCB THERMISTER - Brother International HL 5030 | Service Manual - Page 260
Appendix 9. Engine PCB Circuit Diagram (1/2) APPENDIX A-9 CODE NAME LJ923001 B512153CIR (1/2) A - 9 - Brother International HL 5030 | Service Manual - Page 261
APPENDIX Appendix 10. Engine PCB Circuit Diagram (2/2) CODE NAME LJ923001 B512153CIR (2/2) A - 10 A10 - Brother International HL 5030 | Service Manual - Page 262
Appendix 11. Low-voltage Power Supply PCB Circuit Diagram (120V) APPENDIX A-11 NAME Low-voltage PS Circuit(120V) A - 11 - Brother International HL 5030 | Service Manual - Page 263
APPENDIX Appendix 12. Low-voltage Power Supply PCB Circuit Diagram (230V) A12 NAME Low-voltage PS Circuit(230V) A - 12 - Brother International HL 5030 | Service Manual - Page 264
Appendix 13. High-voltage Power Supply PCB Circuit Diagram APPENDIX A-13 NAME High-voltage PS Circuit A - 13 - Brother International HL 5030 | Service Manual - Page 265
APPENDIX 14. HARNESS ROUTING 1 Toner sensor PCB Toner sensor PCB 2 Fan motor 60 unit Fan motor 60 unit 3 Fan motor 60 unit LV Fan motor 60 unit LV 4 Laser unit (Polygon motor harness) Laser unit Engine PCB 5 Laser unit (LD harness 5P) Main PCB Core Laser unit Engine PCB 6 Panel
-
 1
1 -
 2
2 -
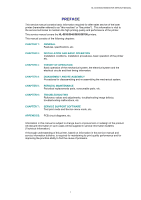 3
3 -
 4
4 -
 5
5 -
 6
6 -
 7
7 -
8
-
9
-
10
-
11
-
12
-
13
-
14
-
15
-
16
-
17
-
18
-
19
-
20
-
21
-
22
-
23
-
24
-
25
-
26
-
27
-
28
-
29
-
30
-
31
-
32
-
33
-
34
-
35
-
36
-
37
-
38
-
39
-
40
-
41
-
42
-
43
-
44
-
45
-
46
-
47
-
48
-
49
-
50
-
51
-
52
-
53
-
54
-
55
-
56
-
57
-
58
-
59
-
60
-
61
-
62
-
63
-
64
-
65
-
66
-
67
-
68
-
69
-
70
-
71
-
72
-
73
-
74
-
75
-
76
-
77
-
78
-
79
-
80
-
81
-
82
-
83
-
84
-
85
-
86
-
87
-
88
-
89
-
90
-
91
-
92
-
93
-
94
-
95
-
96
-
97
-
98
-
99
-
100
-
101
-
102
-
103
-
104
-
105
-
106
-
107
-
108
-
109
-
110
-
111
-
112
-
113
-
114
-
115
-
116
-
117
-
118
-
119
-
120
-
121
-
122
-
123
-
124
-
125
-
126
-
127
-
128
-
129
-
130
-
131
-
132
-
133
-
134
-
135
-
136
-
137
-
138
-
139
-
140
-
141
-
142
-
143
-
144
-
145
-
146
-
147
-
148
-
149
-
150
-
151
-
152
-
153
-
154
-
155
-
156
-
157
-
158
-
159
-
160
-
161
-
162
-
163
-
164
-
165
-
166
-
167
-
168
-
169
-
170
-
171
-
172
-
173
-
174
-
175
-
176
-
177
-
178
-
179
-
180
-
181
-
182
-
183
-
184
-
185
-
186
-
187
-
188
-
189
-
190
-
191
-
192
-
193
-
194
-
195
-
196
-
197
-
198
-
199
-
200
-
201
-
202
-
203
-
204
-
205
-
206
-
207
-
208
-
209
-
210
-
211
-
212
-
213
-
214
-
215
-
216
-
217
-
218
-
219
-
220
-
221
-
222
-
223
-
224
-
225
-
226
-
227
-
228
-
229
-
230
-
231
-
232
-
233
-
234
-
235
-
236
-
237
-
238
-
239
-
240
-
241
-
242
-
243
-
244
-
245
-
246
-
247
-
248
-
249
-
250
-
251
-
252
-
253
-
254
-
255
-
256
-
257
-
258
-
259
-
260
-
261
-
262
-
263
-
264
-
265
 |
 |
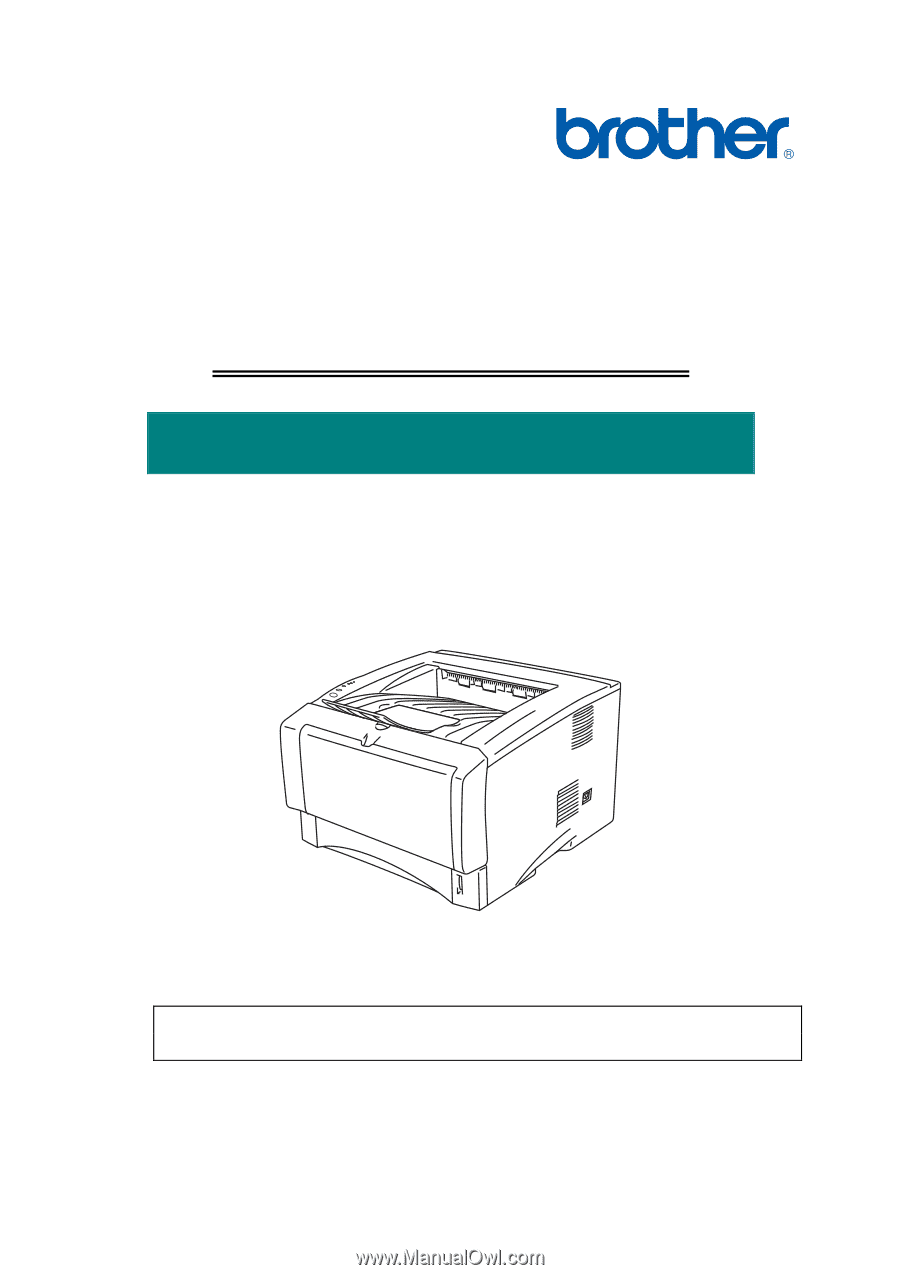
Brother Laser Printer
SERVICE MANUAL
MODEL: HL-5030/5040/5050/5070N
Read this manual thoroughly before maintenance work.
Keep this manual in a convenient place for quick and easy reference at all times.
January 2003
SM-PRN035