Brother International HL 5030 Service Manual - Page 37
Print a test Turn the power switch on.
 |
View all Brother International HL 5030 manuals
Add to My Manuals
Save this manual to your list of manuals |
Page 37 highlights
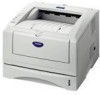
CHAPTER 2 INSTALLATION AND BASIC OPERATION (3) Fan the stack of paper well to avoid paper jams and misfeeds. (4) Put paper in the paper tray. Check that the paper is flat in the tray and below the maximum paper mark. Fig. 2-5 (5) Put the paper tray firmly back in the printer. 3.1.3 Print a test page (1) Make sure the printer power switch is off. Connect the AC power cord to the printer. Do not connect the interface cable. (2) Plug the AC power cord into an AC outlet. Turn the power switch on. (3) After the printer has finished warming up, the Status LED stops blinking and stays green. Fig.2-6 (4) Press the Go button. The printer prints a test page. Check that the test page printed correctly. 2-6
-
 1
1 -
2
-
3
-
4
-
5
-
6
-
7
-
8
-
9
-
10
-
11
-
12
-
13
-
14
-
15
-
16
-
17
-
18
-
19
-
20
-
21
-
22
-
23
-
24
-
25
-
26
-
27
-
28
-
29
-
30
-
31
-
 32
32 -
 33
33 -
 34
34 -
 35
35 -
 36
36 -
 37
37 -
 38
38 -
 39
39 -
 40
40 -
 41
41 -
 42
42 -
43
-
44
-
45
-
46
-
47
-
48
-
49
-
50
-
51
-
52
-
53
-
54
-
55
-
56
-
57
-
58
-
59
-
60
-
61
-
62
-
63
-
64
-
65
-
66
-
67
-
68
-
69
-
70
-
71
-
72
-
73
-
74
-
75
-
76
-
77
-
78
-
79
-
80
-
81
-
82
-
83
-
84
-
85
-
86
-
87
-
88
-
89
-
90
-
91
-
92
-
93
-
94
-
95
-
96
-
97
-
98
-
99
-
100
-
101
-
102
-
103
-
104
-
105
-
106
-
107
-
108
-
109
-
110
-
111
-
112
-
113
-
114
-
115
-
116
-
117
-
118
-
119
-
120
-
121
-
122
-
123
-
124
-
125
-
126
-
127
-
128
-
129
-
130
-
131
-
132
-
133
-
134
-
135
-
136
-
137
-
138
-
139
-
140
-
141
-
142
-
143
-
144
-
145
-
146
-
147
-
148
-
149
-
150
-
151
-
152
-
153
-
154
-
155
-
156
-
157
-
158
-
159
-
160
-
161
-
162
-
163
-
164
-
165
-
166
-
167
-
168
-
169
-
170
-
171
-
172
-
173
-
174
-
175
-
176
-
177
-
178
-
179
-
180
-
181
-
182
-
183
-
184
-
185
-
186
-
187
-
188
-
189
-
190
-
191
-
192
-
193
-
194
-
195
-
196
-
197
-
198
-
199
-
200
-
201
-
202
-
203
-
204
-
205
-
206
-
207
-
208
-
209
-
210
-
211
-
212
-
213
-
214
-
215
-
216
-
217
-
218
-
219
-
220
-
221
-
222
-
223
-
224
-
225
-
226
-
227
-
228
-
229
-
230
-
231
-
232
-
233
-
234
-
235
-
236
-
237
-
238
-
239
-
240
-
241
-
242
-
243
-
244
-
245
-
246
-
247
-
248
-
249
-
250
-
251
-
252
-
253
-
254
-
255
-
256
-
257
-
258
-
259
-
260
-
261
-
262
-
263
-
264
-
265
 |
 |

CHAPTER 2 INSTALLATION AND BASIC OPERATION
2-6
(3) Fan the stack of paper well to avoid paper jams and misfeeds.
(4) Put paper in the paper tray.
Check that the paper is flat in the tray and below the
maximum paper mark.
Fig. 2-5
(5)
Put the paper tray firmly back in the printer.
3.1.3
Print a test page
(1) Make sure the printer power switch is off.
Connect the AC power cord to the printer.
Do
not connect the interface cable.
(2) Plug the AC power cord into an AC outlet.
Turn the power switch on.
(3) After the printer has finished warming up, the
Status
LED stops blinking and stays green.
Fig.2-6
(4)
Press the
Go
button.
The printer prints a test page.
Check that the test page printed
correctly.