Brother International XR-40 Users Manual - English and Spanish
Brother International XR-40 Manual
 |
View all Brother International XR-40 manuals
Add to My Manuals
Save this manual to your list of manuals |
Brother International XR-40 manual content summary:
- Brother International XR-40 | Users Manual - English and Spanish - Page 1
OPERATION MANUAL MANUAL DE INSTRUCCIONES English Spanish 194232-111 Printed in Taiwan brother® - Brother International XR-40 | Users Manual - English and Spanish - Page 2
the needle, threading the bobbin, or changing the presser foot. 15. Always unplug the sewing machine from the electrical outlet when removing covers, lubricating, or when making any other user service adjustments mentioned in this instruction manual. "SAVE THESE INSTRUCTIONS" "This sewing machine - Brother International XR-40 | Users Manual - English and Spanish - Page 3
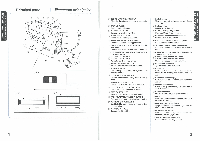
TABLE OF CONTENTS KNOWING YOUR SEWING MACHINE Principal parts 1 Accessories 3 OPERATING YOUR SEWING MACHINE 4 Connecting Plugs 4 Main Power and Sewing Light Switches 5 Foot Controller 5 Replacing the Needle 6 Checking the Needle 6 Changing the Presser Foot 7 Converting to Free-arm - Brother International XR-40 | Users Manual - English and Spanish - Page 4
the needle. © CLUTCH RELEASE SWITCH Switches from bobbin-winding mode to sewing mode. © PATTERN SELECTION DIAL Turn in either direction to select the desired stitch. C) FOOT CONTROLLER RECEPTACLE Insert the foot controller plug for operation. © FOOT CONTROLLER Used to control sewing speed start - Brother International XR-40 | Users Manual - English and Spanish - Page 5
the three-prong plug into the machine. It is located between the foot controller and the power supply plug on the cord. 2. Connect the power supply plug into a wall outlet. CAUTION 1. When changing the light bulb or when the sewing machine is not in use, the power supply plug must be disconnected - Brother International XR-40 | Users Manual - English and Spanish - Page 6
nothing is placed on the foot controller when the machine is not in use. Qi Foot controller: Model N Note (For U.S.A. only): This foot controller can be used for sewing machine models XR31, XR33, XR35, XR37 and XR40. Pedal Al presionar ligeramente el pedal, la maquina funcionara a baja velocidad - Brother International XR-40 | Users Manual - English and Spanish - Page 7
SEWING MACHINE ns VOZON00 . fl • Jl JNIM• 1:13S00 30 Changing the Presser Foot It may be necessary to change the presser foot according to your sewing needs. SNAP-ON TYPE 1. Raise the needle hay en la parte trasera del soporte. machine. The Pattern Selection Dial may be turned in either direction - Brother International XR-40 | Users Manual - English and Spanish - Page 8
- SEWING M 3-5 (1/8-13/64) 5 (13/64) RECOMMENDED PAGE IN LENGTH INSTRUCTIONS [mm(inch)] F-1.5 43 (1/64-1/16) 1-4 30 (3/64-5/ 40 2.5 (3/32) Fixed 40 2.5 (3/32) Fixed 41 2.5 (3/32) Fixed 40 2.5 (3/32) Fixed 40 Fija 2,5 (3/32) PAGINA DEL MANUAL 43 30 33 34 35 36 34 37 37 38 38 39 39 39 - Brother International XR-40 | Users Manual - English and Spanish - Page 9
instructions about how to make the correction. 1. When you slide the bobbin winder pin to the right for bobbin winding, the machine will only allow you to wind the bobbin and the message "BOBBIN WINDING" will appear on the display. 2. When you set the machine to sew lighter. Using the parte superior - Brother International XR-40 | Users Manual - English and Spanish - Page 10
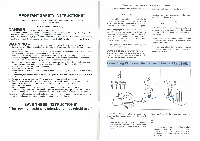
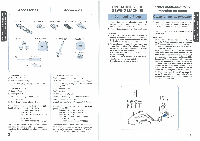
one of the following major categories based on the sewing information you need: Al) SEWING PATTERN A2) USING MACHINE A3) TROUBLE SHOOTING A4) FABRIC•THREAD•NEEDLE A4)FABRIC-THREAD- r NEEDLE r A3)TROUBLE SHOOTING A2)USING MACHINE Al)SEWING PATTERN (SELECT WITH A KEY AND PRESS 4, KEY) 3. When - Brother International XR-40 | Users Manual - English and Spanish - Page 11
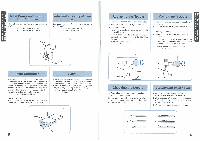
SEWING PATTERN (SELECT WITH A KEY AND PRESS KEY) A2)USING MACHINE -> B1)WINDING BOBBIN 4- -> A3)TROUBLE SHOOTING A4)FABRIC•THREAD• NEEDLE B1)NEEDLE BREAKS B1)NORMAL FABRIC B 1)ATTACH BUTTONHOLE FOOT(A) A2)USING MACHINE B2)REPLACING BOBBIN A3)TROUBLE 2)PETIRAR LA PARTE ATRAS DEL - Brother International XR-40 | Users Manual - English and Spanish - Page 12
to give you instructions about how to make the correction. 1 When you slide the bobbin winder pin to the right for bobbin winding, the machine will only allow you to wind the bobbin and the message "BOBBIN WINDING SELECTED" will appear on the display. 2. When you set the machine to sew a buttonhole - Brother International XR-40 | Users Manual - English and Spanish - Page 13
in as far as possible and hold in that position while pressing lightly on the foot pedal. To sew forward, release the Reverse Sewing Button. The machine will then sew forward. Reverse sewing is used for backtacking and reinforcing seams. Pulsador de retroceso Para coser hacia atras, apriete a fondo - Brother International XR-40 | Users Manual - English and Spanish - Page 14
bobbin by depressing the foot controller. NOTE: The machine stops automatically when the bobbin is full. 7. Cut the thread, push the shaft to the left and remove the full bobbin from the shaft. 8. Return the Clutch Release Switch back to the needle presionando el pedal. NOTA: La la parte delantera - Brother International XR-40 | Users Manual - English and Spanish - Page 15
Palanca tirahilos Using needle threader (When the machine is equipped with a needle threader) The needle threader can be used to thread the needle more easily. 1. Lower the presser foot lever. Lower the threader slightly and position the thread under the guide. ® Needle threader ® Guide 2. Move the - Brother International XR-40 | Users Manual - English and Spanish - Page 16
foot. ® Bagas en el hilo inferior ® Upper thread C) Lower thread loop C) Hilo inferior ® Lower thread pOONNI te . --- 7- 77 1 1 CD 2 CD 3 CD J Twin Needle Sewing Your sewing machine is designed for twin needle sewing which allows your machine to sew with two top threads. You can use - Brother International XR-40 | Users Manual - English and Spanish - Page 17
. or A-2 Bobbin Increase the tension in the bobbin by turning the screw with the enclosed small screwdriver in a clockwise direction. B Upper needle and thread size from the above chart. 2. Use the same size thread for the upper and lower threads (spool and bobbin). 28 KNOWING YOUR SEWING MACHINE - Brother International XR-40 | Users Manual - English and Spanish - Page 18
: 40-50 needle to its highest position and lift the presser foot foot controller. Reverse sewing is used for locking the end of seams and where reinforcement is needed. 7. Release the Reverse Sewing Button and start sewing in the forward direction by applying pressure to the foot la parte atras pedal - Brother International XR-40 | Users Manual - English and Spanish - Page 19
Sewing Direction 1. Stop the machine at the point where you wish to change directions with the needle still in the fabric. 2. Raise the presser foot and turn the fabric to line up its new direction using the needle as a turning point. 3. Lower the presser foot and start sewing in the new direction - Brother International XR-40 | Users Manual - English and Spanish - Page 20
select the Stitch Length and the Stitch Width. It is recommended to sew using the Straight Stitch at the beginning and end of the Zigzag Stitches. ! Puntada de realce Cuando se define el largo de la puntada en la parte "F", se coseran puntadas tupidas (puntada zigzag muy cerradas) que pueden servir - Brother International XR-40 | Users Manual - English and Spanish - Page 21
two pieces of fabric together and center them under the presser foot. 2. Sew them together using the Elastic Stitch taking care to keep the two fabric edges de ancho entre 3 y 5. 2. Coloque una tela de refuerzo debajo de la parte a remendar. 3. Siguiendo la linea de la rasgadura, cosa con la puntada - Brother International XR-40 | Users Manual - English and Spanish - Page 22
INCORPORADAS a o I ch n Pattern 9 (Scallop Stitch) Stitch Length Stitch Width F-15 3-5 This machine automatically produces a Scallop Stitch which may be used as a decorative edging. 1. Set the Pattern Selection Dial to 9. 2. Sew the Scallop Stitch along the edge of the material. 3. If desired - Brother International XR-40 | Users Manual - English and Spanish - Page 23
are useful when sewing stretch materials. 1. Set the Pattern Selection Dial to 15, 16, 18 or 19. 2. Position the fabric under the presser foot so de costura de unos 6 mm (1/4") dado que asi permite a la parte derecha (zigzag) de la puntada enganchar la orilla cortada deltejido talcomoilustrado enla - Brother International XR-40 | Users Manual - English and Spanish - Page 24
This stitch can be used to sew heavyweight stretch fabrics wherever a Zigzag Stitch could be used. The Triple Zigzag Stretch Stitch can also be used as a decorative top stitch del tejido. Ponga el selector de puntadas en 20. tO 40 tOt-itOtOt%t tOtOk OS Ok0404 0t040tri glo% la SVOVI:1OdElOONI - Brother International XR-40 | Users Manual - English and Spanish - Page 25
Using tailor's chalk, mark the position of the buttonhole on the fabric. 2. Attach the buttonhole foot machine. 8. Buttonhole stitching is done in order, 1-4, as shown in fig. D. 9. Stop the machine coser primero el remate de la parte delantera del ojal. 5. Abra , N 9 : UTT • N SEWING : " 4 N , 31 - Brother International XR-40 | Users Manual - English and Spanish - Page 26
sew Straight Stitches (2) to the end of the front bar tack of the buttonhole. 2. Remove the material from the machine final de la llnea del remate de la parte delantera. 2. Retire el tejido de la with the enclosed large screwdriver in the + direction. This adjustment allows both sides of the - Brother International XR-40 | Users Manual - English and Spanish - Page 27
Foot Zipper Foot The zipper foot is used to sew various types of zippers and can easily be positioned to the right or left side of the needle. When sewing de la cremallera, suelte la pata al apretar el boton situado en su parte posterior, instale la pata en el otro lado de la cremallera y siga - Brother International XR-40 | Users Manual - English and Spanish - Page 28
the portion to be darned under the presser foot together with a fabric underlay for reinforcement. 4. Lower the presser foot. 5. Begin sewing alternating between gently drawing the work away from you and pulling it toward you. With the darning plate on the machine the feed dogs will not move the - Brother International XR-40 | Users Manual - English and Spanish - Page 29
USING ATTACHMENTS AND APPLICATIONS US0 DEACCESORIOS Y APLICACIONES Monogramming and Embroidering Pattern Stitch Length Stitch Width 3 Any Any Foot None PREPARING FOR MONOGRAMMING AND EMBROIDERING 1 Place the darning plate on the needle meniques. I MONOGRAMMING 1. Sew moving the hoop slowly - Brother International XR-40 | Users Manual - English and Spanish - Page 30
Apretar D tt Oiling 1. Remove the power supply plug from the outlet. 2. machine. NOTE: The machine should be oiled once a week if it is used more than one hour a day. If the machine is used more often, oil every day. Sewing machine oil is available from your local sewing machine dealer or service - Brother International XR-40 | Users Manual - English and Spanish - Page 31
la parte superior de los dientesyelcuerpo de la lanzadera con un cepillo. Performance Checklist Whenever sewing difficulties are encountered, review the section in this instruction manual that details the operation you are performing to make sure you are correctly using the machine. If the problem - Brother International XR-40 | Users Manual - English and Spanish - Page 32
Thread tension is too tight. • • • Page 23 No Page 25 No Page 6 • Page 27 • Page 27 No Bobbin is not Upper thread is threaded properly Inferior needle is tangled. in the shuttle used. z hook. m z • • z Page 23 No Page 22 No Page 6 No Threading is not correct. • Page 22-25 - Brother International XR-40 | Users Manual - English and Spanish - Page 33
fabric. Do not pull the fabric. Page 22-25 No No Foot controller is not used correctly. • Page 5 No Clutch Release Switch is set at bobbin mark. ♦ Page 20 No Darning plate is installed. • CONTACT YOUR LOCAL SERVICE CENTER 59 LISTADO DE POSIBLES INCIDENCIAS EL TEJIDO NO ARRASTRA BIEN LA - Brother International XR-40 | Users Manual - English and Spanish - Page 34
Keep the carton and packing materials for future use. It may become necessary to reship the sewing machine. Improper packing or improper packing material could result in damage during shipping. Instructions for repacking the machine are illustrated below. Embalaje de la maquina Guarde la caja - Brother International XR-40 | Users Manual - English and Spanish - Page 35
Stitch Triple Zigzag Stretch Stitch Troubleshooting Twin Needle Sewing 27 30 42 57, 59 26 U Upper Tension Control Dial 27 Upper Threading 23 W Winding the Bobbin 20 Z Zigzag Stitch 33 Zipper Insertion 48 M Modalidad brazo libre Monogramas 0 Ojales P Pedal Pulsador de retroceso Puntada
-
 1
1 -
 2
2 -
 3
3 -
 4
4 -
 5
5 -
 6
6 -
 7
7 -
8
-
9
-
10
-
11
-
12
-
13
-
14
-
15
-
16
-
17
-
18
-
19
-
20
-
21
-
22
-
23
-
24
-
25
-
26
-
27
-
28
-
29
-
30
-
31
-
32
-
33
-
34
-
35
 |
 |
English
Spanish
194232-111
Printed
in
Taiwan
OPERATION
MANUAL
MANUAL
DE
INSTRUCCIONES
brother®