Brother International XR-40 Users Manual - English and Spanish - Page 12
Stitch, Length, Selector, largo, puntada, Width, ancho
 |
View all Brother International XR-40 manuals
Add to My Manuals
Save this manual to your list of manuals |
Page 12 highlights
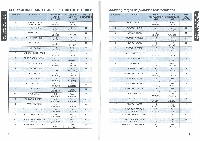
1:13S0.9 3G nunoviNnS VOZONOD 3NIHOVIN ONIM3S unoA ONIMONN When the machine is not properly set and a correction is required, a warning message appears on the display to give you instructions about how to make the correction. 1 When you slide the bobbin winder pin to the right for bobbin winding, the machine will only allow you to wind the bobbin and the message "BOBBIN WINDING SELECTED" will appear on the display. 2. When you set the machine to sew a buttonhole, but the buttonhole lever is not pulled down, the message "LOWER BUTTONHOLE LEVER" will appear on the display. 3. When you choose a pattern otherthan the buttonhole pattern, but the buttonhole lever is pulled down, the message "RAISE BUTTONHOLE LEVER" will appear on the display. Cuando la maquina no este bien ajustada o que se requiere una correccion, un mensaje de advertencia aparece enlapantallapara darleinstrucciones sobre la manera de remediar a la situacion. 1. Al deslizar el porta bobinas a la derecha, para hacer canilla, la maquina solo le permitira hacer canilla y el mensaje "HACIENDO CANILLA" aparecera en la pantalla. 2. Cuando prepara la maquina para coser un ojal, sin bajar la palanca para ojales, el mensaje "BAJAR PALANCA PARA OJALES" aparecera en la pantalla. 3. Si elige un numero de puntada distinto del para hacer ojales, y que la palanca para ojales esta bajada, elmensaje "LEVANTARPALANCA PARA OJALES" aparecera en la pantalla. (ALARM) • RAISE BUTTONHOLE. LEVER • • LOWER BUTTONHOLE • LEVER • • BOBBIN WINDING • SELECTED • (ALARMA) • LEVANTAR PALANCA • PARA OJALES • • BAJAR LA PALANCA • PARA OJALES • • MAQ. PUESTA PARA • • HACER CANILLA • Changing the Language of the LCD Messages The language of the messages displayed in the LCD can be changed to any of the following languages: Para cambiar el idioma de los mensajes de la pantalla. El idioma de los mensajes visualizados en la pantalla puede ser uno de los siguientes: (Languages) p 1) ENGLISH 2) DEUTSCH (GERMAN) 3) FRANCAIS (FRENCH) 4) ITALIANO (ITALIAN) 5) NEDERLANDS (DUTCH) 6) ESPANOL (SPANISH) (Idiomas) 7) DANSK (DANISH) 8) NORSK (NORWEGIAN) 9) SUOMEKSI (FINNISH) 10) SVENSK (SWEDISH) 11) CESTINA (CZECH) 12) SLOWAKIAN (SLOVAK) 13) MAGYAR (HUNGARIAN) 14) SLOVENSKO (SLOVENE) 15) PORTUGUES (PORT.) 16) JAPANESE (1)Turn the main power switch off. (2) While pressing down both the A and B message keys, turn on the main power switch. The name of the language that was initially set for the LCD messages is displayed. (3) Select the appropriate language by pressing the A key (to change the language in the order shown above) or the B key (to change the language in reverse order). 17 (1)Apague el interruptor principal. (2)Mantenga las dos teclas de mensajes A y B presionadas y vuelva a encender la maquina. Va a aparecer el nombre del idioma inicialmente seleccionado para los mensajes de la pantalla. (3)Seleccione elidioma adecuadoapretandola tecla A (para cambiardeidioma segunelordenindicado arriba) o B (para cambiar de idioma en el sentido in verso). (4) Once the language is selected, turn the main power switch off. (5) When the main power switch is turned on again, the messages will be displayed in the chosen language. (4) Cuando haya seleccionado el idioma, apague el interruptor principal. (5)AI encender de nuevo la maquina, los mensajes apareceran en el idioma elegido. Stitch Length Dial Depending on your selected stitch, you may need to adjust the stitch length for best results. The numbers marked on the Stitch Length Dial represent the length of the stitch in millimeters (mm). THE HIGHER THE NUMBER, THE LONGER THE STITCH. The "0" setting does not feed the material. This is used for sewing on a button. The "F" area is used for making a Satin Stitch (a close zigzag stitch) which can be used in making buttonholes and decorative stitches. The position needed for making the Satin Stitch varies according to the material and thread being used. To determine the exact dial position, you should first test the stitch and length settings on a scrap of fabric to observe the feeding of the material. Selector de largo de puntada Segunlapuntada seleccionada,puede sernecesario ajustar su largo para lograr mejores resultados. Los nameros indicados en el disco representan el largo de las puntadas en milimetros. CUANTO MAS ALTO EL NUMERO, MAS LARGA LA PUNTADA. El ajuste "0" no alimenta el tejido. Sirve para coser un boton. La zona "F" se usa para realizar puntadas de realce (una puntada zigzag cerrada) que pueden servir para ojales o decoraciOn. La posiciOnnecesariapara realizar puntadas de realce varia dependiendo del tejido e hilo utilizados. Para determinar la posicion exacta delbotany convieneprimeroprobarlapuntada ylosajustes de largo enunpedazo de tejidopara ver como se alimenta el material. ® STITCH LENGTH ® Shorter ® Longer O g (:), Largo de puntada ® Mas corto ® Mas largo 11 Stitch Width Dial Depending on the stitch selected, you may need to adjust the stitch width. The numbers marked on the dial represent the stitch width. THE HIGHER THE NUMBER, THE WIDER THE STITCH. Selector de ancho de puntada Seganeltipo depuntada seleccionado, senecesitara o no ajustar el ancho de puntada. Los num6ros indicados en elselector representan elancho de las puntadas. A MAYOR NUMERO SELECCIONADO, MAYOR ANCHURA DE PUNTADAS. 18 KN • • " SEWING M , •CZ •C 4 SUM ' 0 A i • '
-
 1
1 -
2
-
3
-
4
-
5
-
6
-
 7
7 -
 8
8 -
 9
9 -
 10
10 -
 11
11 -
 12
12 -
 13
13 -
 14
14 -
 15
15 -
 16
16 -
 17
17 -
18
-
19
-
20
-
21
-
22
-
23
-
24
-
25
-
26
-
27
-
28
-
29
-
30
-
31
-
32
-
33
-
34
-
35
 |
 |
