Canon PIXMA MP160 User's Guide - Page 63
Confirming Or Changing The Device Settings - usb cable
 |
View all Canon PIXMA MP160 manuals
Add to My Manuals
Save this manual to your list of manuals |
Page 63 highlights
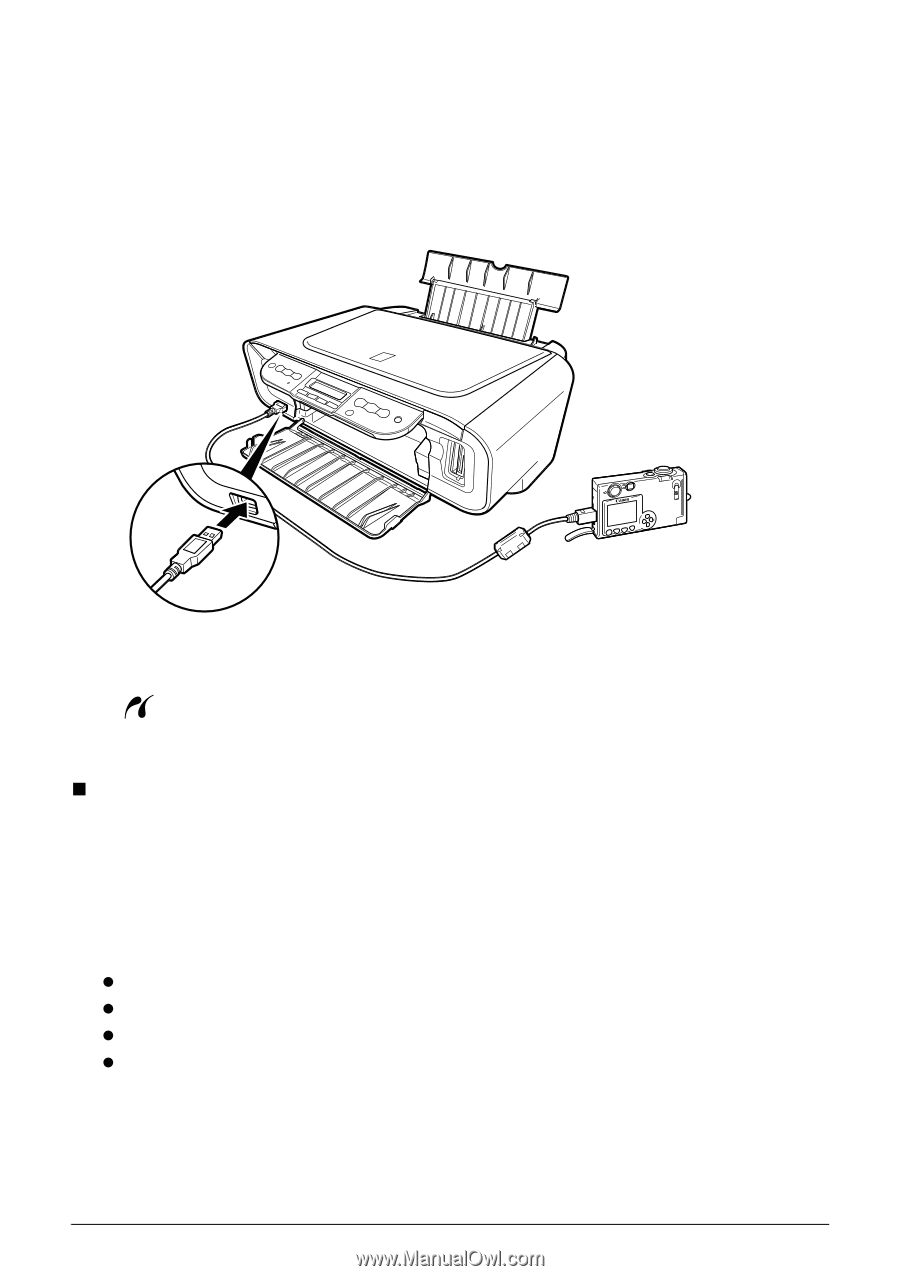
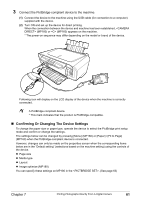
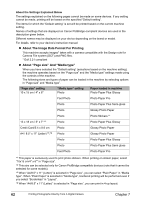
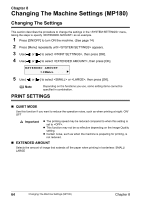
3 Connect the PictBridge-compliant device to the machine. (1) Connect the device to the machine using the USB cable (for connection to a computer) supplied with the device. (2) Turn ON and set up the device for direct printing. When the connection between the device and machine has been established, (MP180) or (MP160) appears on the machine. * The power-on sequence may differ depending on the model or brand of the device. Following icon will display on the LCD display of the device when the machine is correctly connected. A PictBridge-compliant device. * This mark indicates that the product is PictBridge-compatible. „ Confirming Or Changing The Device Settings To change the paper size or paper type, operate the device to select the PictBridge print setup mode and confirm or change the settings. The settings below can be changed by pressing [Menu] (MP180) or [Paper] / [Fit to Page] (MP160) when the PictBridge-compliant device is connected. However, changes can only be made on the properties screen when the corresponding items below are in the "Default setting" (selections based on the machine setting) using the controls of the device. z Page size z Media type z Layout z Image optimize (MP180) You can specify these settings on MP180 in the . (See page 65) Chapter 7 Printing Photographs Directly From A Digital Camera 61
-
 1
1 -
2
-
3
-
4
-
5
-
6
-
7
-
8
-
9
-
10
-
11
-
12
-
13
-
14
-
15
-
16
-
17
-
18
-
19
-
20
-
21
-
22
-
23
-
24
-
25
-
26
-
27
-
28
-
29
-
30
-
31
-
32
-
33
-
34
-
35
-
36
-
37
-
38
-
39
-
40
-
41
-
42
-
43
-
44
-
45
-
46
-
47
-
48
-
49
-
50
-
51
-
52
-
53
-
54
-
55
-
56
-
57
-
 58
58 -
 59
59 -
 60
60 -
 61
61 -
 62
62 -
 63
63 -
 64
64 -
 65
65 -
 66
66 -
 67
67 -
 68
68 -
69
-
70
-
71
-
72
-
73
-
74
-
75
-
76
-
77
-
78
-
79
-
80
-
81
-
82
-
83
-
84
-
85
-
86
-
87
-
88
-
89
-
90
-
91
-
92
-
93
-
94
-
95
-
96
-
97
-
98
-
99
-
100
-
101
-
102
-
103
-
104
-
105
-
106
-
107
-
108
-
109
-
110
-
111
-
112
-
113
-
114
-
115
-
116
-
117
-
118
-
119
-
120
-
121
-
122
-
123
-
124
-
125
-
126
-
127
-
128
 |
 |