Compaq Presario 2200 Reference Guide - Page 62
Replacing the Hard Drive - hard drive remove
 |
View all Compaq Presario 2200 manuals
Add to My Manuals
Save this manual to your list of manuals |
Page 62 highlights
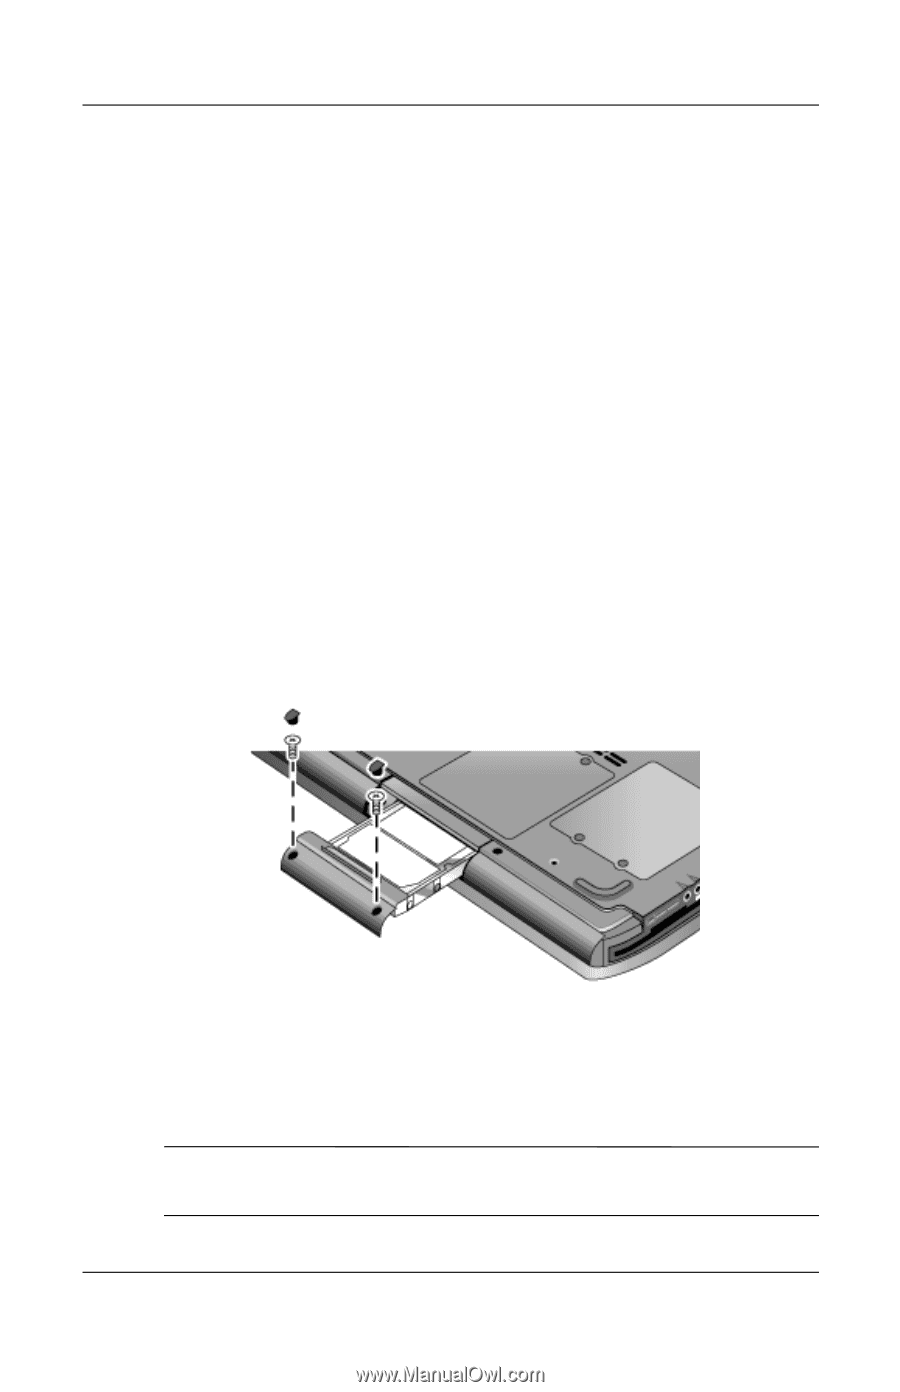
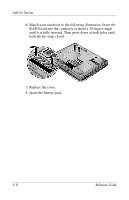
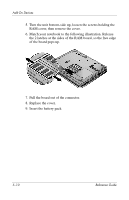
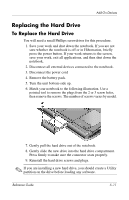
Add-On Devices Replacing the Hard Drive To Replace the Hard Drive You will need a small Phillips screwdriver for this procedure. 1. Save your work and shut down the notebook. If you are not sure whether the notebook is off or in Hibernation, briefly press the power button. If your work returns to the screen, save your work, exit all applications, and then shut down the notebook. 2. Disconnect all external devices connected to the notebook. 3. Disconnect the power cord 4. Remove the battery pack. 5. Turn the unit bottom-side up. 6. Match your notebook to the following illustration. Use a pointed tool to remove the plugs from the 2 or 3 screw holes, then remove the screws. The number of screws varies by model. 7. Gently pull the hard drive out of the notebook. 8. Gently slide the new drive into the hard drive compartment. Press firmly to make sure the connector seats properly. 9. Reinstall the hard drive screws and plugs. ✎ If you are installing a new hard drive, you should create a Utility partition on the drive before loading any software. Reference Guide 5-11
-
 1
1 -
2
-
3
-
4
-
5
-
6
-
7
-
8
-
9
-
10
-
11
-
12
-
13
-
14
-
15
-
16
-
17
-
18
-
19
-
20
-
21
-
22
-
23
-
24
-
25
-
26
-
27
-
28
-
29
-
30
-
31
-
32
-
33
-
34
-
35
-
36
-
37
-
38
-
39
-
40
-
41
-
42
-
43
-
44
-
45
-
46
-
47
-
48
-
49
-
50
-
51
-
52
-
53
-
54
-
55
-
56
-
 57
57 -
 58
58 -
 59
59 -
 60
60 -
 61
61 -
 62
62 -
 63
63 -
 64
64 -
 65
65 -
 66
66 -
 67
67 -
68
-
69
-
70
-
71
-
72
-
73
-
74
-
75
-
76
-
77
-
78
-
79
-
80
-
81
-
82
-
83
-
84
-
85
-
86
-
87
-
88
-
89
-
90
-
91
-
92
-
93
-
94
-
95
-
96
-
97
-
98
-
99
-
100
-
101
-
102
 |
 |