Compaq Presario 2200 Reference Guide - Page 63
To Replace the Hard Drive Holder, on the end of the new hard drive. Work alternately at each end - parts
 |
View all Compaq Presario 2200 manuals
Add to My Manuals
Save this manual to your list of manuals |
Page 63 highlights
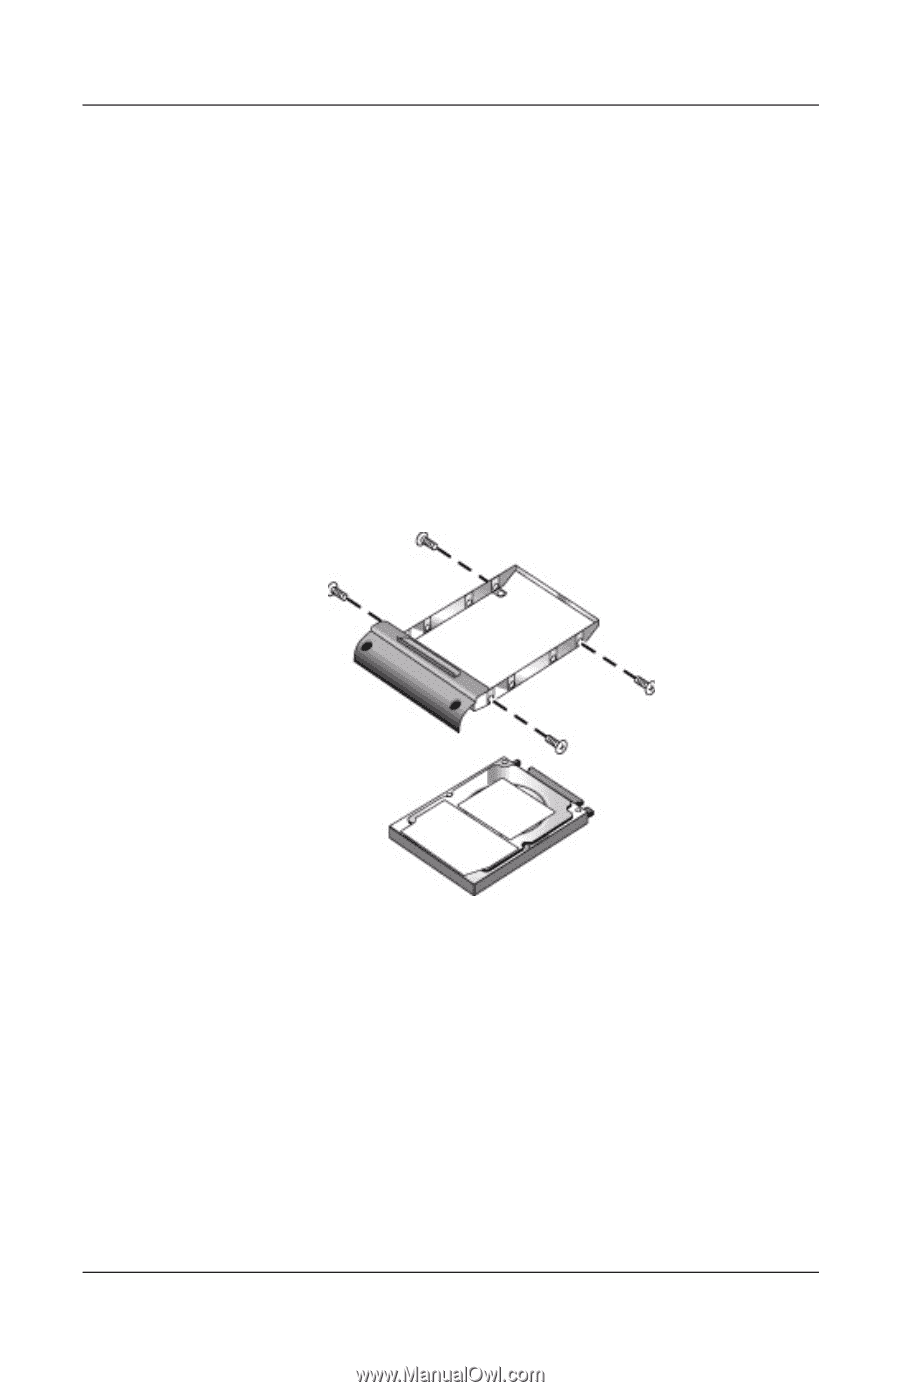
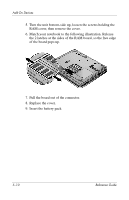
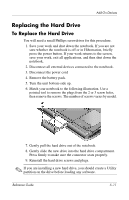
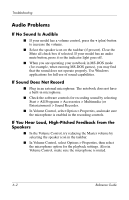
Add-On Devices To Replace the Hard Drive Holder If you are installing a new hard drive that does not have a holder, you can remove the holder parts from the hard drive you are removing. You will need a small Phillips screwdriver for this procedure. 1. Remove the 4 screws from the sides of the holder and drive case, then slide the drive out of the holder. 2. Notice that the hard drive has a pin connector attachment at one end. Carefully remove this connector from the end of the drive. Work alternately at each end so that the connector slides off evenly without bending the connector pins. 3. Carefully put the pin connector attachment back onto the pins on the end of the new hard drive. Work alternately at each end so that the connector slides on evenly without bending the connector pins. 4. Insert the drive into the holder. 5. Reinstall the screws into the holder and drive case. 5-12 Reference Guide
-
 1
1 -
2
-
3
-
4
-
5
-
6
-
7
-
8
-
9
-
10
-
11
-
12
-
13
-
14
-
15
-
16
-
17
-
18
-
19
-
20
-
21
-
22
-
23
-
24
-
25
-
26
-
27
-
28
-
29
-
30
-
31
-
32
-
33
-
34
-
35
-
36
-
37
-
38
-
39
-
40
-
41
-
42
-
43
-
44
-
45
-
46
-
47
-
48
-
49
-
50
-
51
-
52
-
53
-
54
-
55
-
56
-
57
-
 58
58 -
 59
59 -
 60
60 -
 61
61 -
 62
62 -
 63
63 -
 64
64 -
 65
65 -
 66
66 -
 67
67 -
 68
68 -
69
-
70
-
71
-
72
-
73
-
74
-
75
-
76
-
77
-
78
-
79
-
80
-
81
-
82
-
83
-
84
-
85
-
86
-
87
-
88
-
89
-
90
-
91
-
92
-
93
-
94
-
95
-
96
-
97
-
98
-
99
-
100
-
101
-
102
 |
 |