Creative CT4180 Getting Started Guide - Page 9
Knowing Your Audio, metal plate.
 |
View all Creative CT4180 manuals
Add to My Manuals
Save this manual to your list of manuals |
Page 9 highlights
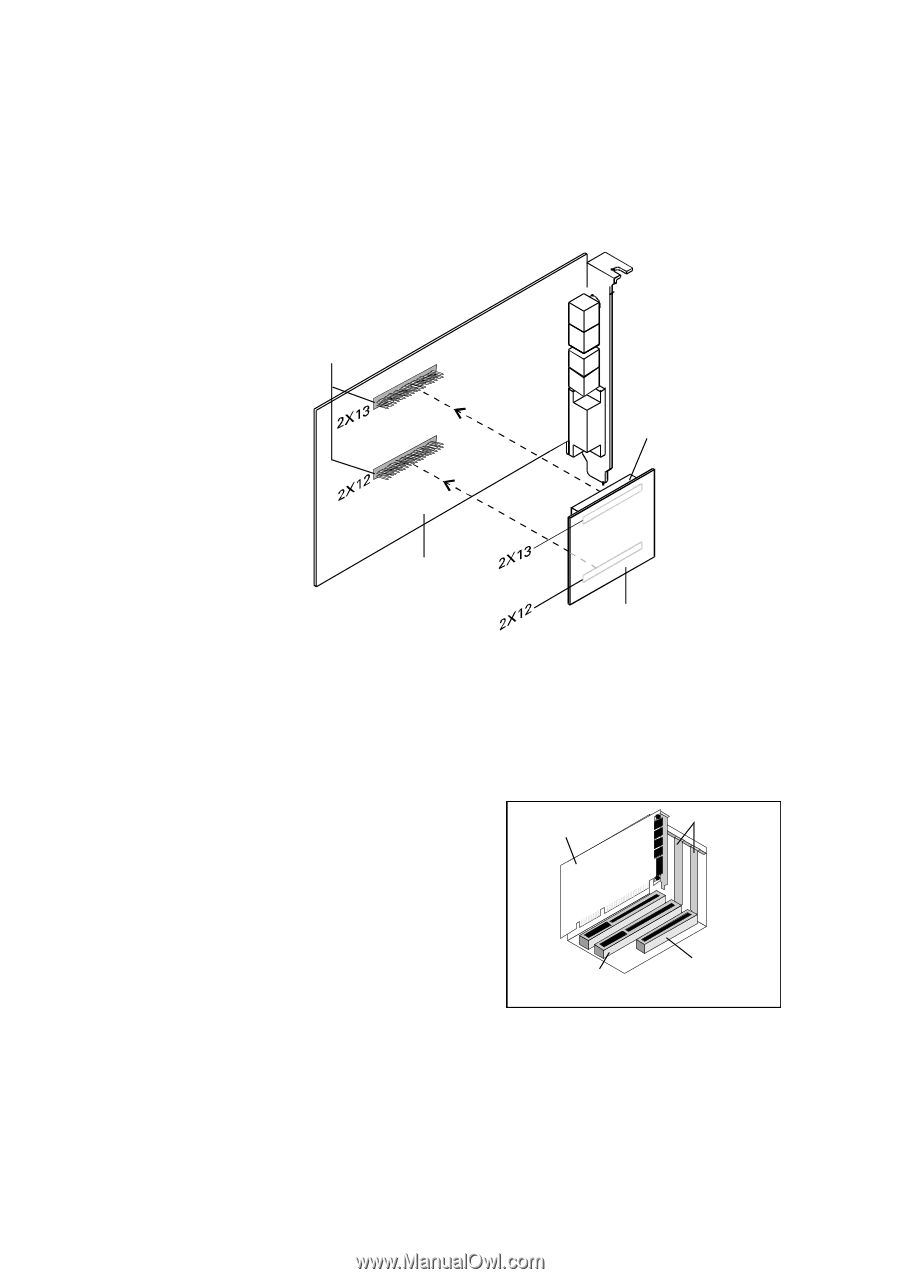
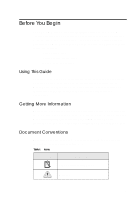
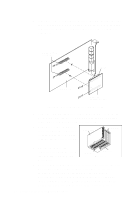
4. If you have a memory upgrade module (DRAM daughterboard) and your card has DRAM upgrade connectors, you may want to mount the module onto your audio card now, as shown in Figure 1-1. DRAM Upgrade connectors Housing Audio Card Memory upgrade module Figure 1-1: Mounting the memory upgrade module. 5. Find a free 16-bit expansion slot in your system. Remove the metal plate from the slot you have chosen and put the screw aside. The screw will be used in a later step. 6. Align your card's 16-bit slot connector with the expansion slot and gently press down the card into the free slot as shown. Audio card Metal plates 7. Secure the card to the expansion slot with the screw that you removed from the metal plate. 16-bit slot 8-bit slot Figure 1-2 8. Connect powered speakers or an external amplifier to the Line Out jack(s) if your audio card does not have an internal amplifier, or if you do not want to use the amplifier. You can also connect non-powered speakers to your audio card's Speaker Out jack. Refer to the Knowing Your Audio Card leaflet to learn how to connect the various devices. 1-2 Installing Audio Card and Related Hardware
-
 1
1 -
2
-
3
-
 4
4 -
 5
5 -
 6
6 -
 7
7 -
 8
8 -
 9
9 -
 10
10 -
 11
11 -
 12
12 -
 13
13 -
 14
14 -
15
-
16
-
17
-
18
-
19
-
20
-
21
-
22
-
23
-
24
-
25
-
26
-
27
-
28
-
29
-
30
-
31
-
32
-
33
-
34
-
35
-
36
-
37
-
38
-
39
-
40
-
41
-
42
-
43
-
44
-
45
-
46
-
47
-
48
-
49
-
50
-
51
-
52
-
53
-
54
-
55
-
56
-
57
-
58
-
59
-
60
-
61
-
62
-
63
-
64
-
65
-
66
-
67
-
68
-
69
-
70
-
71
-
72
-
73
-
74
-
75
-
76
-
77
-
78
-
79
-
80
-
81
-
82
-
83
-
84
-
85
-
86
-
87
-
88
-
89
-
90
-
91
-
92
-
93
-
94
-
95
 |
 |