Creative CT4180 Getting Started Guide - Page 93
Enabling/Disabling the Built-in Amplifier, To enable/disable the built-in, amplifier
 |
View all Creative CT4180 manuals
Add to My Manuals
Save this manual to your list of manuals |
Page 93 highlights
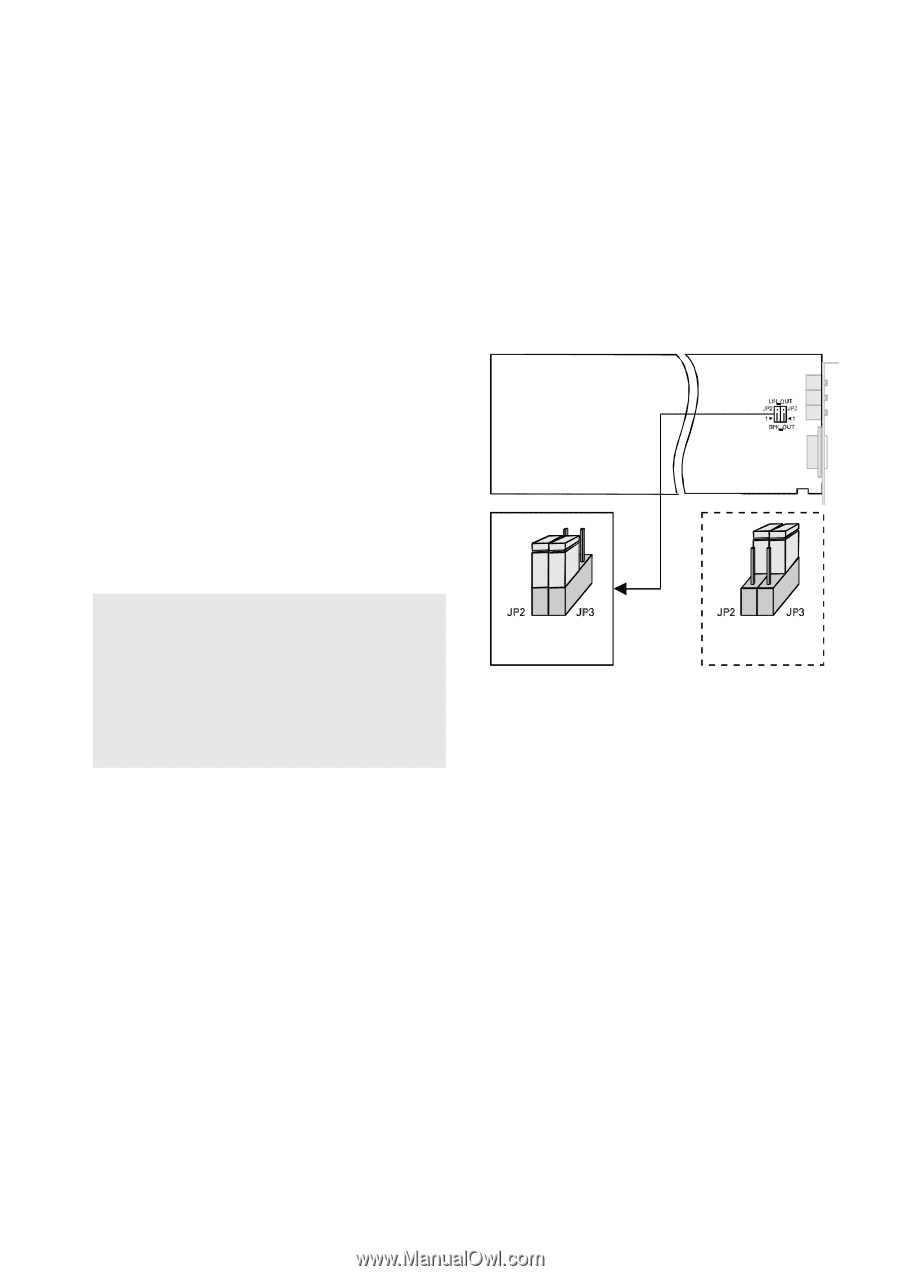
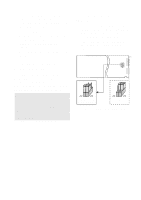
5. To enable the interface, clear the Disable check box for the interface. To disable it, make sure that the Disable check box is selected. 6. Click the OK button twice. 7. On the Menu, click Exit. Type the path of your Windows 3.1x directory (for example, C:\Windows) and press . 8. Restart your system for the change to take effect. Enabling/Disabling the Built-in Amplifier Your audio card comes with a Speaker Out/Line Out jack which connects non-powered speakers by default. To connect powered speakers or an external amplifier, the built-in amplifier must first be disabled. Warning: The built-in stereo power amplifier can deliver a maximum output power of four watts per channel to four-ohm speakers and two watts per channel to eight-ohm speakers. Do not play at maximum volume if your speakers cannot handle this power. To enable/disable the built-in amplifier 1. If your audio card is already installed, switch off your system and all peripheral devices. Remove the cover from your system and then the audio card. 2. Enable or disable the built-in amplifier according to the settings shown in Figure 2. Enabled (Factory default setting) Disabled Figure 2: Enabling/Disabling the built-in amplifier. 5
-
 1
1 -
2
-
3
-
4
-
5
-
6
-
7
-
8
-
9
-
10
-
11
-
12
-
13
-
14
-
15
-
16
-
17
-
18
-
19
-
20
-
21
-
22
-
23
-
24
-
25
-
26
-
27
-
28
-
29
-
30
-
31
-
32
-
33
-
34
-
35
-
36
-
37
-
38
-
39
-
40
-
41
-
42
-
43
-
44
-
45
-
46
-
47
-
48
-
49
-
50
-
51
-
52
-
53
-
54
-
55
-
56
-
57
-
58
-
59
-
60
-
61
-
62
-
63
-
64
-
65
-
66
-
67
-
68
-
69
-
70
-
71
-
72
-
73
-
74
-
75
-
76
-
77
-
78
-
79
-
80
-
81
-
82
-
83
-
84
-
85
-
86
-
87
-
 88
88 -
 89
89 -
 90
90 -
 91
91 -
 92
92 -
 93
93 -
 94
94 -
 95
95
 |
 |