Dell Dimension 8200 Dell Dimension 8200 Systems Solutions Guide - Page 29
Printer Problems, If you cannot print to a parallel port printer - diagnostic lights
 |
View all Dell Dimension 8200 manuals
Add to My Manuals
Save this manual to your list of manuals |
Page 29 highlights
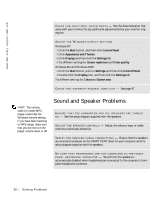
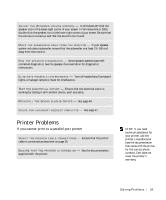
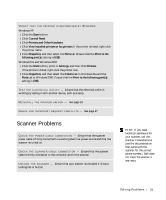
A D J U S T T HE W I N D O W S V O L U M E C O N T R O L - In Windows XP, click the speaker icon in the lower-right corner of your screen. In Windows Me or 2000, double-click the speaker icon in the lower-right corner of your screen. Be sure that the volume is turned up and that the sound is not muted. M O V E T H E S U B W O O F E R A W A Y F R O M T H E M O N I T O R - If your speaker system includes a subwoofer, ensure that the subwoofer is at least 2 ft (60 cm) away from the monitor. R UN T HE S P E A K E R D I A G N O S T I C S - Some speaker systems have selfcontained diagnostics. See the speaker documentation for diagnostics instructions. E L I M I N A T E P O S S I B L E IN T E R F E R E N C E - Turn off nearby fans, fluorescent lights, or halogen lamps to check for interference. TE S T T H E E L E C T R I C A L O UT L E T - Ensure that the electrical outlet is working by testing it with another device, such as a lamp. RE I N S T A L L T H E S O U N D ( A U D I O ) D R I V E R - See page 44. C H E C K F O R I N T E R R U P T R E Q U E S T C O N F L I C T S - See page 47. Printer Problems If you cannot print to a parallel port printer VE R I F Y T H E P R I N T E R C A B L E C O N N E C T I O N S - Ensure that the printer cable is connected as described on page 16. E N S U R E T H A T T H E P R I N T E R I S T U R N E D O N - See the documentation supplied with the printer. HINT: If you need technical assistance for your printer, call the printer's manufacturer (see the documentation that came with the printer for the correct phone number). Dell does not cover the printer's warranty. S olving Pr oblems 29
-
 1
1 -
2
-
3
-
4
-
5
-
6
-
7
-
8
-
9
-
10
-
11
-
12
-
13
-
14
-
15
-
16
-
17
-
18
-
19
-
20
-
21
-
22
-
23
-
 24
24 -
 25
25 -
 26
26 -
 27
27 -
 28
28 -
 29
29 -
 30
30 -
 31
31 -
 32
32 -
 33
33 -
 34
34 -
35
-
36
-
37
-
38
-
39
-
40
-
41
-
42
-
43
-
44
-
45
-
46
-
47
-
48
-
49
-
50
-
51
-
52
-
53
-
54
-
55
-
56
-
57
-
58
-
59
-
60
-
61
-
62
-
63
-
64
-
65
-
66
-
67
-
68
-
69
-
70
-
71
-
72
-
73
-
74
-
75
-
76
-
77
-
78
-
79
-
80
-
81
-
82
-
83
-
84
-
85
-
86
-
87
-
88
-
89
-
90
-
91
-
92
-
93
-
94
-
95
-
96
-
97
-
98
-
99
-
100
-
101
-
102
-
103
-
104
-
105
-
106
-
107
-
108
-
109
-
110
-
111
-
112
-
113
-
114
-
115
-
116
-
117
-
118
-
119
-
120
-
121
-
122
-
123
-
124
-
125
-
126
-
127
-
128
-
129
-
130
-
131
-
132
-
133
-
134
-
135
-
136
-
137
-
138
-
139
-
140
-
141
-
142
-
143
-
144
-
145
-
146
-
147
-
148
-
149
-
150
 |
 |