Dell XPS 600 Renegade Owner's Manual - Page 101
Floppy Drive, Removing a Floppy Drive
 |
View all Dell XPS 600 Renegade manuals
Add to My Manuals
Save this manual to your list of manuals |
Page 101 highlights
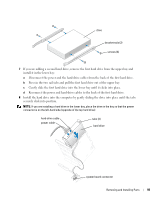
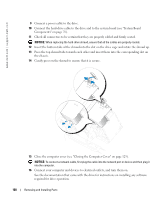
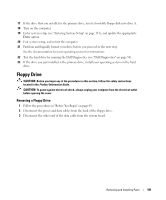
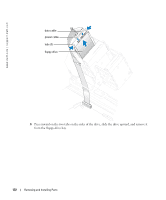
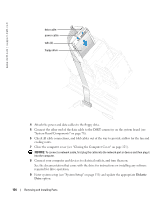
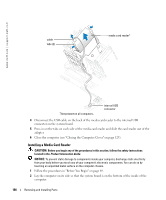
17 If the drive that you installed is the primary drive, insert a bootable floppy disk into drive A. 18 Turn on the computer. 19 Enter system setup (see "Entering System Setup" on page 131), and update the appropriate Drive option. 20 Exit system setup, and restart the computer. 21 Partition and logically format your drive before you proceed to the next step. See the documentation for your operating system for instructions. 22 Test the hard drive by running the Dell Diagnostics (see "Dell Diagnostics" on page 58). 23 If the drive you just installed is the primary drive, install your operating system on the hard drive. Floppy Drive CAUTION: Before you begin any of the procedures in this section, follow the safety instructions located in the Product Information Guide. CAUTION: To guard against electrical shock, always unplug your computer from the electrical outlet before opening the cover. Removing a Floppy Drive 1 Follow the procedures in "Before You Begin" on page 69. 2 Disconnect the power and data cables from the back of the floppy drive. 3 Disconnect the other end of the data cable from the system board. Removing and Installing Parts 101
-
 1
1 -
2
-
3
-
4
-
5
-
6
-
7
-
8
-
9
-
10
-
11
-
12
-
13
-
14
-
15
-
16
-
17
-
18
-
19
-
20
-
21
-
22
-
23
-
24
-
25
-
26
-
27
-
28
-
29
-
30
-
31
-
32
-
33
-
34
-
35
-
36
-
37
-
38
-
39
-
40
-
41
-
42
-
43
-
44
-
45
-
46
-
47
-
48
-
49
-
50
-
51
-
52
-
53
-
54
-
55
-
56
-
57
-
58
-
59
-
60
-
61
-
62
-
63
-
64
-
65
-
66
-
67
-
68
-
69
-
70
-
71
-
72
-
73
-
74
-
75
-
76
-
77
-
78
-
79
-
80
-
81
-
82
-
83
-
84
-
85
-
86
-
87
-
88
-
89
-
90
-
91
-
92
-
93
-
94
-
95
-
 96
96 -
 97
97 -
 98
98 -
 99
99 -
 100
100 -
 101
101 -
 102
102 -
 103
103 -
 104
104 -
 105
105 -
 106
106 -
107
-
108
-
109
-
110
-
111
-
112
-
113
-
114
-
115
-
116
-
117
-
118
-
119
-
120
-
121
-
122
-
123
-
124
-
125
-
126
-
127
-
128
-
129
-
130
-
131
-
132
-
133
-
134
-
135
-
136
-
137
-
138
-
139
-
140
-
141
-
142
-
143
-
144
-
145
-
146
-
147
-
148
-
149
-
150
-
151
-
152
-
153
-
154
-
155
-
156
-
157
-
158
-
159
-
160
-
161
-
162
-
163
-
164
-
165
-
166
 |
 |
