Edimax IC-7001W User Guide - Page 9
Hardware Installation
 |
View all Edimax IC-7001W manuals
Add to My Manuals
Save this manual to your list of manuals |
Page 9 highlights
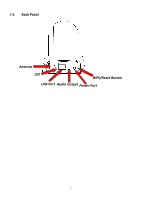
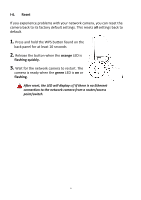
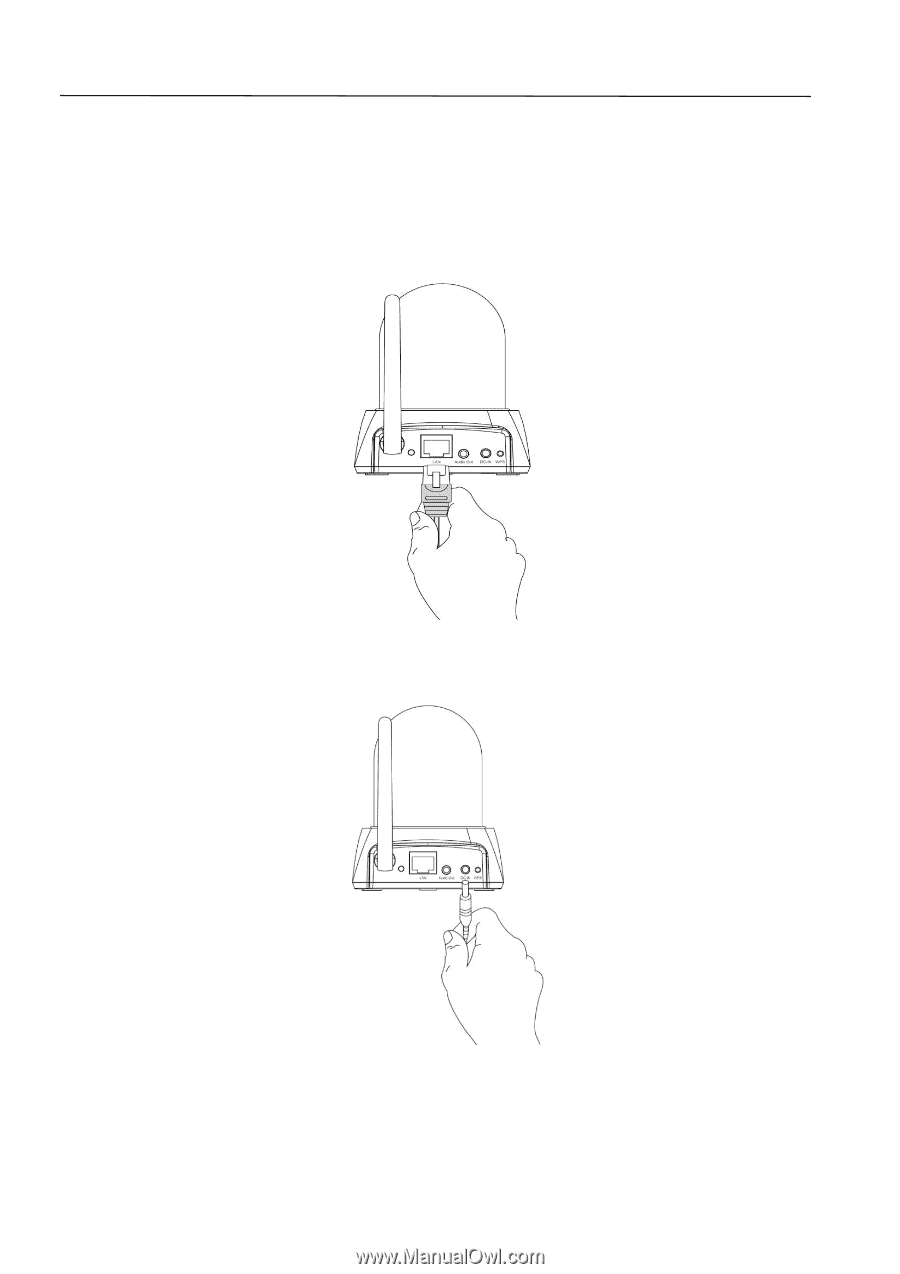
II. Hardware Installation Follow the instructions below to ensure your camera is properly connected and ready for setup. 1. Use an Ethernet cable to connect the network camera's LAN port to a router/switch/access point's LAN port, as shown below. 2. Connect the power adapter to the network camera's power port and to a power supply, as shown below. 3. Wait a moment for the camera to power on. The camera is ready when the green LED on the back of the camera displays on or flashing. Please refer to III. Camera Setup to setup your network camera. 5
-
 1
1 -
2
-
3
-
 4
4 -
 5
5 -
 6
6 -
 7
7 -
 8
8 -
 9
9 -
 10
10 -
 11
11 -
 12
12 -
 13
13 -
 14
14 -
15
-
16
-
17
-
18
-
19
-
20
-
21
-
22
-
23
-
24
-
25
-
26
-
27
-
28
-
29
-
30
-
31
-
32
-
33
-
34
-
35
-
36
-
37
-
38
-
39
-
40
-
41
-
42
-
43
-
44
-
45
-
46
-
47
-
48
-
49
-
50
-
51
-
52
-
53
-
54
-
55
-
56
-
57
-
58
-
59
-
60
-
61
-
62
-
63
-
64
-
65
-
66
-
67
-
68
-
69
-
70
-
71
-
72
-
73
-
74
-
75
-
76
-
77
-
78
-
79
-
80
-
81
-
82
-
83
-
84
-
85
-
86
-
87
-
88
-
89
-
90
-
91
-
92
-
93
-
94
-
95
-
96
-
97
-
98
-
99
-
100
-
101
-
102
-
103
-
104
-
105
-
106
-
107
-
108
-
109
-
110
-
111
 |
 |
5
II.
Hardware Installation
Follow the instructions below to ensure your camera is properly connected
and ready for setup.
1.
Use an Ethernet cable to connect the network camera’s LAN port to a
router/s
witch/access point’s LAN port, as shown below.
2.
Connect the power adapter to the network camera’s power port and to a
power supply, as shown below.
3.
Wait a moment for the camera to power on. The camera is ready when
the
green
LED on the back of the camera displays
on
or
flashing
. Please
refer to
III. Camera Setup
to setup your network camera.