Epson XP-600 Epson Connect Guide - Page 18
Basic printer setup, 2. Setting up Epson Connect, Setting Up from Your Smartphone or Tablet, - scan
 |
View all Epson XP-600 manuals
Add to My Manuals
Save this manual to your list of manuals |
Page 18 highlights
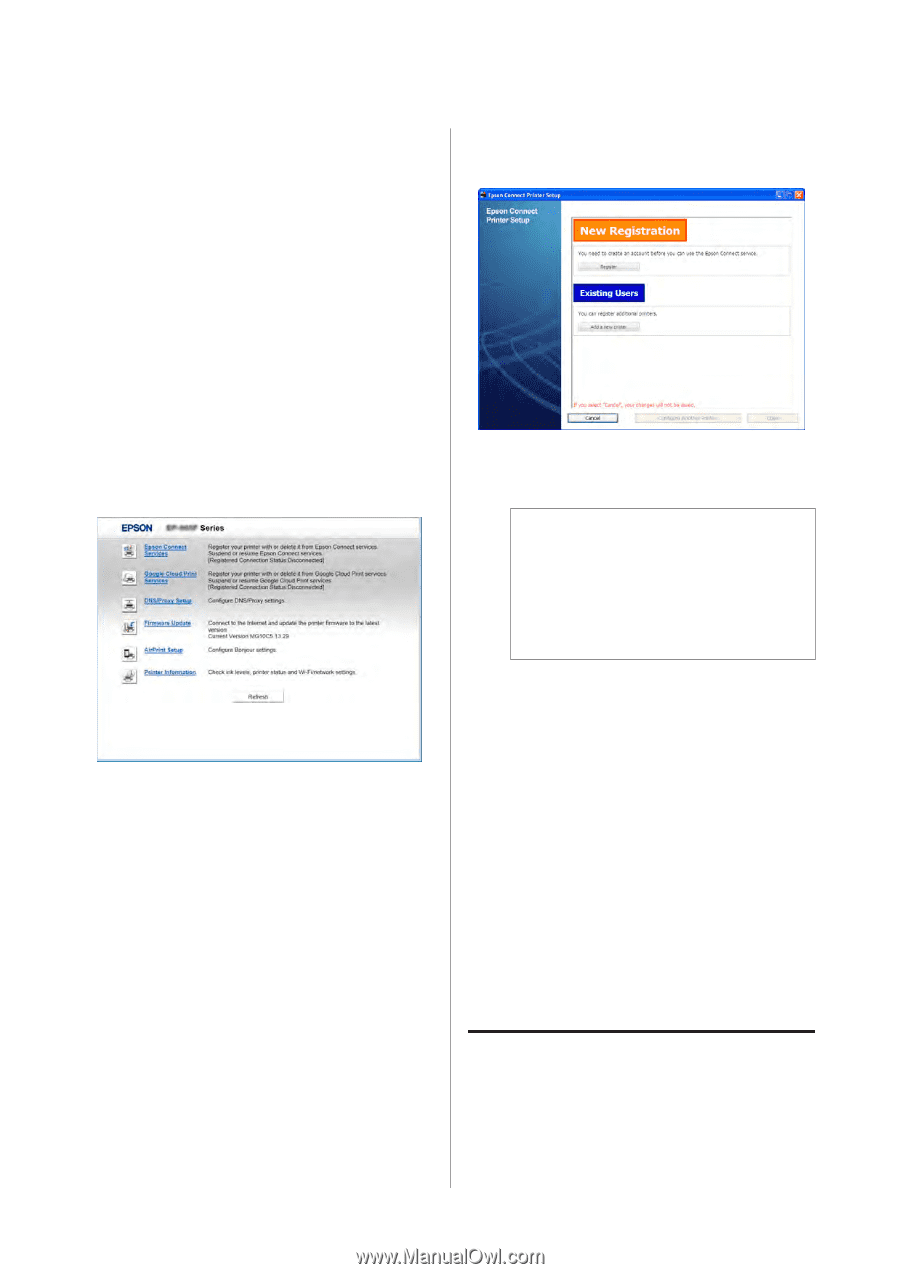
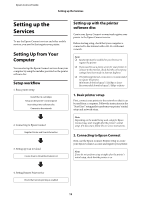
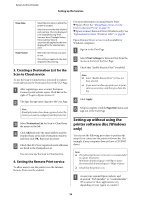
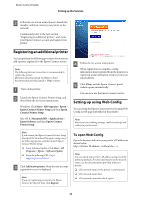
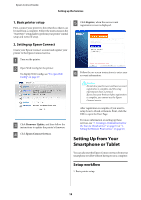
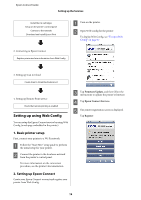
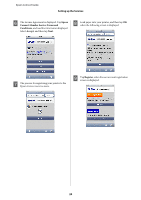
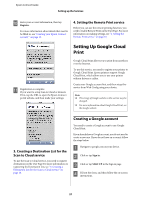
Epson Connect Guide Setting up the Services 1. Basic printer setup First, connect your printer to the network so that it can be used from a computer. Follow the instructions in the "Start Here" setup guide to perform your printer's initial setup and network setup. E Click Register, when the user account registration screen is displayed. 2. Setting up Epson Connect Create your Epson Connect account and register your printer to the Epson Connect service. A Turn on the printer. B Open Web Config for the printer. To display Web Config, see "To open Web Config" on page 17. F Follow the on-screen instructions to enter your account information. !Caution: Do not close your browser until user account registration is complete and the setup information sheet is printed. If you close your browser before registration is complete, you cannot use the Epson Connect service. C Click Firmware Update, and then follow the instructions to update the printer's firmware. D Click Epson Connect Services. After registration is complete, if you want to setup Scan to Cloud or Remote Print, click the URL to open the User Page. For more information on setting up these services, see "3. Creating a Destination List for the Scan to Cloud service" on page 16 or "4. Setting the Remote Print service" on page 16. Setting Up from Your Smartphone or Tablet You can also start the Epson Connect services from your smartphone or tablet without having to use a computer. Setup workflow 1. Basic printer setup 18
-
 1
1 -
2
-
3
-
4
-
5
-
6
-
7
-
8
-
9
-
10
-
11
-
12
-
 13
13 -
 14
14 -
 15
15 -
 16
16 -
 17
17 -
 18
18 -
 19
19 -
 20
20 -
 21
21 -
 22
22 -
 23
23 -
24
-
25
-
26
-
27
-
28
-
29
-
30
-
31
-
32
-
33
-
34
-
35
-
36
-
37
-
38
-
39
-
40
-
41
-
42
-
43
-
44
-
45
-
46
 |
 |