HP Designjet T770 HP Designjet T770 & T1200 Printer series - Users Guide - Page 55
Feed and cut the paper, Setup, Printer Settings, Advanced, Cutter, Print retrieval, Enable cutter
 |
View all HP Designjet T770 manuals
Add to My Manuals
Save this manual to your list of manuals |
Page 55 highlights
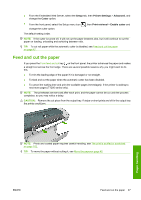
● From the Embedded Web Server, select the Setup tab, then Printer Settings > Advanced, and change the Cutter option. ● From the front panel, select the Setup menu icon , then Print retrieval > Enable cutter and change the cutter option. The default setting is On. NOTE: If the cutter is turned off, it will not cut the paper between jobs, but it will continue to cut the paper on loading, unloading and switching between rolls. TIP: To cut roll paper while the automatic cutter is disabled, see Feed and cut the paper on page 47. Feed and cut the paper If you press the Form feed and cut key on the front panel, the printer advances the paper and makes a straight cut across the front edge. There are several possible reasons why you might want to do this. ● To trim the leading edge of the paper if it is damaged or not straight. ● To feed and cut the paper when the automatic cutter has been disabled. ● To cancel the waiting time and print the available pages immediagely, if the printer is waiting to nest more pages (T1200 series only). NOTE: The printheads are serviced after each print, and the paper cannot be cut until the process completes, so you may notice a delay. CAUTION: Remove the cut piece from the output tray. If strips or short prints are left in the output tray the printer could jam. Paper handling NOTE: Photo and coated paper requires careful handling, see The print is scuffed or scratched on page 162. TIP: To move the paper without cutting it, see Move the paperon page 45. ENWW Feed and cut the paper 47
-
 1
1 -
2
-
3
-
4
-
5
-
6
-
7
-
8
-
9
-
10
-
11
-
12
-
13
-
14
-
15
-
16
-
17
-
18
-
19
-
20
-
21
-
22
-
23
-
24
-
25
-
26
-
27
-
28
-
29
-
30
-
31
-
32
-
33
-
34
-
35
-
36
-
37
-
38
-
39
-
40
-
41
-
42
-
43
-
44
-
45
-
46
-
47
-
48
-
49
-
 50
50 -
 51
51 -
 52
52 -
 53
53 -
 54
54 -
 55
55 -
 56
56 -
 57
57 -
 58
58 -
 59
59 -
 60
60 -
61
-
62
-
63
-
64
-
65
-
66
-
67
-
68
-
69
-
70
-
71
-
72
-
73
-
74
-
75
-
76
-
77
-
78
-
79
-
80
-
81
-
82
-
83
-
84
-
85
-
86
-
87
-
88
-
89
-
90
-
91
-
92
-
93
-
94
-
95
-
96
-
97
-
98
-
99
-
100
-
101
-
102
-
103
-
104
-
105
-
106
-
107
-
108
-
109
-
110
-
111
-
112
-
113
-
114
-
115
-
116
-
117
-
118
-
119
-
120
-
121
-
122
-
123
-
124
-
125
-
126
-
127
-
128
-
129
-
130
-
131
-
132
-
133
-
134
-
135
-
136
-
137
-
138
-
139
-
140
-
141
-
142
-
143
-
144
-
145
-
146
-
147
-
148
-
149
-
150
-
151
-
152
-
153
-
154
-
155
-
156
-
157
-
158
-
159
-
160
-
161
-
162
-
163
-
164
-
165
-
166
-
167
-
168
-
169
-
170
-
171
-
172
-
173
-
174
-
175
-
176
-
177
-
178
-
179
-
180
-
181
-
182
-
183
-
184
-
185
-
186
-
187
-
188
-
189
-
190
-
191
-
192
-
193
-
194
-
195
-
196
-
197
-
198
-
199
-
200
-
201
-
202
-
203
-
204
-
205
-
206
-
207
-
208
-
209
-
210
-
211
-
212
-
213
-
214
-
215
-
216
-
217
-
218
-
219
-
220
-
221
-
222
 |
 |
