HP LaserJet 1100 Service Manual - Page 118
Table 5-2. Service and error messages, Light status, Description, Recommended action - light codes
 |
View all HP LaserJet 1100 manuals
Add to My Manuals
Save this manual to your list of manuals |
Page 118 highlights
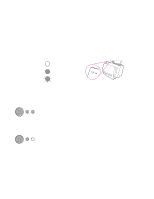
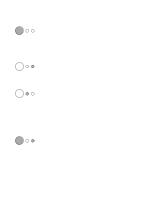
Table 5-2. Service and error messages Light status Description Recommended action Beam Error. There are a number of causes for this error, and some of the causes may disappear. 1. Power cycle the printer by unplugging the printer and plugging it back in. 2. Make certain the Laser/Scanner Assembly is correctly seated on the printer chassis. 3. Replace the Laser/Scanner cable. 4. Replace the Laser/Scanner Assembly. 5. Replace the ECU. Print Engine Error. The formatter and engine are not communicating. 1. Power cycle the printer by unplugging the printer and plugging it back in. 2. Reseat Formatter to ECU cable. 3. Replace the Formatter PCA. 4. Replace the ECU. Printer Laser/Scanner Error. Caused by a laser scanner malfunction. 1. Power cycle the printer by unplugging the printer and plugging it back in. If this does not clear the error, go to step 2. 2. Ensure condensation caused by moving the printer from a cold to a warm environment hasn't occurred. Allow the printer to acclimate to the warmer room. 3. Verify the two Laser/Scanner Assembly connectors are firmly seated. 4. Replace the scanner cable on the ECU. 5. Replace the Laser/Scanner Assembly. 6. Replace the ECU. Firmware Error. 1. Power cycle the printer by unplugging the printer and plugging it back in. Note the LED patterns on the BiTronics error code. 2. Disconnect the parallel I/O cable and try running a printer Contact HP technical self test. Reconnect the parallel cable if the self test is support with this successful and try host/printer communications again. information as well as a description of what data 3. If the error persists, replace the Formatter PCA. was sent, the errors encountered prior to the firmware error, the condition of the printer prior to the error, and any other information that may help isolate the error. C4224-90962 Fatal errors/accessory errors 123
-
 1
1 -
2
-
3
-
4
-
5
-
6
-
7
-
8
-
9
-
10
-
11
-
12
-
13
-
14
-
15
-
16
-
17
-
18
-
19
-
20
-
21
-
22
-
23
-
24
-
25
-
26
-
27
-
28
-
29
-
30
-
31
-
32
-
33
-
34
-
35
-
36
-
37
-
38
-
39
-
40
-
41
-
42
-
43
-
44
-
45
-
46
-
47
-
48
-
49
-
50
-
51
-
52
-
53
-
54
-
55
-
56
-
57
-
58
-
59
-
60
-
61
-
62
-
63
-
64
-
65
-
66
-
67
-
68
-
69
-
70
-
71
-
72
-
73
-
74
-
75
-
76
-
77
-
78
-
79
-
80
-
81
-
82
-
83
-
84
-
85
-
86
-
87
-
88
-
89
-
90
-
91
-
92
-
93
-
94
-
95
-
96
-
97
-
98
-
99
-
100
-
101
-
102
-
103
-
104
-
105
-
106
-
107
-
108
-
109
-
110
-
111
-
112
-
 113
113 -
 114
114 -
 115
115 -
 116
116 -
 117
117 -
 118
118 -
 119
119 -
 120
120 -
 121
121 -
 122
122 -
 123
123 -
124
-
125
-
126
-
127
-
128
-
129
-
130
-
131
-
132
-
133
-
134
-
135
-
136
-
137
-
138
-
139
-
140
-
141
-
142
-
143
-
144
-
145
-
146
-
147
-
148
-
149
-
150
-
151
-
152
-
153
-
154
-
155
-
156
-
157
-
158
-
159
-
160
-
161
-
162
-
163
-
164
-
165
-
166
-
167
-
168
-
169
-
170
-
171
-
172
-
173
-
174
-
175
-
176
-
177
-
178
-
179
-
180
-
181
-
182
-
183
-
184
-
185
-
186
-
187
-
188
-
189
-
190
-
191
 |
 |
