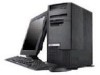
IBM 689912U Hardware Maintenance Manual - Page 247
Recovering from a Forgotten OS/2, Password, Backing Up and Restoring Files, Backing Up Your Hard Disk
 |
View all IBM 689912U manuals
Add to My Manuals
Save this manual to your list of manuals |
Page 247 highlights
3. Double-click on OS/2 Window or OS/2 Full Screen. 4. Type CHKDSK D: /F:2 and press Enter. (If you are checking a drive other than D, substitute that drive letter for the D used in this example.) 5. Follow any instructions that appear on the screen. Recovering from a Forgotten OS/2 Password If you forget your OS/2 lockup password, use the following procedure. 1. Power-on the computer. 2. When a small white box appears in the upper left-hand corner of the screen, press Alt+F1. 3. When the Recovery Choices screen appears, press C. 4. Type CD \OS/2 and press Enter. 5. Type the following: MAKEINI OS2.INI LOCK.RC 6. Press Enter. 7. Restart the computer. Backing Up and Restoring Files The backup routines provided with OS/2 and DOS allow you to back up a single file, a directory, or the entire contents of a disk. Backing up files that contain your day-to-day work will help to protect you from losing data that cannot be recovered from another source. Backing up the entire contents of each disk takes longer, but ensures that you can reinstall your operating system, programs, and data files exactly as they were before a major problem occurred. Procedures for backing up and restoring files using DOS are in the DOS/Windows users guide. Procedures for backing up and restoring files using OS/2 Warp are in the online OS/2 Command Reference. If a problem occurs, you might not be able to view the online OS/2 Command Reference, or you might not be able to get to a command prompt. Therefore, the following short procedures have been included to help you to back up and restore the entire contents of your hard disk using the OS/2 Warp Utility Diskettes. Backing Up Your Hard Disk To back up the entire contents of your hard disk: 1. Insert Utility Diskette 1 in your diskette drive. 2. Power-on the computer. If the computer is already on, restart the computer using the Ctrl+Alt+Del key sequence. 3. Follow the instructions on the screen until you get to a command prompt. 4. Insert Utility Diskette 3. Reference Information 237
-
 1
1 -
2
-
3
-
4
-
5
-
6
-
7
-
8
-
9
-
10
-
11
-
12
-
13
-
14
-
15
-
16
-
17
-
18
-
19
-
20
-
21
-
22
-
23
-
24
-
25
-
26
-
27
-
28
-
29
-
30
-
31
-
32
-
33
-
34
-
35
-
36
-
37
-
38
-
39
-
40
-
41
-
42
-
43
-
44
-
45
-
46
-
47
-
48
-
49
-
50
-
51
-
52
-
53
-
54
-
55
-
56
-
57
-
58
-
59
-
60
-
61
-
62
-
63
-
64
-
65
-
66
-
67
-
68
-
69
-
70
-
71
-
72
-
73
-
74
-
75
-
76
-
77
-
78
-
79
-
80
-
81
-
82
-
83
-
84
-
85
-
86
-
87
-
88
-
89
-
90
-
91
-
92
-
93
-
94
-
95
-
96
-
97
-
98
-
99
-
100
-
101
-
102
-
103
-
104
-
105
-
106
-
107
-
108
-
109
-
110
-
111
-
112
-
113
-
114
-
115
-
116
-
117
-
118
-
119
-
120
-
121
-
122
-
123
-
124
-
125
-
126
-
127
-
128
-
129
-
130
-
131
-
132
-
133
-
134
-
135
-
136
-
137
-
138
-
139
-
140
-
141
-
142
-
143
-
144
-
145
-
146
-
147
-
148
-
149
-
150
-
151
-
152
-
153
-
154
-
155
-
156
-
157
-
158
-
159
-
160
-
161
-
162
-
163
-
164
-
165
-
166
-
167
-
168
-
169
-
170
-
171
-
172
-
173
-
174
-
175
-
176
-
177
-
178
-
179
-
180
-
181
-
182
-
183
-
184
-
185
-
186
-
187
-
188
-
189
-
190
-
191
-
192
-
193
-
194
-
195
-
196
-
197
-
198
-
199
-
200
-
201
-
202
-
203
-
204
-
205
-
206
-
207
-
208
-
209
-
210
-
211
-
212
-
213
-
214
-
215
-
216
-
217
-
218
-
219
-
220
-
221
-
222
-
223
-
224
-
225
-
226
-
227
-
228
-
229
-
230
-
231
-
232
-
233
-
234
-
235
-
236
-
237
-
238
-
239
-
240
-
241
-
 242
242 -
 243
243 -
 244
244 -
 245
245 -
 246
246 -
 247
247 -
 248
248 -
 249
249 -
 250
250 -
 251
251 -
 252
252 -
253
-
254
-
255
-
256
-
257
-
258
-
259
-
260
-
261
-
262
-
263
-
264
-
265
-
266
-
267
-
268
-
269
-
270
-
271
-
272
-
273
-
274
-
275
-
276
-
277
-
278
-
279
-
280
-
281
-
282
-
283
-
284
-
285
-
286
-
287
-
288
-
289
-
290
-
291
-
292
-
293
-
294
-
295
-
296
-
297
-
298
-
299
-
300
-
301
-
302
-
303
-
304
-
305
-
306
-
307
-
308
-
309
-
310
-
311
-
312
-
313
-
314
-
315
-
316
-
317
-
318
-
319
-
320
-
321
-
322
-
323
-
324
-
325
-
326
-
327
-
328
-
329
-
330
-
331
-
332
-
333
-
334
-
335
-
336
-
337
-
338
-
339
-
340
-
341
-
342
-
343
-
344
-
345
-
346
-
347
-
348
-
349
-
350
-
351
-
352
-
353
-
354
-
355
-
356
-
357
-
358
-
359
-
360
-
361
-
362
-
363
-
364
-
365
-
366
-
367
-
368
-
369
-
370
-
371
-
372
-
373
-
374
-
375
-
376
-
377
-
378
-
379
-
380
-
381
-
382
-
383
-
384
-
385
-
386
-
387
-
388
-
389
-
390
-
391
-
392
-
393
-
394
-
395
-
396
-
397
-
398
-
399
-
400
-
401
-
402
-
403
-
404
-
405
-
406
-
407
-
408
-
409
-
410
-
411
-
412
-
413
-
414
-
415
-
416
-
417
-
418
-
419
-
420
-
421
-
422
-
423
-
424
-
425
-
426
-
427
-
428
-
429
-
430
-
431
-
432
-
433
-
434
-
435
-
436
-
437
-
438
-
439
-
440
-
441
-
442
-
443
-
444
-
445
-
446
-
447
-
448
-
449
-
450
-
451
-
452
-
453
-
454
-
455
-
456
-
457
-
458
-
459
-
460
-
461
-
462
-
463
-
464
-
465
-
466
-
467
-
468
-
469
-
470
-
471
-
472
 |
 |
