Kyocera TASKalfa 181 181/221 Print Driver User Guide - Page 8
Utilities Installation, Upgrading Driver Components, Express Installation - drivers windows 7
 |
View all Kyocera TASKalfa 181 manuals
Add to My Manuals
Save this manual to your list of manuals |
Page 8 highlights
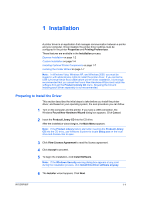
Installation The installation differs based on your operating system and connection method. Select your operating system and connection method from the following list and proceed to the reference page to continue the installation. Express Installation Installing on Windows Vista and Windows XP on page 1-2 Custom Installation Installing on Windows Vista and Windows XP with a USB Connection on page 1-4 Installing on Windows Vista and Windows XP with a Network Connection on page 1-5 Note: KPrint installs a client port monitor that lets Windows TCP/IP print from any network card connected to a printing system. KPrint supports LPR and IPP printing. For the KPrint Installation instructions, refer to your Product Library CD. KPrint uses a stand-alone installer. Utilities Installation On the Installation Method screen, click Utilities to install printer utilities. You can also select utilities to install during the Custom Installation procedure. Upgrading Driver Components If the installation wizard detects older driver or utility components, the Software Component Upgrade page appears. 1 Choose the component to upgrade. Click Next. 2 Confirm your upgrade settings. To start the upgrade, click Upgrade. 3 When the upgrade completes, click Next. The Installation Method page appears. Express Installation Express mode applies to driver installation for a USB or network connection only. The installation wizard discovers printers that are turned on, and connected by USB and network cable. In Custom Mode, you are able to select the installation packages and specify the port. Installing on Windows Vista and Windows XP This section describes the express installation procedure of the driver software on Windows Vista and Windows XP. 1 Ensure that your printer and computer are turned on and connected by USB or network cable. Note: If the Found New Hardware Wizard dialog box appears during the installation process, click Cancel. If the Hardware Installation warning dialog box appears, click Continue Anyway. 1-2 User Guide
-
 1
1 -
2
-
 3
3 -
 4
4 -
 5
5 -
 6
6 -
 7
7 -
 8
8 -
 9
9 -
 10
10 -
 11
11 -
 12
12 -
 13
13 -
14
-
15
-
16
-
17
-
18
-
19
-
20
-
21
-
22
-
23
-
24
-
25
-
26
-
27
-
28
-
29
-
30
-
31
-
32
-
33
-
34
-
35
-
36
-
37
-
38
-
39
-
40
-
41
-
42
-
43
-
44
-
45
-
46
-
47
-
48
-
49
-
50
-
51
-
52
-
53
-
54
-
55
-
56
-
57
-
58
-
59
-
60
-
61
-
62
-
63
-
64
-
65
-
66
-
67
-
68
-
69
-
70
-
71
-
72
-
73
-
74
-
75
-
76
-
77
-
78
-
79
-
80
-
81
-
82
-
83
-
84
-
85
-
86
-
87
-
88
-
89
-
90
-
91
-
92
-
93
 |
 |
