Lexmark Genesis S815 Quick Reference Guide - Page 28
Interpreting the colors of the Wi-Fi indicator, Special wireless installation instructions
 |
View all Lexmark Genesis S815 manuals
Add to My Manuals
Save this manual to your list of manuals |
Page 28 highlights
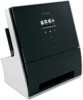
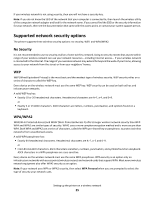
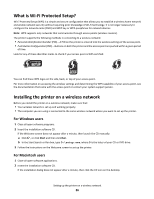
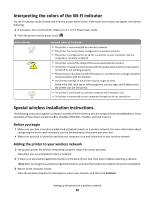
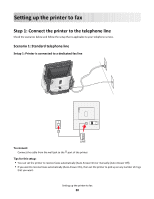
Interpreting the colors of the Wi-Fi indicator The Wi-Fi indicator can be viewed only from the printer home screen. If the home screen does not appear, then do the following: 1 If necessary, turn on the printer. Make sure it is not in Power Saver mode. 2 From the printer control panel, touch . Wi-Fi indicator ! Network status of the printer • The printer is not connected to a wireless network. • The printer has not yet been configured for a wireless network. • The printer is configured for an ad hoc connection to your computer, but the computer is currently turned off. • The printer is out of the range of the access point (wireless router). • The printer is trying to communicate with the access point, but the access point is turned off or not working properly. • The access point has been turned off and back on, and the printer is trying to establish communications with the network. • The wireless settings of the printer may no longer be valid. Check if the SSID, WEP key or WPA passphrase, security type, and IP address that the printer uses are still correct. • The printer is connected to a wireless network and is ready for use. • The printer is connected to your computer through an ad hoc connection. Special wireless installation instructions The following instructions apply to customers outside of North America who are using a wireless broadband box. Some examples of these boxes include LiveBox, AliceBox, N9UF Box, FreeBox, and Club Internet. Before you begin • Make sure your box is wireless-enabled and activated to work on a wireless network. For more information about configuring the box to work wirelessly, see the documentation that came with your box. • Make sure your box is turned on and that your computer is on and connected to your wireless network. Adding the printer to your wireless network 1 Set up your printer for wireless networking using the setup instructions provided. Stop when you are prompted to select a network. 2 If there is an association/registration button on the back of your box, then press it before selecting a network. Note: After pressing the association/registration button, you have five minutes to complete the printer installation. 3 Return to the computer screen. From the wireless networks list that appears, select your network, and then click Continue. Setting up the printer on a wireless network 28
-
 1
1 -
2
-
3
-
4
-
5
-
6
-
7
-
8
-
9
-
10
-
11
-
12
-
13
-
14
-
15
-
16
-
17
-
18
-
19
-
20
-
21
-
22
-
 23
23 -
 24
24 -
 25
25 -
 26
26 -
 27
27 -
 28
28 -
 29
29 -
 30
30 -
 31
31 -
 32
32 -
 33
33 -
34
-
35
-
36
-
37
-
38
-
39
-
40
-
41
-
42
-
43
-
44
-
45
-
46
-
47
-
48
-
49
-
50
-
51
-
52
-
53
-
54
-
55
-
56
-
57
-
58
-
59
-
60
-
61
-
62
-
63
-
64
-
65
-
66
-
67
-
68
-
69
-
70
-
71
-
72
-
73
-
74
-
75
-
76
-
77
-
78
-
79
-
80
-
81
-
82
-
83
-
84
-
85
-
86
-
87
-
88
-
89
-
90
-
91
-
92
-
93
-
94
-
95
-
96
-
97
 |
 |