Lexmark Genesis S815 User Manual - Page 132
Print job does not print or is missing s, Print, Add Printer
 |
View all Lexmark Genesis S815 manuals
Add to My Manuals
Save this manual to your list of manuals |
Page 132 highlights
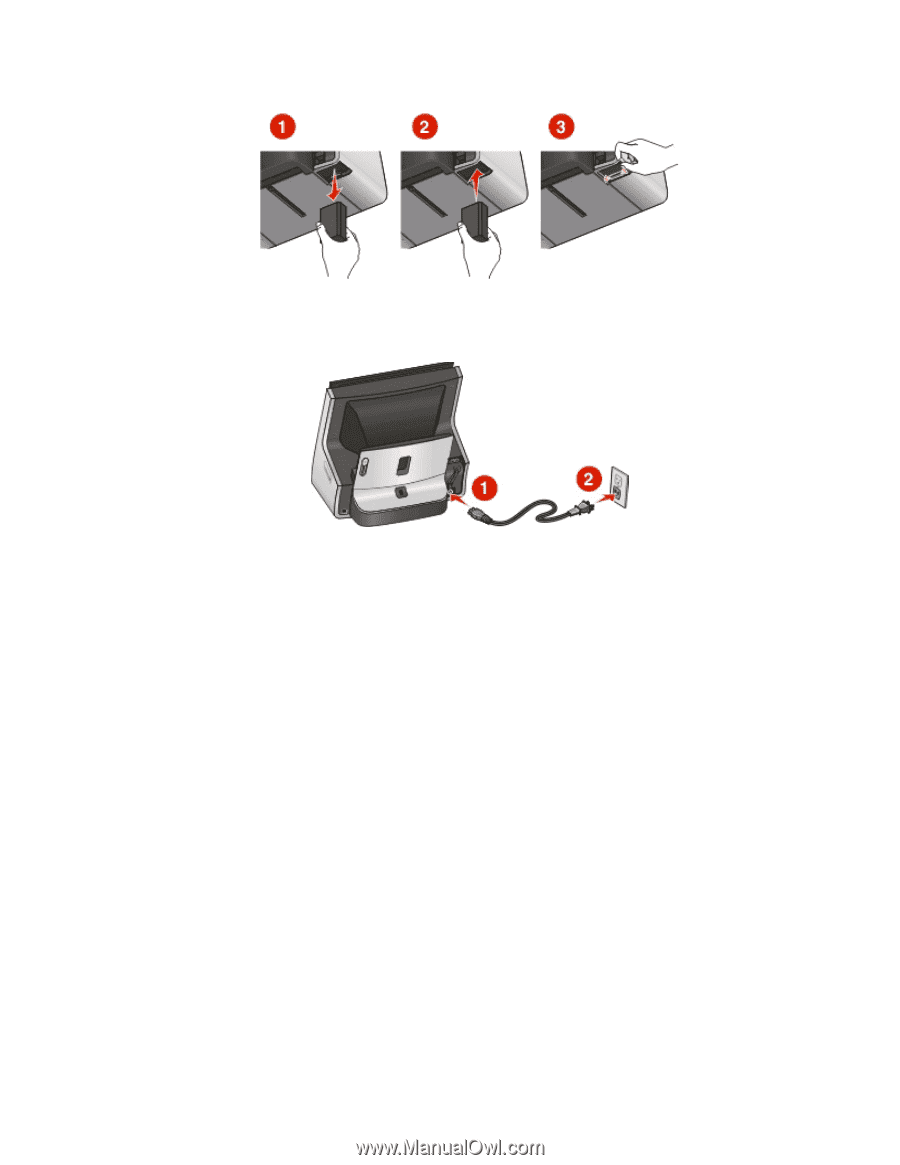
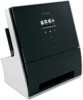
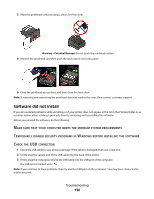
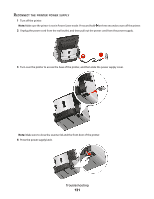
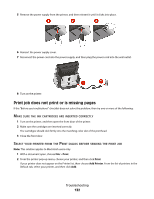
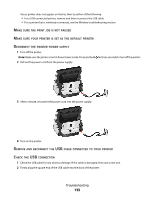
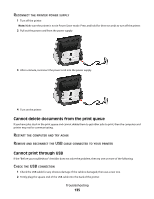
5 Remove the power supply from the printer, and then reinsert it until it clicks into place. 6 Reinsert the power supply cover. 7 Reconnect the power cord into the power supply, and then plug the power cord into the wall outlet. 8 Turn on the printer. Print job does not print or is missing pages If the "Before you troubleshoot" checklist does not solve the problem, then try one or more of the following: MAKE SURE THE INK CARTRIDGES ARE INSERTED CORRECTLY 1 Turn on the printer, and then open the front door of the printer. 2 Make sure the cartridges are inserted correctly. The cartridges should click firmly into the matching color slot of the printhead. 3 Close the front door. SELECT YOUR PRINTER FROM THE PRINT DIALOG BEFORE SENDING THE PRINT JOB Note: This solution applies to Macintosh users only. 1 With a document open, choose File > Print. 2 From the printer pop-up menu, choose your printer, and then click Print. If your printer does not appear on the Printer list, then choose Add Printer. From the list of printers in the Default tab, select your printer, and then click Add. Troubleshooting 132
-
 1
1 -
2
-
3
-
4
-
5
-
6
-
7
-
8
-
9
-
10
-
11
-
12
-
13
-
14
-
15
-
16
-
17
-
18
-
19
-
20
-
21
-
22
-
23
-
24
-
25
-
26
-
27
-
28
-
29
-
30
-
31
-
32
-
33
-
34
-
35
-
36
-
37
-
38
-
39
-
40
-
41
-
42
-
43
-
44
-
45
-
46
-
47
-
48
-
49
-
50
-
51
-
52
-
53
-
54
-
55
-
56
-
57
-
58
-
59
-
60
-
61
-
62
-
63
-
64
-
65
-
66
-
67
-
68
-
69
-
70
-
71
-
72
-
73
-
74
-
75
-
76
-
77
-
78
-
79
-
80
-
81
-
82
-
83
-
84
-
85
-
86
-
87
-
88
-
89
-
90
-
91
-
92
-
93
-
94
-
95
-
96
-
97
-
98
-
99
-
100
-
101
-
102
-
103
-
104
-
105
-
106
-
107
-
108
-
109
-
110
-
111
-
112
-
113
-
114
-
115
-
116
-
117
-
118
-
119
-
120
-
121
-
122
-
123
-
124
-
125
-
126
-
 127
127 -
 128
128 -
 129
129 -
 130
130 -
 131
131 -
 132
132 -
 133
133 -
 134
134 -
 135
135 -
 136
136 -
 137
137 -
138
-
139
-
140
-
141
-
142
-
143
-
144
-
145
-
146
-
147
-
148
-
149
-
150
-
151
-
152
-
153
-
154
-
155
-
156
-
157
-
158
-
159
-
160
-
161
-
162
-
163
-
164
-
165
-
166
-
167
-
168
-
169
-
170
-
171
-
172
-
173
-
174
-
175
-
176
-
177
-
178
-
179
-
180
-
181
-
182
-
183
-
184
-
185
-
186
-
187
-
188
-
189
-
190
-
191
-
192
-
193
-
194
-
195
-
196
-
197
 |
 |