Lexmark X652DE Common Criteria Installation Supplement and Administrator Guide - Page 7
Encrypting the hard disk
 |
UPC - 734646093835
View all Lexmark X652DE manuals
Add to My Manuals
Save this manual to your list of manuals |
Page 7 highlights
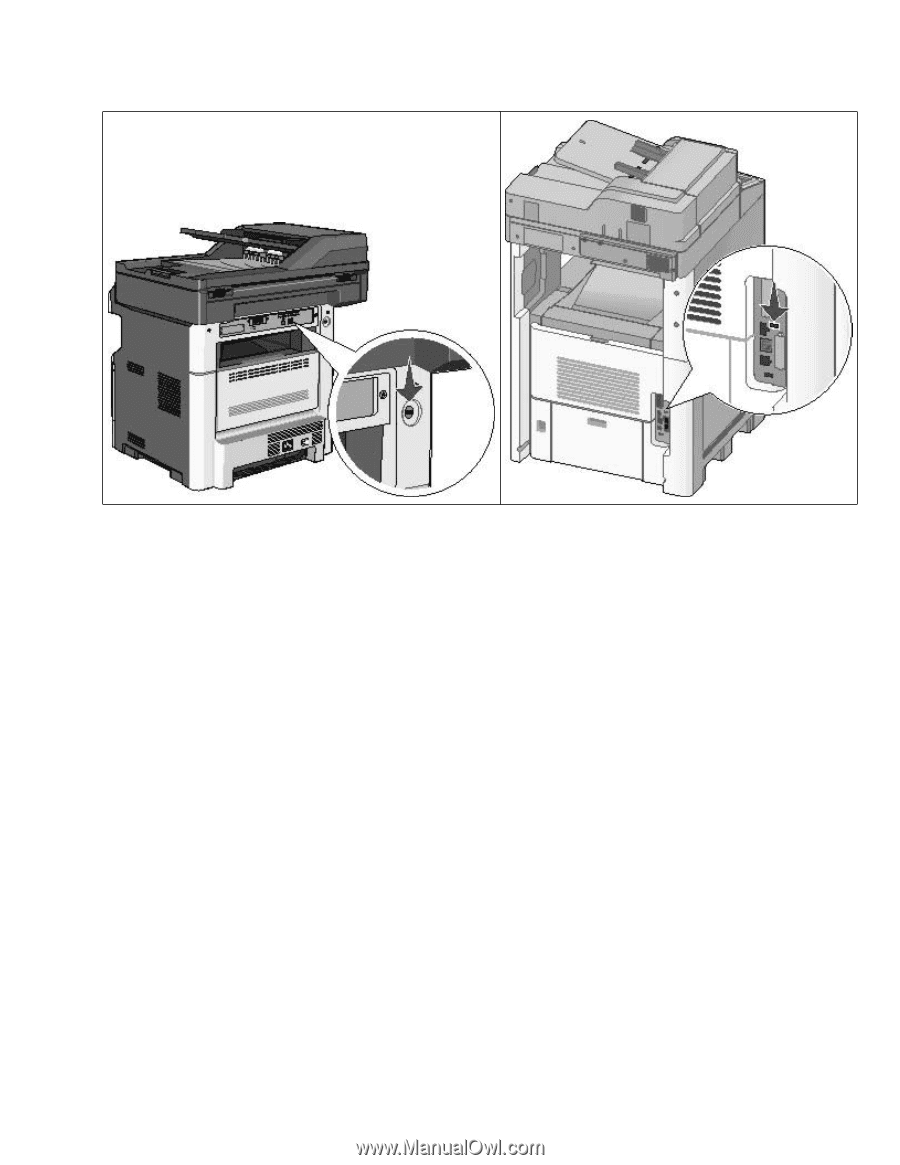
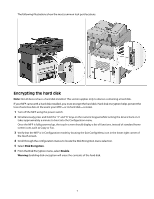
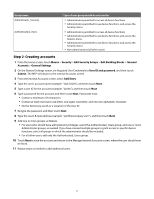
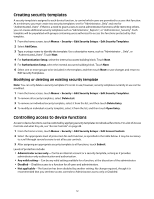
The following illustrations show the most common lock port locations: Encrypting the hard disk Note: Not all devices have a hard disk installed. This section applies only to devices containing a hard disk. If your MFP came with a hard disk installed, you must encrypt the hard disk. Hard disk encryption helps prevent the loss of sensitive data in the event your MFP-or its hard disk-is stolen. 1 Turn off the MFP using the power switch. 2 Simultaneously press and hold the "2" and "6" keys on the numeric keypad while turning the device back on. It takes approximately a minute to boot into the Configuration menu. Once the MFP is fully powered up, the touch screen should display a list of functions, instead of standard home screen icons such as Copy or Fax. 3 Verify that the MFP is in Configuration mode by locating the Exit Config Menu icon in the lower right corner of the touch screen. 4 Scroll through the configuration menus to locate the Disk Encryption menu selection. 5 Select Disk Encryption. 6 From the Disk Encryption menu, select Enable. Warning: Enabling disk encryption will erase the contents of the hard disk. 7
-
 1
1 -
 2
2 -
 3
3 -
 4
4 -
 5
5 -
 6
6 -
 7
7 -
 8
8 -
 9
9 -
 10
10 -
 11
11 -
 12
12 -
13
-
14
-
15
-
16
-
17
-
18
-
19
-
20
-
21
-
22
-
23
-
24
-
25
-
26
-
27
-
28
-
29
-
30
-
31
-
32
-
33
-
34
-
35
-
36
-
37
-
38
-
39
-
40
-
41
-
42
-
43
-
44
-
45
-
46
-
47
-
48
-
49
-
50
-
51
-
52
-
53
-
54
-
55
-
56
-
57
-
58
 |
 |