Linksys SPA922 Cisco SPA9000 Voice System Web-UI Based Product Installation an - Page 57

Performing a Factory Reset, Connecting Optional Devices
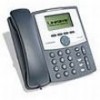
Page 57 highlights

Connecting the Equipment Installing the IP Phones 4 Performing a Factory Reset If an IP phone has been used before, it may not register to the SPA9000 because it has the IP address and registration information from a previous SPA9000. To allow the auto-provisioning feature of the SPA9000 to configure your phone for you, reset it to the factory default settings, as described below. STEP 1 Press the Setup button on the phone keypad. STEP 2 Press 14 - Factory Reset. STEP 3 Press the select soft key to confirm. STEP 4 After the phone reboots, the system automatically assigns an extension number to the phone. Connecting Optional Devices Depending on the site requirements, you may need the following additional devices: • POES5 Power Adapter: The POES5 provides an 802.3af PoE port for connection back to a PoE switch. If you have a SPA9x1 series phone and a PoE switch, you can connect the POES5 to the phone to allow it to receive PoE. • MB100 Wall-Mount Kit: The MB100 wall-mount bracket increases the versatility of the SPA9000 Voice System by allowing phones to be mounted on walls in hallways, sales floors, kitchens, and other locations where desktop placement is not practical. • WBP54G: The Wireless-G Bridge for Phone Adapters allows you to connect an IP phone to your wireless network so that you can install the phone in any location within range of your wireless router. The IP phone must be connected to a power adapter since it is not cabled to the switch. The bridge shares electrical power with the IP phone. SPA9000 Voice System Installation and Configuration Guide for Web UI 55

  • 1
  • 2
  • 3
  • 4
  • 5
  • 6
  • 7
  • 8
  • 9
  • 10
  • 11
  • 12
  • 13
  • 14
  • 15
  • 16
  • 17
  • 18
  • 19
  • 20
  • 21
  • 22
  • 23
  • 24
  • 25
  • 26
  • 27
  • 28
  • 29
  • 30
  • 31
  • 32
  • 33
  • 34
  • 35
  • 36
  • 37
  • 38
  • 39
  • 40
  • 41
  • 42
  • 43
  • 44
  • 45
  • 46
  • 47
  • 48
  • 49
  • 50
  • 51
  • 52
  • 53
  • 54
  • 55
  • 56
  • 57
  • 58
  • 59
  • 60
  • 61
  • 62
  • 63
  • 64
  • 65
  • 66
  • 67
  • 68
  • 69
  • 70
  • 71
  • 72
  • 73
  • 74
  • 75
  • 76
  • 77
  • 78
  • 79
  • 80
  • 81
  • 82
  • 83
  • 84
  • 85
  • 86
  • 87
  • 88
  • 89
  • 90
  • 91
  • 92
  • 93
  • 94
  • 95
  • 96
  • 97
  • 98
  • 99
  • 100
  • 101
  • 102
  • 103
  • 104
  • 105
  • 106
  • 107
  • 108
  • 109
  • 110
  • 111
  • 112
  • 113
  • 114
  • 115
  • 116
  • 117
  • 118
  • 119
  • 120
  • 121
  • 122
  • 123
  • 124
  • 125
  • 126
  • 127
  • 128
  • 129
  • 130
  • 131
  • 132
  • 133
  • 134
  • 135
  • 136
  • 137
  • 138
  • 139
  • 140
  • 141
  • 142
  • 143
  • 144
  • 145
  • 146
  • 147
  • 148
  • 149
  • 150
  • 151
  • 152
  • 153
  • 154
  • 155
  • 156
  • 157
  • 158
  • 159
  • 160
  • 161

Connecting the Equipment
Installing the IP Phones
SPA9000 Voice System Installation and Configuration Guide for Web UI
55
4
Performing a Factory Reset
If an IP phone has been used before, it may not register to the SPA9000 because it
has the IP address and registration information from a previous SPA9000. To allow
the auto-provisioning feature of the SPA9000 to configure your phone for you,
reset it to the factory default settings, as described below.
STEP 1
Press the
Setup
button on the phone keypad.
STEP 2
Press
14 - Factory Reset
.
STEP 3
Press the
select
soft key to confirm.
STEP 4
After the phone reboots, the system automatically assigns an extension number to
the phone.
Connecting Optional Devices
Depending on the site requirements, you may need the following additional
devices:
POES5 Power Adapter: The POES5 provides an 802.3af PoE port for
connection back to a PoE switch. If you have a SPA9x1 series phone and a PoE
switch, you can connect the POES5 to the phone to allow it to receive PoE.
MB100 Wall-Mount Kit: The MB100 wall-mount bracket increases the versatility
of the SPA9000 Voice System by allowing phones to be mounted on walls in
hallways, sales floors, kitchens, and other locations where desktop placement
is not practical.
WBP54G: The Wireless-G Bridge for Phone Adapters allows you to connect an
IP phone to your wireless network so that you can install the phone in any
location within range of your wireless router. The IP phone must be connected
to a power adapter since it is not cabled to the switch. The bridge shares
electrical power with the IP phone.