Linksys WMLS11B User Guide - Page 15
Connecting the Wireless-B Media Link for Music to Your Network for Setup
 |
UPC - 745883559282
View all Linksys WMLS11B manuals
Add to My Manuals
Save this manual to your list of manuals |
Page 15 highlights
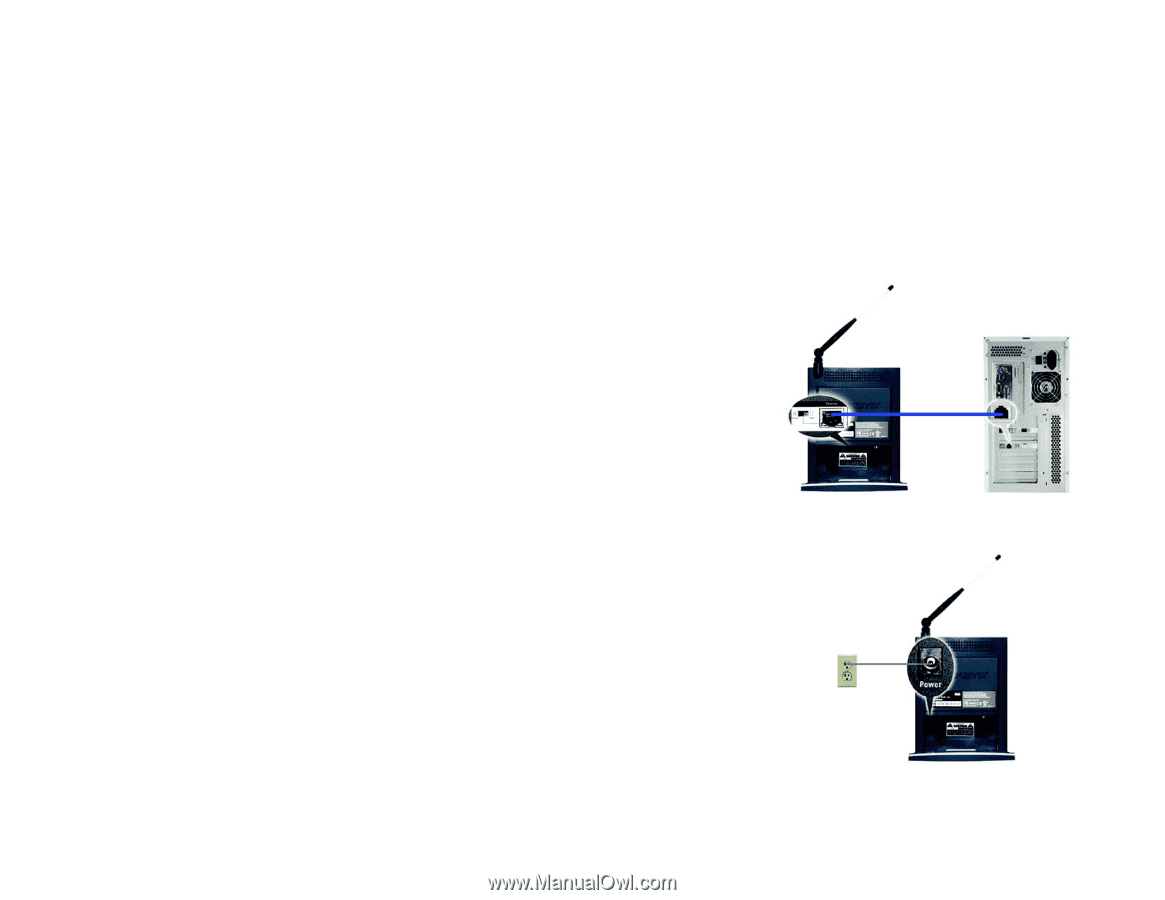
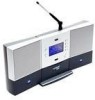
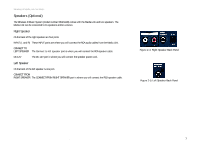
Wireless-B Media Link for Music Chapter 3: Connecting the Wireless-B Media Link for Music to Your Network for Setup Overview This chapter will explain how to connect the Media Link to your wired computer or network for setup. If you want to set up the Media Link using its front panel LCD screen (without using your computer), then proceed to "Chapter 5: Connecting the Wireless-B Media Link for Music to Your Audio System." Connection to a Wired Network for Setup 1. Connect the included Ethernet network cable to an Ethernet (LAN) port on your PC, router, or switch. 2. Connect the other end of the cable to the Ethernet port on the Media Link's back panel. 3. If you have connected the Media Link to your PC, then move the Media Link's crossover (X-II) switch to the Crossover (X) position. If you have connected the Media LInk to your router or switch, then move the crossover (X-II) switch to the Parallel (II) position. 4. Plug the power adapter into the Media Link's Power port, and plug the other end into an electrical outlet. 5. The Media Link will automatically power on, and the green LED adjacent to the Ethernet port will light up. Figure 3-1: Connect the Ethernet Network Cable Chapter 3: Connecting the Wireless-B Media Link for Music to Your Network for Setup Overview Figure 3-2: Connect the Media Link's Power 8
-
 1
1 -
2
-
3
-
4
-
5
-
6
-
7
-
8
-
9
-
 10
10 -
 11
11 -
 12
12 -
 13
13 -
 14
14 -
 15
15 -
 16
16 -
 17
17 -
 18
18 -
 19
19 -
 20
20 -
21
-
22
-
23
-
24
-
25
-
26
-
27
-
28
-
29
-
30
-
31
-
32
-
33
-
34
-
35
-
36
-
37
-
38
-
39
-
40
-
41
-
42
-
43
-
44
-
45
-
46
-
47
-
48
-
49
-
50
-
51
-
52
-
53
-
54
-
55
-
56
-
57
-
58
-
59
-
60
-
61
-
62
-
63
-
64
-
65
-
66
-
67
-
68
 |
 |