Linksys WMLS11B User Guide - Page 29
Using the LCD Menus to Set up the Media Link, Change to wired, Device Name
 |
UPC - 745883559282
View all Linksys WMLS11B manuals
Add to My Manuals
Save this manual to your list of manuals |
Page 29 highlights
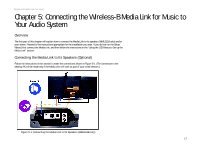
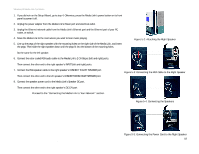
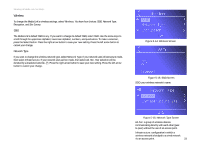
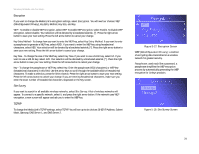
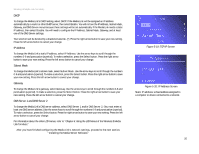
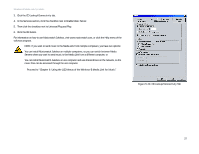
Wireless-B Media Link for Music Using the LCD Menus to Set up the Media Link Before setting up the Media Link, decide whether the Media Link will be connected to your wireless or wired network AFTER you have configured it. For more information, refer to "Appendix C: Planning Your Use of the Wireless-B Media Link for Music." To navigate the menus of the LCD screen, use the directional arrows on the remote or the Media Link's front panel. Press the Select or right arrow button to make a selection. Press the right arrow button to save any changes. Press the left arrow button to cancel any selection or changes. Press the Menu button to access the main menu at any time. To set up the Media Link directly from the front panel, follow these instructions: 1. On the LCD screen, select Network Setup. 2. You will see these choices: Change to wired (network), Device Name, Wireless (settings), TCP/IP (settings), and Proxy (settings). Depending on the configuration of your network, follow the instructions in the appropriate section. NOTE: Every time you want to save a new setting, you must press the right arrow button on the remote or front panel. Then the Media Link will save the setting and restart itself. Change to wired If you want to use the Media Link as part of your wired network, select Change to wired. When asked if you are sure, select Yes to continue, or select No to cancel the setup. Press the right arrow button to save your new setting. Press the left arrow button to cancel your change. Device Name If you want to change the Media Link's Device Name, select Device Name. Use the arrow keys to scroll through the uppercase alphabet, lowercase alphabet, numbers, and punctuation. To make a selection, press the Select button. Press the right arrow button to save your new setting. Press the left arrow button to cancel your change. Chapter 5: Connecting the Wireless-B Media Link for Music to Your Audio System Using the LCD Menus to Set up the Media Link Figure 5-12: Main Menu Screen Figure 5-13: Network Setup Screen 22
-
 1
1 -
2
-
3
-
4
-
5
-
6
-
7
-
8
-
9
-
10
-
11
-
12
-
13
-
14
-
15
-
16
-
17
-
18
-
19
-
20
-
21
-
22
-
23
-
 24
24 -
 25
25 -
 26
26 -
 27
27 -
 28
28 -
 29
29 -
 30
30 -
 31
31 -
 32
32 -
 33
33 -
 34
34 -
35
-
36
-
37
-
38
-
39
-
40
-
41
-
42
-
43
-
44
-
45
-
46
-
47
-
48
-
49
-
50
-
51
-
52
-
53
-
54
-
55
-
56
-
57
-
58
-
59
-
60
-
61
-
62
-
63
-
64
-
65
-
66
-
67
-
68
 |
 |