Netgear WGX102 WGX102v2 Reference Manual - Page 40
Configuring the Powerline Network Password, Wall Plug, Settings
 |
View all Netgear WGX102 manuals
Add to My Manuals
Save this manual to your list of manuals |
Page 40 highlights
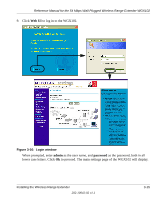
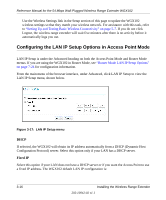
Reference Manual for the 54 Mbps Wall-Plugged Wireless Range Extender WGX102 • Because the data is always encrypted, the password allows you to protect your network from unauthorized access via the powerline network. • The password is case sensitive. • The password defines a network. That is, if there are four powerline devices in use in a home and two have the password upstairs, and two have the password downstairs, the "upstairs" powerline devices will communicate with one another but will not communicate with the "downstairs" devices and the "downstairs" devices will communicate with one another but not with the "upstairs" devices. - In order for powerline devices to communicate on the same network, every device in the powerline network must have the same password. - Powerline devices on different networks will not be able to communicate. Note: Once you begin to change the password for each device, portions of your network may become disabled until all of the devices have been set with the new password. Configuring the Powerline Network Password You can change either a single or all powerline devices on the network at the same time. You assign a Network Password using the WGX102 Wall Plug Settings screen. 1. From the main menu of the browser interface, under the Setup section, click Wall Plug Settings to display the Wall Plug Settings screen. Figure 4-2: Wall Plug Settings screen 4-2 Powerline Network Configuration and Security 202-10042-02 v1.1
-
 1
1 -
2
-
3
-
4
-
5
-
6
-
7
-
8
-
9
-
10
-
11
-
12
-
13
-
14
-
15
-
16
-
17
-
18
-
19
-
20
-
21
-
22
-
23
-
24
-
25
-
26
-
27
-
28
-
29
-
30
-
31
-
32
-
33
-
34
-
 35
35 -
 36
36 -
 37
37 -
 38
38 -
 39
39 -
 40
40 -
 41
41 -
 42
42 -
 43
43 -
 44
44 -
 45
45 -
46
-
47
-
48
-
49
-
50
-
51
-
52
-
53
-
54
-
55
-
56
-
57
-
58
-
59
-
60
-
61
-
62
-
63
-
64
-
65
-
66
-
67
-
68
-
69
-
70
-
71
-
72
-
73
-
74
-
75
-
76
-
77
-
78
-
79
-
80
-
81
-
82
-
83
-
84
-
85
-
86
-
87
-
88
-
89
-
90
-
91
-
92
-
93
-
94
-
95
-
96
-
97
-
98
-
99
-
100
-
101
-
102
-
103
-
104
-
105
-
106
-
107
-
108
-
109
-
110
-
111
-
112
-
113
-
114
-
115
-
116
-
117
-
118
-
119
-
120
-
121
-
122
-
123
-
124
-
125
-
126
-
127
-
128
-
129
-
130
-
131
-
132
-
133
-
134
-
135
-
136
-
137
-
138
-
139
-
140
-
141
-
142
-
143
-
144
-
145
-
146
-
147
-
148
-
149
-
150
-
151
-
152
-
153
-
154
-
155
-
156
-
157
-
158
-
159
-
160
-
161
-
162
-
163
-
164
-
165
-
166
-
167
-
168
-
169
 |
 |
