Philips DVDR985A User manual - Page 46
Record Settings, Markers
 |
UPC - 037849922774
View all Philips DVDR985A manuals
Add to My Manuals
Save this manual to your list of manuals |
Page 46 highlights
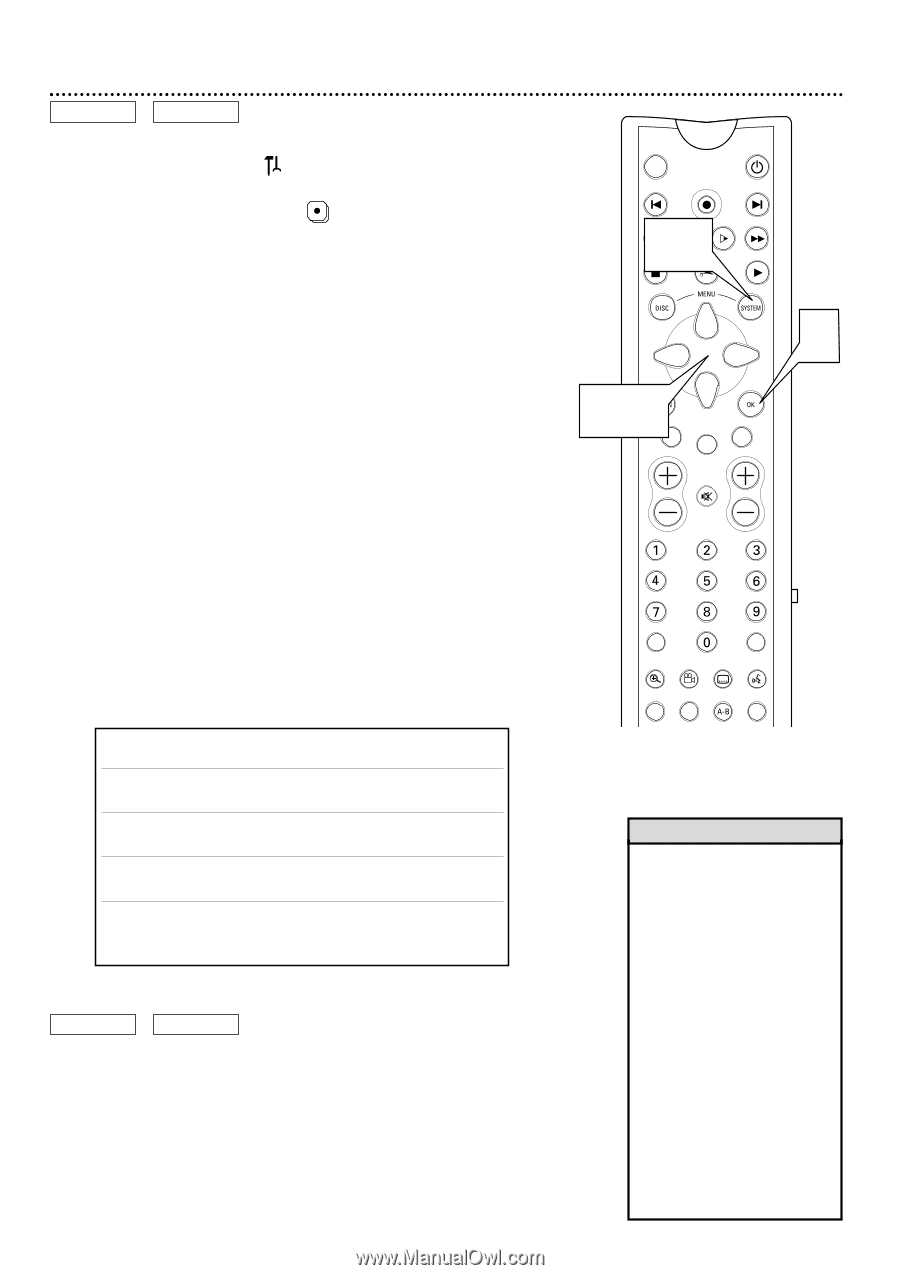
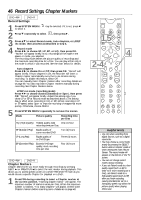
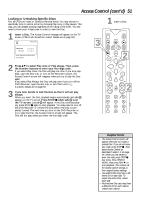
46 Record Settings, Chapter Markers DVD+RW DVD+R Record Settings 1 Press SYSTEM MENU. to select it. may be selected. If it is not, press ; 2 Press 9 repeatedly to select , then press :. 3 Press 89 to select Record mode, Auto chapters, or LP/EP rec mode, then proceed as described in step 4. 4 q Record mode Press ; : to choose SP, LP, EP, or HQ, then press OK. "Stored" will appear briefly. Now, recordings will be made in the speed, or mode, you selected. The recording mode defines the picture quality of recordings and the maximum recording time for a Disc. You can play a Disc only in the mode in which it was recorded. See the chart below for details. q Auto chapters Press ; : to choose On or Off, then press OK. "Stored" will appear briefly. If Auto chapters is On, the Recorder will insert a Chapter marker automatically every five to six minutes during recording. To disable this feature, select Off. You can manually insert Chapter markers after recording. Details are on page 48. You also may insert Chapter markers manually during recording. See Chapter Markers below. q LP/EP rec mode (recording mode) Press ; : to choose Stndrd (Standard) or Sport, then press OK. "Stored" will appear briefly. Adjust this setting only if you chose LP or EP at Record mode as described above. (The setting has no effect when recording in HQ or SP.) When recording in LP or EP speed, select Sport to improve recording of images that move quickly. Otherwise, choose Stndrd. 5 Press SYSTEM MENU repeatedly to remove the menus. Mode Picture quality Recording time per Disc HQ (High Quality) Highest quality; least One (1) hour recording time per Disc SP (Standard Play) Equals quality of a pre-recorded DVD Two (2) hours LP (Long Play) Equals quality of an S-VHS tape Three (3) hours EP (Extended Play) Exceeds VHS tape Four (4) hours quality; most recording time per Disc DVD+RW DVD+R Chapter Markers Chapter Markers let you move easily through recordings by pressing NEXT ∑ or PREVIOUS w to select the next marker during playback. This allows you to access specific points on a DVD+RW/DVD+R much as you would choose a specific Chapter for playback on a DVD. 1 Press FSS during recording to insert a Chapter marker at the current position. "Inserting chapter marker" will appear. The maximum number of markers varies per Disc. When the maximum number is reached, "Too many chapters" will appear. Delete some Chapter markers before inserting more. Details are on page 48. MONITOR ON/OFF PREVIOUS REC/OTR NEXT 1,5 REVERSE PAUSE SLOW STOP FSS FORWARD PLAY 4 2-4 CLEAR SELECT TIMER VOL CH MUTE T/C A/CH ZOOM ANGLE SUBTITLE AUDIO DIM REPEAT REPEAT SCAN Helpful Hints • Use HQ when recording from digital sources, such as a digital camcorder. • You may choose a record mode simply by pressing the SELECT button while in Monitor mode or when viewing the Index Picture Screen. The record mode will appear at the bottom of the TV screen. • You can not change record modes during recording. • If you set Record mode to a lowquality speed (such as EP in order to fit more recording on a Disc), set Record mode to a high-quality speed (such as SP) after you finish recording. Leaving the Recorder set to a low-quality speed may affect the picture quality when playing DVDs later.
-
 1
1 -
2
-
3
-
4
-
5
-
6
-
7
-
8
-
9
-
10
-
11
-
12
-
13
-
14
-
15
-
16
-
17
-
18
-
19
-
20
-
21
-
22
-
23
-
24
-
25
-
26
-
27
-
28
-
29
-
30
-
31
-
32
-
33
-
34
-
35
-
36
-
37
-
38
-
39
-
40
-
 41
41 -
 42
42 -
 43
43 -
 44
44 -
 45
45 -
 46
46 -
 47
47 -
 48
48 -
 49
49 -
 50
50 -
 51
51 -
52
-
53
-
54
-
55
-
56
-
57
-
58
-
59
-
60
-
61
-
62
-
63
-
64
-
65
-
66
-
67
-
68
 |
 |