Pioneer AVHP7800DVD Owner's Manual
Pioneer AVHP7800DVD - DVD Player / LCD Monitor Manual
 |
UPC - 012562799179
View all Pioneer AVHP7800DVD manuals
Add to My Manuals
Save this manual to your list of manuals |
Pioneer AVHP7800DVD manual content summary:
- Pioneer AVHP7800DVD | Owner's Manual - Page 1
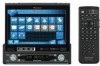
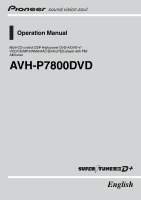
Operation Manual Multi-CD control DSP High power DVD-A/DVD-V/ VCD/CD/MP3/WMA/AAC/DivX/JPEG player with FM/ AM tuner AVH-P7800DVD English - Pioneer AVHP7800DVD | Owner's Manual - Page 2
for buying this Pioneer product. Please read through these operating instructions so you will know how to operate your model properly. After you have finished reading the instructions, keep this manual in a safe place for future reference. Be sure to read this ! Playable discs 9 ! DVD video disc - Pioneer AVHP7800DVD | Owner's Manual - Page 3
41 Introduction of advanced Video CD operation 42 Repeating play 42 Selecting audio output 42 Playing CDs part you want to play 50 Changing audio language during playback (Multi-audio) 51 Changing the subtitle language during playback (Multi-subtitle) 51 Introduction of advanced built-in DVD player - Pioneer AVHP7800DVD | Owner's Manual - Page 4
display and preset list display 67 Storing and recalling broadcast stations 68 Using the MyMix function 68 Using the Game Alert function 70 Displaying the Radio ID 71 Bluetooth Audio Listening to songs on BT Audio (Bluetooth audio player) 72 Function operation 73 Connecting a Bluetooth audio player - Pioneer AVHP7800DVD | Owner's Manual - Page 5
Contents Introduction of advanced DVD player operation 88 Repeating play 88 Playing tracks in random order 88 Scanning tracks of a CD/MP3/WMA 88 Selecting audio output 89 Audio Adjustments Introduction to built-in DSP features 90 Introduction of audio adjustments 92 Using balance adjustment 92 - Pioneer AVHP7800DVD | Owner's Manual - Page 6
Selecting the background display 121 Adjusting the response positions of the touch panels (Touch Panel Calibration) 121 Using the AUX source 122 Using the PGM button 122 Additional Information Troubleshooting 124 Error messages 126 Understanding auto TA and EQ error messages 127 DVD player and care - Pioneer AVHP7800DVD | Owner's Manual - Page 7
SIDE OF THE PARKING BRAKE SWITCH. IMPROPER CONNECTION OR USE OF THIS LEAD MAY VIOLATE APPLICABLE LAW AND MAY RESULT IN SERIOUS INJURY OR DAMAGE. ! To avoid the risk of damage and injury and the potential violation of applicable laws, this unit is not for use with a video screen that is visible - Pioneer AVHP7800DVD | Owner's Manual - Page 8
the front display. To watch a DVD, Video CD or TV on the front display, park your vehicle in a safe place and apply the parking brake. Parking brake interlock Certain functions (DVD/TV viewing and certain touch panel keys) offered by this unit could be dangerous and/or unlawful if used while driving - Pioneer AVHP7800DVD | Owner's Manual - Page 9
on this unit are allocated for use in North America. Use in other areas may result in poor reception. WARNING Handling the cord on this product or cords associated with accessories sold with the product may expose you to chemicals listed on proposition 65 known to the State of California and other - Pioneer AVHP7800DVD | Owner's Manual - Page 10
Section 02 Before You Start DVD audio DVD video region number of the player can be found on the bottom of this unit. The illustration below shows the regions and corresponding region numbers. Video CD CD About this manual This unit features a number of sophisticated functions ensuring superior - Pioneer AVHP7800DVD | Owner's Manual - Page 11
owner's manuals, order product catalogues, research new products, and much more. Features Touch panel key operation It is possible to operate this unit by using touch panel key. DVD audio playback It is possible to play back DVD audio. DVD video playback It is possible to play back DVD video - Pioneer AVHP7800DVD | Owner's Manual - Page 12
hands-free phoning with Bluetooth wireless technology. Bluetooth audio player compatibility Using Bluetooth adapter (e.g. CD-BTB100), you can control Bluetooth audio player featuring Bluetooth wireless technology. iPod® compatibility When you use this unit with a Pioneer iPod adapter (CD-IB100II - Pioneer AVHP7800DVD | Owner's Manual - Page 13
and other rights owners. Use of this copyright protection Player used to encode WMA files, album names and other text information may not be correctly displayed. About DivX DivX is a compressed digital video format created by the DivX® video codec from DivX, Inc. This unit can play DivX video - Pioneer AVHP7800DVD | Owner's Manual - Page 14
or nearest authorized Pioneer service station regarding the satellite radio tuner that can be connected to this unit. For satellite radio tuner operation, please refer to the satellite radio tuner owner's manual. Notes ! The system will use direct satellite-to-receiver broadcasting technology to - Pioneer AVHP7800DVD | Owner's Manual - Page 15
marks on DVDs indicate The marks below may be found on DVD disc labels and packages. They indicate the type of images and audio recorded on the disc, and the functions you can use. Mark : ! Prior to using this unit for the first time after installation ! If the unit fails to operate properly En 15 - Pioneer AVHP7800DVD | Owner's Manual - Page 16
when the car engine is turned off, it may drain battery power. Important The red lead (ACC) of this unit should be connected store the battery with metallic materi- als. ! In the event of battery leakage, wipe the re- mote control completely clean and install a new battery. ! When disposing of used - Pioneer AVHP7800DVD | Owner's Manual - Page 17
e dc b a9 8 Head unit 1 DISPLAY button Press to turn the information display on or off when the video is displayed. 2 MEMO button Press and hold to store the information of the song you are listening to. Press to switch to a station broadcasting the memorized song. ! You can use this button only - Pioneer AVHP7800DVD | Owner's Manual - Page 18
. c REAR ON button Press to switch between the video sources (such as DVD or AV) on rear display. d 2ch/MULTI-CH button Press to switch between the output. Press and hold to switch between the displays on the sub-display. e SOURCE button, VOLUME This unit is turned on by selecting a source. Press - Pioneer AVHP7800DVD | Owner's Manual - Page 19
g What's What Section 03 Remote control Button names AVH mode DVD mode with remote control code AVH 1 Remote control selection switch Switch to change the AUDIO button Press to change the audio language during DVD playback. 5 SUBTITLE button Press to change the subtitle language during DVD - Pioneer AVHP7800DVD | Owner's Manual - Page 20
channel select. Not used. 13 REAR SOURCE button Press to switch between the video sources (such as DVD or AV) on rear display. 14 DISPLAY button Press to turn the information display on or off when the video is displayed. 15 EJECT button Press to eject a disc from this unit. Press and hold - Pioneer AVHP7800DVD | Owner's Manual - Page 21
TOP MENU button Press to display the DVD menu during DVD playback. Press to return to the top menu during DVD playback. Using the remote control operation mode switch There are three remote control operation modes on the remote control. AVH mode operation When operating this unit by remote control - Pioneer AVHP7800DVD | Owner's Manual - Page 22
0-10. (Refer to Watching a Video CD on page 40.) TV mode operation TV operations available with a Pioneer TV tuner (e.g. GEX-P5700TV) can be controled with AVH mode. TV mode is not used with this unit. ! For details concerning operation, refer to the TV tuner's operation manuals. % When you want to - Pioneer AVHP7800DVD | Owner's Manual - Page 23
- BT telephone ! BT AUDIO - Bluetooth audio player ! OFF - Turn the unit off # When the source icon is not displayed, you can display it by touching the screen. # While operating the menu, you cannot select a source by touching the source icon. # To close source select menu, touch ESC. % When using - Pioneer AVHP7800DVD | Owner's Manual - Page 24
(built-in DVD player) on both the front and the rear display, audio is not outputted from REAR DISPLAY OUT. # When selecting FRONT in REAR MODE, you can select F. SOURCE only. And audio is not outputted from REAR DISPLAY OUT. (Refer to Setting the video of rear display on page 111.) Using the rear - Pioneer AVHP7800DVD | Owner's Manual - Page 25
key Touch to select various DVD setup functions. ! DVD SETUP appears on the display only when DVD is played back on this unit. 5 ESC key Touch to cancel the control mode of functions. 6 BACK key Touch to return to the previous display. 1 Touch AV MENU to display AUDIO MENU. AUDIO MENU appears on the - Pioneer AVHP7800DVD | Owner's Manual - Page 26
AVH to operate the menu by using the joystick on the remote control. (Refer to page 21.) 1 Click the joystick during display of each source to display AUDIO MENU. AUDIO MENU appears on the display. 2 Move the joystick left or right to display and fingers clear of the unit when opening, closing, or - Pioneer AVHP7800DVD | Owner's Manual - Page 27
to an easily viewable angle. The LCD panel angle continues changing as long as you touch TILT ( / ) and hold. Protecting your unit from theft The front panel can be detached from the head unit and stored in the provided protective case to prevent theft. ! If the front panel is not detached from the - Pioneer AVHP7800DVD | Owner's Manual - Page 28
to select the built-in DVD player (refer to page 23). # If you are playing a DVD or Video CD, a menu may appear. Refer to Operating the DVD menu on page 34 and PBC playback on page 40. # When the automatic playback function is on, this unit will cancel the DVD menu and automatically start playback - Pioneer AVHP7800DVD | Owner's Manual - Page 29
. ! You may find with some DVD or video CD discs that some playback controls do not work in certain parts of the disc. This is not Audio data (CD-DA) - Compressed audio (MP3/WMA/AAC) files - DivX video files - JPEG picture files ! In case of DVD-R/RW/ROM, this unit does not allow playback of audio - Pioneer AVHP7800DVD | Owner's Manual - Page 30
until the desired band is displayed, BAND 1, BAND 2 or BAND 3. 3 To perform manual tuning, briefly touch c or d. displayed, you can display them by touching LIST. Notes ! Up to 18 FM stations, six for each of the three FM bands, and six AM stations can be stored in memory. ! You can also use - Pioneer AVHP7800DVD | Owner's Manual - Page 31
display. # To return to the previous display, touch BACK. Storing the strongest broadcast frequencies BSM (best stations memory) lets you automatically store , touch BSM again. Note Storing broadcast frequencies with BSM may replace broadcast frequencies you have saved using P1-P6. Tuning in strong - Pioneer AVHP7800DVD | Owner's Manual - Page 32
1 Touch the source icon and then touch DVD to select the DVD player. # If no disc is loaded in the unit, you cannot select DVD (DVD player). Insert a disc in the unit. (Refer to page 28.) # With some discs, a menu may be displayed. (Refer to Operating the DVD menu on page 34.) 2 Touch the screen - Pioneer AVHP7800DVD | Owner's Manual - Page 33
by touching INFO. ! If you do not use the touch panel keys within 30 seconds, they will be hidden automatically. Listening to a DVD audio 123 4 5 76 These are the basic steps necessary to play a DVD audio with your DVD player. More advanced DVD audio operation is explained starting on page 38 - Pioneer AVHP7800DVD | Owner's Manual - Page 34
instructions provided with the disc. Using DVD menu direct touch control This function allows you to operate the DVD DVD, the joystick on the remote control can also operate the DVD menu. (Refer to page 21.) # You cannot operate the DVD menu from the joystick on the head unit. # The way to display - Pioneer AVHP7800DVD | Owner's Manual - Page 35
on the disc during DVD audio playback. ! You DVD, the joystick on the remote control can also browse still pictures. (Refer to page 21.) # You cannot browse still pictures from the joystick on the head unit playback (Bookmark) When playing DVD video discs, you can use this function. The Bookmark - Pioneer AVHP7800DVD | Owner's Manual - Page 36
motion playback is not possible. Searching for the part you want to play You can use the search function to find the part you want to play. For DVD video, you can select TITLE (title), CHAPT (chapter), TIME (time) or 10KEY (numeric keypad). For DVD audio, you can select GROUP (group), TRACK (track - Pioneer AVHP7800DVD | Owner's Manual - Page 37
the angle icon is displayed. Turn angle icon display on or off using DVD SETUP MENU. For details, refer to Setting the angle icon display on page 113. playback. Automatic playback of DVDs When a DVD disc with DVD menu is inserted, this unit will cancel the DVD menu automatically and start playback - Pioneer AVHP7800DVD | Owner's Manual - Page 38
. During DVD video playback ! DISC - Play through the current disc ! TITLE - Repeat just the current title ! CHAPTER - Repeat just the current chapter During DVD audio playback ! DISC - Play through the current disc ! GROUP - Repeat just the current group Playing tracks in random order Random - Pioneer AVHP7800DVD | Owner's Manual - Page 39
Playing DVD discs Selecting audio output When playing DVD video discs recorded with LPCM audio, you can switch the audio output. ! This function is not possible when disc playback has been stopped. % Touch L/R SELECT on the function menu to select the audio output. Touch L/R SELECT repeatedly until - Pioneer AVHP7800DVD | Owner's Manual - Page 40
Shows the selected repeat range. 1 Touch the source icon and then touch DVD to select the DVD player. # If no disc is loaded in the unit, you cannot select DVD (DVD player). Insert a disc in the unit. (Refer to page 28.) # With a Video CD featuring the PBC (playback control) function, a menu is - Pioneer AVHP7800DVD | Owner's Manual - Page 41
! You can display the menu by touching during PBC playback. For details, refer to the instructions provided with the disc. ! PBC playback of Video-CD cannot be cancelled. ! During playback of Video CDs featuring PBC (Playback Control), PBC:ON, search and time search functions cannot be used nor can - Pioneer AVHP7800DVD | Owner's Manual - Page 42
. Touch L/R SELECT repeatedly until the desired audio output appears in the display. ! L+R - left and right ! LEFT - left ! RIGHT - right ! MIX - mixing left and right Repeating play There are two repeat play ranges for the Video CD playback: TRACK (track repeat) and DISC (disc repeat). ! During - Pioneer AVHP7800DVD | Owner's Manual - Page 43
Shows the track title list. 1 Touch the source icon and then touch DVD to select the DVD player. # If no disc is loaded in the unit, you cannot select DVD (DVD player). Insert a disc in the unit. (Refer to page 28.) 2 To skip back or forward to another track, touch o or p. Touching p skips to - Pioneer AVHP7800DVD | Owner's Manual - Page 44
(disc repeat). % Touch REPEAT on the function menu to select the repeat range. Touch REPEAT repeatedly until the desired repeat range appears in the display. ! DISC - Repeat the current disc ! TRACK - Repeat just the current track Note If you perform track search or fast forward/reverse, the repeat - Pioneer AVHP7800DVD | Owner's Manual - Page 45
been selected. 2 ROM-Audio indicator Shows when a compressed audio (MP3/ WMA/AAC) DVD to select the DVD player. # If no disc is loaded in the unit, you cannot select DVD (DVD player). Insert a disc in the unit displayed if fast forward or reverse operations are used. ! There is no sound on fast - Pioneer AVHP7800DVD | Owner's Manual - Page 46
)-Track (track title)-Artist (artist name) # If specific information has not been recorded on an MP3/WMA/AAC disc, no xxxx will be displayed (e.g., no artist). # Depending on the version of Windows Media Player used to encode WMA files, album names and other text information may not be correctly - Pioneer AVHP7800DVD | Owner's Manual - Page 47
09 Playing MP3/WMA/AAC files Introduction of advanced built-in DVD player (MP3/ WMA/AAC) operation ! If you perform track search and tracks While you are using FOLDER, the beginning of each track in the selected folder plays for about 10 seconds. When you are using DISC, the beginning of the - Pioneer AVHP7800DVD | Owner's Manual - Page 48
and file name. 1 Touch the source icon and then touch DVD to select the DVD player. # If no disc is loaded in the unit, you cannot select DVD (DVD player). Insert a disc in the unit. (Refer to page 28.) 2 Touch the screen to display the touch panel keys. 3 Touch a or b to select a folder. # You - Pioneer AVHP7800DVD | Owner's Manual - Page 49
you do not use the touch panel keys within 30 seconds, they will be hidden automatically. Viewing a JPEG slideshow When loading a CD/CD-R/RW containing JPEG picture files, this unit automatically starts a slideshow from the first folder/picture on the disc. The player displays the pictures in each - Pioneer AVHP7800DVD | Owner's Manual - Page 50
between the lists of names. # When the list of file names is not displayed, touch LIST. 2 Touch your favorite file name (or folder name). That selection ble. Searching for the part you want to play When playing DivX video file, you can use the time search function to find the part you want to play. - Pioneer AVHP7800DVD | Owner's Manual - Page 51
by using the joystick and 0-9. 3 Touch ENTER. This starts playback from the selected part. Note Touching SUBTITLE during fast forward/fast reverse, pause or slow motion playback returns you to normal playback. Changing audio language during playback (Multi-audio) When playing a DivX video disc - Pioneer AVHP7800DVD | Owner's Manual - Page 52
10 Playing DivX/JPEG files Introduction of advanced built-in DVD player (DivX/ JPEG) operation ! FILE - Repeat just the ranges. # To turn random play off, touch RANDOM again. Repeating play For DivX video file playback, there are three repeat play ranges: FOLDER (folder repeat), FILE (file repeat - Pioneer AVHP7800DVD | Owner's Manual - Page 53
. Notes ! When the multi-CD player performs the preparatory operations, READY is displayed. ! If an error message such as ERROR-02 is displayed, refer to the multi-CD player owner's manual. ! If there are no discs in the multi-CD player magazine, NO DISC is displayed. Pausing CD playback Pause lets - Pioneer AVHP7800DVD | Owner's Manual - Page 54
has not been recorded on a CD TEXT disc, No XXXX will be displayed (e.g., No Name). Displaying text information on CD TEXT discs You can use these functions only with a CD TEXT compatible multi-CD player. Some discs have certain information encoded on the disc during manufacture. These discs - Pioneer AVHP7800DVD | Owner's Manual - Page 55
REPEAT repeatedly until the desired repeat range appears in the display. ! MULTI-CD - Repeat all discs in the multiCD player ! TRACK - Repeat just the current track ! DISC - Repeat the current disc Scanning CDs and tracks While you are using DISC, the beginning of each track on the selected disc - Pioneer AVHP7800DVD | Owner's Manual - Page 56
# If the multi-CD player does not support COMP/DBE, NO COMP is displayed and COMPRESSION cannot be operated. Using ITS playlists ITS (instant track (with the disc titles). (With multi-CD players sold before the CDX-P1250 and CDX-P650, up to 24 tracks can be stored in the playlist.) 1 Play a CD that - Pioneer AVHP7800DVD | Owner's Manual - Page 57
playlist begins. # If there are no tracks from your playlist in the current range, ITS EMPTY is displayed and normal play resumes. Erasing a CD from your ITS playlist You can delete all tracks of a CD playing CD are erased from your playlist and CLEAR is displayed. Section 11 En 57 Multi-CD Player - Pioneer AVHP7800DVD | Owner's Manual - Page 58
to songs on your iPod 1 2 3 45 6 87 You can use this unit to control an iPod adapter, which is sold separately. 1 Source to the operation of the iPod as possible for easy operation and song search. 1 Touch TOP to display the top menu. 2 Touch one of the categories in which you want to search for a - Pioneer AVHP7800DVD | Owner's Manual - Page 59
settings: Song Title (song title)-Artist (artist name)- Album (album title) # If the characters recorded on the iPod are not compatible with this unit, those characters will not be displayed. Displaying information on song Song title, artist name, album title of the currently playing song can be - Pioneer AVHP7800DVD | Owner's Manual - Page 60
use this unit to control an XM satellite digital tuner (GEX-P920XM), which is sold separately. For details concerning operation, refer to the XM tuner's operation manuals information or preset list display Shows the detail information of the broadcast channel currently being received or the preset - Pioneer AVHP7800DVD | Owner's Manual - Page 61
stations, six for each of three XM bands can be stored in memory. ! You can also use a and b to recall stations assigned to preset tuning keys in the selected channel category. Selecting a channel from the XM channel list display The list content can be switched so you can search for the track you - Pioneer AVHP7800DVD | Owner's Manual - Page 62
channel list appears in the display. Each touch of changes the its artist name is memorized to this unit. The MyMix function will start on title or the artist name when is displayed on the title information. # You possible that the memorized title is not displayed correctly. 2 Touch OK to confirm. - Pioneer AVHP7800DVD | Owner's Manual - Page 63
can set up an alert on or off by each song in the MyMix playlist. First, display the MyMix playlist and then change each alert setting. Set up an alert to on so you can receive the alert when the song is broadcast, or set it up to off to stop the - Pioneer AVHP7800DVD | Owner's Manual - Page 64
use this unit to control a XM satellite digital tuner (GEX-P910XM), which is sold separately. For details concerning operation, refer to the XM tuner's operation manuals to select a XM band. Touch BAND repeatedly until the desired XM band is displayed, XM 1, XM 2 or XM 3. 3 Touch c or d to select - Pioneer AVHP7800DVD | Owner's Manual - Page 65
a channel directly Refer to Selecting a channel directly on page 62. Displaying the Radio ID Refer to Displaying the Radio ID on page 63. Notes ! Up to 18 stations, six for each of three XM bands can be stored in memory. ! You can also use a and b to recall stations assigned to preset tuning keys - Pioneer AVHP7800DVD | Owner's Manual - Page 66
used together with this unit, some operations differ slightly from those described in the SIRIUS operation manual. This manual provides information on these points. For all other information on using list display Shows the detail information of the broadcast channel currently being received or - Pioneer AVHP7800DVD | Owner's Manual - Page 67
-Song/program title- Composer-Channel number-Channel name -Channel Category Switching between the detail information display and preset list display Only when SIR-PNR2/SIR-PNR2C is connected to this unit, you can operate this function. You can switch the left side of the basic screen according - Pioneer AVHP7800DVD | Owner's Manual - Page 68
three SIRIUS bands can be stored in memory. Using the MyMix function Only when SIR-PNR2/SIR-PNR2C is connected to this unit, you can operate this be memorized. When you try to save more than 10 tracks, FULL is displayed and that song being broadcast cannot be saved. # You cannot memorize the - Pioneer AVHP7800DVD | Owner's Manual - Page 69
MyMix function on or off You can turn the MyMix function off and stop this unit to alert you for all the songs in the MyMix playlist. To restart, the MyMix playlist. First, display the MyMix playlist and then change each alert setting. Set up an alert to on so you can receive the alert when the song - Pioneer AVHP7800DVD | Owner's Manual - Page 70
this unit, you can operate this function. This unit can alert you when games involving your favorite teams are about to start. To use this function the selected category are switched in the display. 4 Touch ON/OFF to store the selected team in memory. ON is displayed with the selected team, and the - Pioneer AVHP7800DVD | Owner's Manual - Page 71
the Radio ID If you select CH000, the ID code is displayed. % Touch c or d to select CH 000. Note To select CH000, set the channel select setting to ChNumber. About the channel select setting, refer to Selecting - Pioneer AVHP7800DVD | Owner's Manual - Page 72
player using this unit vary in great range. Please refer to the instruction manual that came with your Bluetooth audio player as well as this manual while operating your player on this unit. ! Information about songs (e.g. the elapsed playing time, song title, song index, etc.) cannot be displayed - Pioneer AVHP7800DVD | Owner's Manual - Page 73
right. 5 To stop playback, touch g. Note Depending on the Bluetooth audio player you connected to this unit, operations on this unit to control the player may differ from those explained in this manual. Function operation 1 1 Function display Shows the function names. 1 Touch AV MENU and then touch - Pioneer AVHP7800DVD | Owner's Manual - Page 74
Bluetooth Audio Note Before you can use audio players you may need to enter the PIN code into this unit. If your player requires a PIN code to establish a connection, look for the code on the player or in its accompanying documentation. Enter the PIN code referring to Entering PIN code for Bluetooth - Pioneer AVHP7800DVD | Owner's Manual - Page 75
Bluetooth adapter's operation manual. Important Since this unit is on standby to connect with your cellular phones via Bluetooth wireless technology, using this unit ! If the battery strength is not available, nothing is displayed in the battery strength indicator area. 8 Signal level indicator - Pioneer AVHP7800DVD | Owner's Manual - Page 76
will need to set up the unit for use with your cellular phone. This entails establishing a Bluetooth wireless connection between this unit and your phone, registering your phone with this unit, and adjusting the volume level. 1 Connection For detailed instructions on connecting your phone to this - Pioneer AVHP7800DVD | Owner's Manual - Page 77
1 Touch PHONE CONNECT on the function menu. 2 Touch SEARCH to search for available cellular phones. While searching, SEARCHING flashes. When available cellular phones featuring Bluetooth wireless technology are found, device names or Name Not Found (if names cannot be obtained) are displayed. En 77 - Pioneer AVHP7800DVD | Owner's Manual - Page 78
name (Pioneer BT unit) and enter the link code on your cellular phone. If the connection is established, CONNECTED is displayed. # The link code is set to 0000 as default. You can change this code in the initial setting. Refer to Entering PIN code for Bluetooth wireless connection on page 118. Using - Pioneer AVHP7800DVD | Owner's Manual - Page 79
phone to perform phone book transfer. Perform phone book transfer using the cellular phone. For detailed instruction on this, refer to the instruction manual that came with your cellular phone. # The display indicates how many entries have been transferred and the total number to be transferred - Pioneer AVHP7800DVD | Owner's Manual - Page 80
Bluetooth Telephone Calling a number in the Phone Book Important You are required to park your vehicle and set the parking brake in order to perform this operation. After finding the number in the Phone Book you want to call, you can select the entry and make the call. 1 Touch PHONEBOOK to display - Pioneer AVHP7800DVD | Owner's Manual - Page 81
You are required to park your vehicle and set the parking brake in order to perform this operation. The 12 most recent calls made (dialed), received and missed are stored in the Call History. You can browse the Call History and call numbers from it. 1 Touch LOG to display the Call History. Touching - Pioneer AVHP7800DVD | Owner's Manual - Page 82
17 Bluetooth Telephone Using preset numbers Important You are required to park your vehicle and set the parking brake in phone number. # If you want to store the entered phone number to preset assignment, touch SET here. The display returns to the normal display and the phone number you entered is - Pioneer AVHP7800DVD | Owner's Manual - Page 83
the automatic answer off, touch AUTO ANSWER again. Echo canceling and noise reduction % Touch ECHO CANCEL on the function menu to turn Echo Cancel function on. # To turn echo canceling off, touch ECHO CANCEL again. Displaying BD (Bluetooth Device) address % Touch DEVICE INFO on the function menu to - Pioneer AVHP7800DVD | Owner's Manual - Page 84
use this unit to control a TV tuner (e.g. GEX-P5700TV), which is sold separately. For details concerning operation, refer to the TV tuner's operation manual. This section provides information on TV operations with this unit tuned. 6 Preset list display Shows the preset list. 1 Touch the source icon - Pioneer AVHP7800DVD | Owner's Manual - Page 85
NEXT. # When P01-P06 and P07-P12 are not displayed, you can display them by touching LIST. Storing the strongest broadcast stations sequentially Notes ! Up to 24 stations, 12 for each of two TV bands, can be stored in memory. ! You can also use a and b to recall stations assigned to preset tuning - Pioneer AVHP7800DVD | Owner's Manual - Page 86
this unit which differs from that described in the DVD player's or multi-DVD player's operation manual. ! When operating DVD player/multi-DVD player by using the touch panel keys, refer to built-in DVD player operation. - When using a DVD player or multi-DVD player, you cannot operate the DVD menu - Pioneer AVHP7800DVD | Owner's Manual - Page 87
on the remote control when the remote control operation mode is switched to DVD. Note If you do not use the touch panel keys within 30 seconds, they will be hidden automatically when playing DVD video or video CD. Turning the DVD player on or off ! Only the remote control can operate this function - Pioneer AVHP7800DVD | Owner's Manual - Page 88
DVD Player Introduction of advanced DVD player operation 1 1 Function display Shows the function names. 1 Touch AV MENU and then touch FUNCTION to display the function names. The function names are displayed and operable ones are highlighted. 2 Touch ESC to return to the playback display video CD - Pioneer AVHP7800DVD | Owner's Manual - Page 89
DVD Player Selecting audio output When playing DVD video discs recorded with LPCM audio, or video CD discs, you can switch the audio output. ! This function is not possible when disc playback has been stopped. % Touch L/R SELECT on the function menu to select the audio output. Touch L/R SELECT - Pioneer AVHP7800DVD | Owner's Manual - Page 90
(PARAMETRIC EQ) can be used for multi-channel mode only. Note When selecting 2-channel mode, audio does not be output from front center and rear center speakers. Sound settings (SETTING1, SETTING2 or SETTING3) Created acoustic sound field can be stored in this unit and called up easily. Additionally - Pioneer AVHP7800DVD | Owner's Manual - Page 91
Audio Adjustments ! DVD video ! Video CD ! CD (CD-DA) ! DTS-CD ! Compressed audio (MP3/WMA/AAC) files ! DivX video files Notes ! XM tuner and SIRIUS tuner are set to the same value automatically. ! External unit 1 and external unit (SOUND SETTING) ! Using the position selector (POSITION) En 91 - Pioneer AVHP7800DVD | Owner's Manual - Page 92
range control (DYNAMIC RANGE CONTROL) ! Using the down-mix function (DOWN MIX) Introduction of audio adjustments 1 1 Audio display Shows the audio function names. 1 Touch AV MENU to display the audio function names. The audio function names are displayed and operable ones are highlighted. # When - Pioneer AVHP7800DVD | Owner's Manual - Page 93
the source volume. +14dB to -14dB is displayed as the source volume is increased or decreased. Notes ! Video CD, CD, compressed audio (MP3/WMA/ AAC) and DivX are set to the same source level adjustment volume automatically. ! DVD and the optional DVD player are set to the same source level - Pioneer AVHP7800DVD | Owner's Manual - Page 94
Audio Adjustments Listening in surround sound Using this unit, the rear speakers are set to OFF, you cannot use this function. ! Dolby Pro Logic II supports up to 48kHz sampling rate stereo source and has no -3 is displayed as the front/surround speaker balance moves from front to surrounds. 94 En - Pioneer AVHP7800DVD | Owner's Manual - Page 95
front left and right speakers over a range 10 to 0. Using the DTS Neo:6 DTS Neo:6 can generate 6.1 channel surround sound from any matrixed stereo source (such as video or TV) and from 5.1 channel sources. 1 Touch Dolby/DTS on the audio function menu to select DTS Neo:6. Refer to Recalling surround - Pioneer AVHP7800DVD | Owner's Manual - Page 96
stored in this unit according to the source you are listening to. For detailed instructions on creating the acoustic sound field, refer to Introduction of sound settings on the next page. % Touch SOUND SETTING on the audio the display. ! MCH - Multi-channel audio output ! 2CH - 2-channel audio output - Pioneer AVHP7800DVD | Owner's Manual - Page 97
Audio Adjustments 1 1 Sound setting display Shows the sound setting function names. 1 Touch AV MENU to display the audio function names. The audio function names are displayed Sound setting function display Shows the adjustment screen of the selected sound setting function. Using the position - Pioneer AVHP7800DVD | Owner's Manual - Page 98
Audio car interior acoustic characteristics as desired. There are eight stored equalizer curves which you can easily recall at any time. Here is a list of the equalizer curves: Display the sound. This is useful to check the effect is not memorized in this unit. When selecting 2-channel mode - Pioneer AVHP7800DVD | Owner's Manual - Page 99
center, and then reproducing a 5.1-ch. audio (Dolby Digital or DTS) and adjusting # You can also select the equalizer by using EQUALIZER LIST. # To close the equalizer curve unit. 4 Touch or next to SPEAKER to select the speaker to be adjusted. Touch or until the desired speaker appears in the display - Pioneer AVHP7800DVD | Owner's Manual - Page 100
can store the adjusted setting in memory by using MEMORY. For details concerning operation, refer to Storing the adjusted audio settings the desired speaker appears in the display. LEFT (left speakers)-RIGHT (right speakers) # You can mute the selected speaker units by touching . To cancel muting, - Pioneer AVHP7800DVD | Owner's Manual - Page 101
bass content, or if no subwoofer is installed. 1 Recall the speaker setting you want Storing the adjusted audio settings in memory on page 106. Using the cut-off frequency You can adjust the cut-off frequency and slope to match the characteristics of each speaker unit. And then you can store - Pioneer AVHP7800DVD | Owner's Manual - Page 102
Audio only when the adjusted cut-off frequency setting is not memorized in this unit. # You cannot select AUTO when NETWORK has been selected. (Refer to frequency, under which sounds are reproduced through the subwoofer. If the installed speakers include one whose size has been set to SMALL, you - Pioneer AVHP7800DVD | Owner's Manual - Page 103
You can mute the selected speaker unit by touching MUTE OFF. To problem, try changing the phase setting for the subwoofer. ! You can store the adjusted setting in memory by using MEMORY. For details concerning op- eration, refer to Storing the adjusted audio settings in memory on page 106. Using - Pioneer AVHP7800DVD | Owner's Manual - Page 104
store the adjusted setting in memory by using MEMORY. For details concerning operation, refer to Storing the adjusted audio settings in memory on page 106. Adjusting the speaker output levels You can adjust the speaker output level of each speaker unit are shown in the display. Front left speaker- - Pioneer AVHP7800DVD | Owner's Manual - Page 105
level. -24dB to +10dB is displayed as the level is increased or decreased. # You cannot select speakers whose size is set at OFF. Notes ! You can store the adjusted setting in memory by using MEMORY. For details concerning operation, refer to Storing the adjusted audio settings in memory on the - Pioneer AVHP7800DVD | Owner's Manual - Page 106
Section 20 Audio Adjustments Storing the adjusted audio settings in memory You can store the adjusted audio settings in this unit for later recall. 1 Touch MEMORY. 2 Touch any of CUSTOM1, CUSTOM2 or CUSTOM3 to store the adjusted setting. 3 Touch YES to store the current setting into the selected - Pioneer AVHP7800DVD | Owner's Manual - Page 107
in incorrect measurement of the car interior acoustic characteristics. ! When front speaker is not connected, auto TA and EQ cannot be carried out. ! If a speaker size is set to OFF, audio does not output from the speaker even when the speaker is installed. ! When this unit is connected to a power - Pioneer AVHP7800DVD | Owner's Manual - Page 108
Section 20 Audio Adjustments 3 Turn the ignition switch to ON or ACC. If the car's air conditioner or heater is turned on, turn it off. Noise from the fan in the air conditioner or heater may prevent correct auto TA and EQ. 4 Press SOURCE to turn the source off if this unit is turned on - Pioneer AVHP7800DVD | Owner's Manual - Page 109
INPUT until the desired setting is selected. ! OFF - No video component is connected ! VIDEO - External video component (such as portable video player) Setting for rear view camera (back up camera) CAUTION Pioneer recommends the use of a camera which outputs mirror reversed images, otherwise screen - Pioneer AVHP7800DVD | Owner's Manual - Page 110
vehicle when it is in P (park) position, or when you do not wish the display to open/close automatically, you can set the automatic open function in the manual mode. % Touch AUTO FLAP on the setup menu to select the display to open/close automatically or manually. Each time you touch AUTO FLAP - Pioneer AVHP7800DVD | Owner's Manual - Page 111
When selecting FRONT and the selected source is an audio source, nothing is displayed on the rear display. ! When selecting FRONT, audio is not outputted from REAR DISPLAY OUT. % Touch REAR MODE on the setup menu to select the video on rear display. Each time you touch REAR MODE it switches between - Pioneer AVHP7800DVD | Owner's Manual - Page 112
Setting up the DVD player Introduction of DVD setup adjustments 1 You can use this menu to change audio, subtitle, parental lock and other DVD settings. ! When watching a DVD/Video CD on the rear display independently, you cannot operate this menu. 1 DVD setup menu display Shows the DVD setup menu - Pioneer AVHP7800DVD | Owner's Manual - Page 113
Setting up the DVD player Section 22 Setting up the DVD player ! You can also switch the audio language by touching AUDIO during playback. (Refer to Changing audio language during playback (Multi-audio) on page 36.) ! Even if you use AUDIO during playback to switch the audio language, this does - Pioneer AVHP7800DVD | Owner's Manual - Page 114
DVD player ! Some discs do not enable changing of the TV aspect. For details, refer to the disc's instructions. Setting the parental lock Some DVD video discs let you use disc itself. Parental lock of this unit is not possible if a parental lock the instruction manual that came with the discs. Changing - Pioneer AVHP7800DVD | Owner's Manual - Page 115
type enables you to operate the Pioneer DVD player with the supplied remote control. There are three remote codes, code type A, code type B and code type AVH. When operating a multi-DVD player (e.g. XDV-P6), select code A. When operating this unit, select code AVH. 1 Set the remote control selection - Pioneer AVHP7800DVD | Owner's Manual - Page 116
not detached from the head unit within five seconds of turning off the ignition, a warning tone will sound. You can turn off the warning tone. % Touch DETACH WARNING on the initial menu to turn warning tone on. # To turn warning tone off, touch DETACH WARNING again. Using the initial settings, you - Pioneer AVHP7800DVD | Owner's Manual - Page 117
from the equipment with mute function is received. ! Sound from this system returns to displayed and no audio adjustments are possible. ! The sound is attenuated, ATT is displayed and no audio to on. Switching the DSP setting mode This unit features two operation modes: the network mode and - Pioneer AVHP7800DVD | Owner's Manual - Page 118
the PIN code of your Bluetooth audio player. # To cancel the inputted numbers, touch C. 3 After inputting PIN code (up to 16 digits), touch ENTER. The PIN code you entered is stored in this unit. Setting the optical input When connecting a DVD player, select S-DVD. % Touch OPTICAL INPUT on the - Pioneer AVHP7800DVD | Owner's Manual - Page 119
sized picture (wide screen picture). NORMAL (normal) A 4:3 picture is displayed as it is, giving you no sense of disparity since its proportions are video source. ! When video is viewed in a wide screen mode that does not match its original aspect ratio, it may appear different. ! Remember that using - Pioneer AVHP7800DVD | Owner's Manual - Page 120
video. ! You cannot adjust HUE for DVD source. ! You cannot adjust COLOR or HUE for the audio source. 1 Press V.ADJUST to display is stored used for adjusting BRIGHTNESS and CONTRAST may differ from DIMMER slightly. 1 Press V.ADJUST to display PICTURE ADJUSTMENT. The ambient light level used - Pioneer AVHP7800DVD | Owner's Manual - Page 121
display in the background. The selected picture/movie is displayed at the background. Note In the following cases, background images from that source cannot be selected: ! When there is no disc in the unit. ! When the AV (AV input) is not set to VIDEO . ! Make sure to use the supplied pen for ad - Pioneer AVHP7800DVD | Owner's Manual - Page 122
functions for each source by using BOOKMARK on the remote control. % Press BOOKMARK to turn pause on when selecting the following sources: ! DVD - Built-in DVD player ! S-DVD - DVD player/multi-DVD player ! M-CD - Multi-CD player ! iPod - iPod ! BT AUDIO - Bluetooth Audio # To turn pause off, press - Pioneer AVHP7800DVD | Owner's Manual - Page 123
Other Functions # To cancel the storage process, press BOOKMARK again. % Press BOOKMARK and hold to turn BSSM on when selecting TV as the source. Press BOOKMARK and hold until the BSSM turns on. # To cancel the storage process, press BOOKMARK again. % Press BOOKMARK to select the desired channel - Pioneer AVHP7800DVD | Owner's Manual - Page 124
(Page 101) SMALL or LARGE whereas no cen- ter speaker is installed. There is no picture. The parking brake cord is not con- Connect a parking brake cord, and apply the nected. parking brake. The parking brake is not applied. Connect a parking brake cord, and apply the parking brake. 124 En - Pioneer AVHP7800DVD | Owner's Manual - Page 125
volume level is low. The attenuator is on. Adjust the volume level. Turn the attenuator off. There is audio and video skip- The unit is not firmly secured. ping. Secure the unit firmly. The picture is stretched, the as- The aspect setting is incorrect for Select the appropriate setting for your - Pioneer AVHP7800DVD | Owner's Manual - Page 126
suffer from horizontal stripes or other imperfections when viewed on some displays. This does not mean this unit is malfunctioning. Problems during Video CD playback Symptom Cause Action (See) The PBC (playback control) menu display cannot be called up. Repeat play and track/time search are - Pioneer AVHP7800DVD | Owner's Manual - Page 127
car interior acoustic characteristics is not possible using the auto TA and EQ, an error message may appear on the display. If an error message appears, refer to the table below to see what the problem Error. Please check noise. The surrounding noise level is too high. ! Stop your car in a place - Pioneer AVHP7800DVD | Owner's Manual - Page 128
that condensation is a problem turn off the DVD player for an hour or so to allow it to dry out and wipe any damp discs with a soft cloth to remove the moisture. ! Road shocks may interrupt disc playback. DVD discs ! With some DVD video discs, it may not be possible to use certain functions. ! It - Pioneer AVHP7800DVD | Owner's Manual - Page 129
! Read the precautions with CD-R/CD-RW discs before using them. Dual Discs ! Dual Discs are two-sided discs that have a recordable CD for audio on one side and a recordable DVD for video on the other. ! Playback of the DVD side is possible with this unit. However, since the CD side of Dual Discs is - Pioneer AVHP7800DVD | Owner's Manual - Page 130
on the original audio CD. Important ! When naming an MP3/WMA/AAC file, add the corresponding filename extension (.mp3, .wma or .m4a). ! This unit plays back files with the filename extension (.mp3, .wma or .m4a) as an MP3/ WMA/AAC file. To prevent noise and malfunctions, do not use these extensions - Pioneer AVHP7800DVD | Owner's Manual - Page 131
Additional Information Appendix Additional Information ! This unit doesn't support the following formats. - Apple Lossless .jpe). ! This unit plays back files with the filename extension (.jpg, .jpeg or .jpe) as a JPEG picture file. To prevent malfunctions, do not use these extensions for files - Pioneer AVHP7800DVD | Owner's Manual - Page 132
prevent noise and malfunctions, do not use these extensions for files other than DivX video files. Using the display correctly CAUTION ! If liquid or foreign matter should get inside this unit, turn off the power immediately and consult your dealer or the nearest authorized PIONEER Service Station - Pioneer AVHP7800DVD | Owner's Manual - Page 133
the display at low temperatures reduces the service life of the fluorescent tube.) - When the fluorescent tube reaches the end of its useful life, the screen will be dark and the image will no longer be projected. If this happens, consult your dealer or the nearest authorized PIONEER Service Station - Pioneer AVHP7800DVD | Owner's Manual - Page 134
Appendix Additional Information Language code chart for DVD Language (code), input code Japanese (ja), 1001 English (en), 0514 French (fr), 0618 Spanish (es), 0519 German (de), 0405 Italian (it), 0920 Chinese (zh), 2608 - Pioneer AVHP7800DVD | Owner's Manual - Page 135
record sheet Please make a copy of sheet below as desired. Parametric equalizer setting (PARAMETRIC EQ) (when selecting multi-channel mode only) Speaker unit BAND Frequency Level Q.Fac LOW FRONT LEFT MID HIGH LOW FRONT RIGHT MID HIGH LOW REAR LEFT MID HIGH LOW REAR RIGHT MID - Pioneer AVHP7800DVD | Owner's Manual - Page 136
LOW PASS HIGH PASS LOW PASS HIGH PASS PHASE Time alignment setting (TIME ALIGNMENT) and speaker level setting (SPEAKER LEVEL) Speaker unit TIME ALIGNMENT SPEAKER LEVEL Tweeter left Tweeter right Front center Front left Front right Rear left Rear right Rear center Subwoofer Tweeters - Pioneer AVHP7800DVD | Owner's Manual - Page 137
extension of the original DTS Digital Surround which offers high quality 96 kHz/24-bit audio using a DTS 96/24 decoder. This format is also fully backward compatible with all existing decoders. This means that DVD players can play this software using a conventional DTS 5.1 channel decoder. En 137 - Pioneer AVHP7800DVD | Owner's Manual - Page 138
digital still cameras. Digital cameras from various manufacturers use this compressed file format which carries date, time and thumbnail information, as well as the picture data. Group A collection of tracks on a DVD audio disc. Equivalent to a DVD video title. ID3 tag This is a method of embedding - Pioneer AVHP7800DVD | Owner's Manual - Page 139
video image compression standard. Some DVDs feature digital audio compressed and recorded using data from beginning to end is treated as a single unit or session. Multi-session is a method of recording more system that enables more PCM audio to be stored on a DVD audio disc than would otherwise be - Pioneer AVHP7800DVD | Owner's Manual - Page 140
the same region number as the DVD player. This unit's region number is displayed on the bottom of the unit. Slideshow A feature of some DVD discs in which still pictures recorded on the disc cycle automatically while the audio is played back. Title DVD video discs have high data capacity, enabling - Pioneer AVHP7800DVD | Owner's Manual - Page 141
Grounding system Negative type Head unit: Max. current display area: 152.4 × 91.44 mm) Pixels 1 152 000 (800 × 480 × 3) Type TFT active matrix, transmis- sive type Color system NTSC compatible Storage temperature range 4 °F to +176 °F Angle adjustment 50° to 110° (initial settings: 90°) Audio - Pioneer AVHP7800DVD | Owner's Manual - Page 142
DVD Player System DVD audio, DVD video, Video CD, CD, MP3, WMA, AAC, DivX, JPEG system Usable discs DVD audio, DVD video, Video CD, dtsCD, CD, CD-R/ RW, DVD kHz (10 kHz) Usable sensitivity 18 µV (S/N: 20 dB) Signal-to-noise ratio 65 dB (IHF-A network) Note Specifications and the design are - Pioneer AVHP7800DVD | Owner's Manual - Page 143
A Angle icon 37,.113 Aspect ratio 113,.137 Audio language 36,.51,.112 B Bonus group 137 Bookmark code chart 134 Linear PCM (LPCM 139 M Menu language 113 MPEG 139 Multi-angle 37,.139 Multi-audio 36,.51,.139 Multi-subtitle 37,.51,.139 P Packed PCM 139 Parental lock 114,.139 PBC (playback - Pioneer AVHP7800DVD | Owner's Manual - Page 144
CHOME, MEGURO-KU, TOKYO 153-8654, JAPAN PIONEER ELECTRONICS (USA) INC. P.O. Box 1540, Long Beach, California 90801-1540, U.S.A. TEL: (800) 421-1404 PIONEER EUROPE NV Haven 1087, Keetberglaan 1, B-9120 Melsele, Belgium TEL: (0) 3/570.05.11 PIONEER ELECTRONICS ASIACENTRE PTE. LTD. 253 Alexandra Road
-
 1
1 -
 2
2 -
 3
3 -
 4
4 -
 5
5 -
 6
6 -
 7
7 -
8
-
9
-
10
-
11
-
12
-
13
-
14
-
15
-
16
-
17
-
18
-
19
-
20
-
21
-
22
-
23
-
24
-
25
-
26
-
27
-
28
-
29
-
30
-
31
-
32
-
33
-
34
-
35
-
36
-
37
-
38
-
39
-
40
-
41
-
42
-
43
-
44
-
45
-
46
-
47
-
48
-
49
-
50
-
51
-
52
-
53
-
54
-
55
-
56
-
57
-
58
-
59
-
60
-
61
-
62
-
63
-
64
-
65
-
66
-
67
-
68
-
69
-
70
-
71
-
72
-
73
-
74
-
75
-
76
-
77
-
78
-
79
-
80
-
81
-
82
-
83
-
84
-
85
-
86
-
87
-
88
-
89
-
90
-
91
-
92
-
93
-
94
-
95
-
96
-
97
-
98
-
99
-
100
-
101
-
102
-
103
-
104
-
105
-
106
-
107
-
108
-
109
-
110
-
111
-
112
-
113
-
114
-
115
-
116
-
117
-
118
-
119
-
120
-
121
-
122
-
123
-
124
-
125
-
126
-
127
-
128
-
129
-
130
-
131
-
132
-
133
-
134
-
135
-
136
-
137
-
138
-
139
-
140
-
141
-
142
-
143
-
144
 |
 |

Operation Manual
Multi-CD control DSP High power DVD-A/DVD-V/
VCD/CD/MP3/WMA/AAC/DivX/JPEG player with FM/
AM tuner
AVH-P7800DVD
English