Pioneer AVHP7800DVD Owner's Manual - Page 101
Setting the speaker setting, Using the cut-off frequency, Audio Adjustments
 |
UPC - 012562799179
View all Pioneer AVHP7800DVD manuals
Add to My Manuals
Save this manual to your list of manuals |
Page 101 highlights
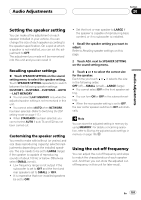
Audio Adjustments Section 20 Audio Adjustments Setting the speaker setting You can make a fine adjustment on each speaker installed in your vehicle. You can change the size of each speaker according to the speaker specification. On a spot at which a speaker is not installed, you can set the adjustment to OFF. The adjustment you made will be memorized into this unit and you can recall it. Recalling speaker settings % Touch SPEAKER SETTING on the sound setting menu to select the speaker setting. Touch SPEAKER SETTING repeatedly to switch between the following speaker settings: CUSTOM1-CUSTOM2-CUSTOM3-AUTO -LAST MEMORY # You can select LAST MEMORY only when the adjusted speaker setting is not memorized in this unit. # You cannot select AUTO when NETWORK has been selected. (Refer to Switching the DSP setting mode on page 117.) # When STANDARD has been selected, you cannot select AUTO if auto TA and EQ has not been carried out. Customizing the speaker setting You need to make with/without (or yes/no) and size (bass reproducing capacity) selection/adjustments depending on the installed speakers. The size needs to be set to LARGE (large) if the speaker is capable of reproducing sounds of about 100 Hz or below. Otherwise select SMALL (small). ! Low frequency range is not output if the subwoofer is set to OFF and the front and rear speakers set to SMALL or OFF. ! It is imperative that non-installed speakers be set to OFF. ! Set the front or rear speaker to LARGE if the speaker is capable of reproducing bass content, or if no subwoofer is installed. 1 Recall the speaker setting you want to adjust. Refer to Recalling speaker settings on this page. 2 Touch ADJ. next to SPEAKER SETTING on the sound setting menu. 3 Touch or to select the correct size for the speaker. Each time you touch or it selects the size in the following order: OFF (off)-SMALL (small)-LARGE (large) # You cannot select OFF in the front speaker setting. # You can turn ON or OFF in the subwoofer setting. # When the rear speaker setting is set to OFF, the rear center speaker switches to OFF automatically. Note You can store the adjusted setting in memory by using MEMORY. For details concerning operation, refer to Storing the adjusted audio settings in memory on page 106. Using the cut-off frequency You can adjust the cut-off frequency and slope to match the characteristics of each speaker unit. And then you can store the adjusted cutoff frequency in this unit for later recall. En 101
-
 1
1 -
2
-
3
-
4
-
5
-
6
-
7
-
8
-
9
-
10
-
11
-
12
-
13
-
14
-
15
-
16
-
17
-
18
-
19
-
20
-
21
-
22
-
23
-
24
-
25
-
26
-
27
-
28
-
29
-
30
-
31
-
32
-
33
-
34
-
35
-
36
-
37
-
38
-
39
-
40
-
41
-
42
-
43
-
44
-
45
-
46
-
47
-
48
-
49
-
50
-
51
-
52
-
53
-
54
-
55
-
56
-
57
-
58
-
59
-
60
-
61
-
62
-
63
-
64
-
65
-
66
-
67
-
68
-
69
-
70
-
71
-
72
-
73
-
74
-
75
-
76
-
77
-
78
-
79
-
80
-
81
-
82
-
83
-
84
-
85
-
86
-
87
-
88
-
89
-
90
-
91
-
92
-
93
-
94
-
95
-
 96
96 -
 97
97 -
 98
98 -
 99
99 -
 100
100 -
 101
101 -
 102
102 -
 103
103 -
 104
104 -
 105
105 -
 106
106 -
107
-
108
-
109
-
110
-
111
-
112
-
113
-
114
-
115
-
116
-
117
-
118
-
119
-
120
-
121
-
122
-
123
-
124
-
125
-
126
-
127
-
128
-
129
-
130
-
131
-
132
-
133
-
134
-
135
-
136
-
137
-
138
-
139
-
140
-
141
-
142
-
143
-
144
 |
 |
