Samsung CLP-510 User Manual (ENGLISH) - Page 143
Insert the imaging unit carefully so as not to scratch or, damage the surface of the green roller.
 |
UPC - 635753700404
View all Samsung CLP-510 manuals
Add to My Manuals
Save this manual to your list of manuals |
Page 143 highlights
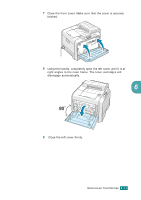
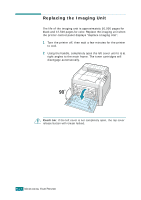
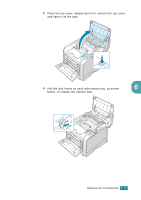
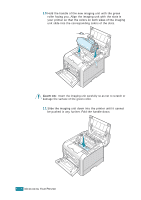
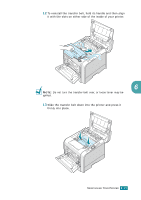
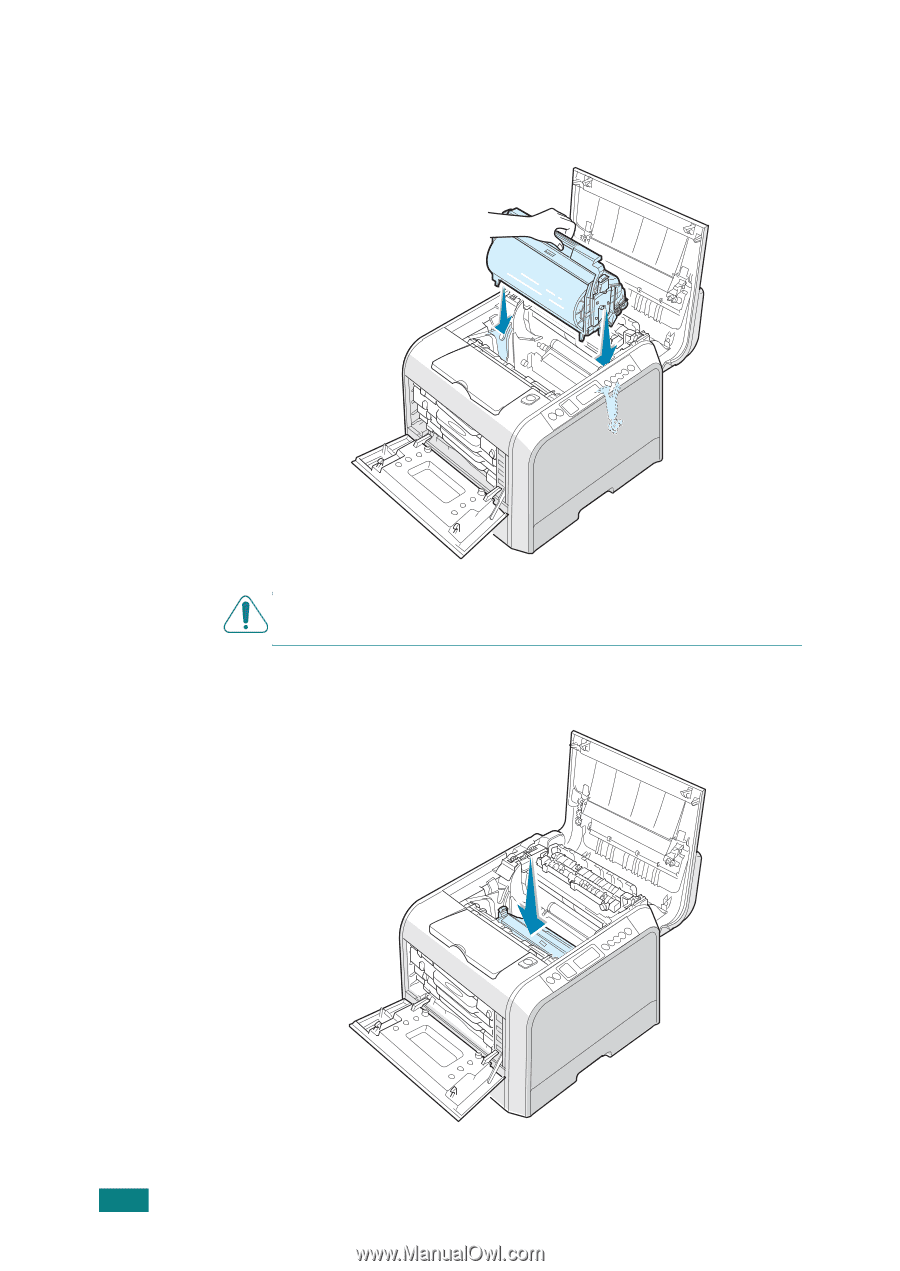
10 Hold the handle of the new imaging unit with the green roller facing you. Align the imaging unit with the slots in your printer so that the colors on both sides of the imaging unit slide into the corresponding colors of the slots. CAUTION: Insert the imaging unit carefully so as not to scratch or damage the surface of the green roller. 11 Slide the imaging unit down into the printer until it cannot be pushed in any further. Fold the handle down. 6.18 MAINTAINING YOUR PRINTER
-
 1
1 -
2
-
3
-
4
-
5
-
6
-
7
-
8
-
9
-
10
-
11
-
12
-
13
-
14
-
15
-
16
-
17
-
18
-
19
-
20
-
21
-
22
-
23
-
24
-
25
-
26
-
27
-
28
-
29
-
30
-
31
-
32
-
33
-
34
-
35
-
36
-
37
-
38
-
39
-
40
-
41
-
42
-
43
-
44
-
45
-
46
-
47
-
48
-
49
-
50
-
51
-
52
-
53
-
54
-
55
-
56
-
57
-
58
-
59
-
60
-
61
-
62
-
63
-
64
-
65
-
66
-
67
-
68
-
69
-
70
-
71
-
72
-
73
-
74
-
75
-
76
-
77
-
78
-
79
-
80
-
81
-
82
-
83
-
84
-
85
-
86
-
87
-
88
-
89
-
90
-
91
-
92
-
93
-
94
-
95
-
96
-
97
-
98
-
99
-
100
-
101
-
102
-
103
-
104
-
105
-
106
-
107
-
108
-
109
-
110
-
111
-
112
-
113
-
114
-
115
-
116
-
117
-
118
-
119
-
120
-
121
-
122
-
123
-
124
-
125
-
126
-
127
-
128
-
129
-
130
-
131
-
132
-
133
-
134
-
135
-
136
-
137
-
 138
138 -
 139
139 -
 140
140 -
 141
141 -
 142
142 -
 143
143 -
 144
144 -
 145
145 -
 146
146 -
 147
147 -
 148
148 -
149
-
150
-
151
-
152
-
153
-
154
-
155
-
156
-
157
-
158
-
159
-
160
-
161
-
162
-
163
-
164
-
165
-
166
-
167
-
168
-
169
-
170
-
171
-
172
-
173
-
174
-
175
-
176
-
177
-
178
-
179
-
180
-
181
-
182
-
183
-
184
-
185
-
186
-
187
-
188
-
189
-
190
-
191
-
192
-
193
-
194
-
195
-
196
-
197
-
198
-
199
-
200
-
201
-
202
-
203
-
204
-
205
-
206
-
207
-
208
-
209
-
210
-
211
-
212
-
213
-
214
-
215
-
216
-
217
-
218
-
219
-
220
-
221
-
222
-
223
-
224
-
225
-
226
-
227
-
228
-
229
-
230
-
231
-
232
-
233
-
234
-
235
-
236
-
237
-
238
-
239
-
240
-
241
-
242
-
243
-
244
-
245
-
246
-
247
-
248
-
249
-
250
-
251
-
252
-
253
-
254
-
255
-
256
-
257
-
258
-
259
-
260
-
261
-
262
-
263
-
264
-
265
-
266
 |
 |
M
AINTAINING
Y
OUR
P
RINTER
6.
18
10
Hold the handle of the new imaging unit with the green
roller facing you. Align the imaging unit with the slots in
your printer so that the colors on both sides of the imaging
unit slide into the corresponding colors of the slots.
C
AUTION
:
Insert the imaging unit carefully so as not to scratch or
damage the surface of the green roller.
11
Slide the imaging unit down into the printer until it cannot
be pushed in any further. Fold the handle down.