Samsung CLX 3175FN User Manual (ENGLISH) - Page 30
Printing Configuration report, Setting IP address, IP setting using control panel, IP setting using - printer reviews
 |
UPC - 635753710281
View all Samsung CLX 3175FN manuals
Add to My Manuals
Save this manual to your list of manuals |
Page 30 highlights
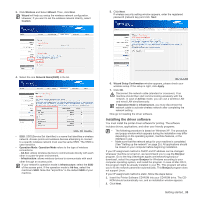
assign the IP address and set other network parameters. If you know that you are connecting to an Infrastructure mode network with an access point, and the IP address is assigned by a DHCP server, you may proceed to the Configuring the machine's wireless network part after reviewing the following parts on printing a Network Configuration Report. If you know that you are connecting to an Infrastructure mode network with an access point, but it does not have DHCP address assignment, or you are required to set a static IP, proceed to the Setting IP address part before going to Configuring the machine's wireless network part after reviewing the following parts on printing a Network Configuration Report. • Ad-hoc mode : An Ad-hoc mode network provides peer to peer communication. In an Ad-hoc mode network, wireless devices and computers communicate directly with each other, without using an access point. They can share files and machines, but may not be able to access the Internet. The machine receives print jobs from wireless computers directly. If you know that you are connecting to an ad-hoc mode network without an access point, proceed to the Setting IP address part before going to Configuring the machine's wireless network part after reviewing the following parts on printing a Network Configuration Report. Printing Configuration report You can print a Network Configuration Report from the machine's control panel that will show the current machine's network settings. This will help you to set up a network and troubleshooting problems. 1. Press Menu until System Setup appears on the bottom line of the display and press OK. 2. Press the left/right arrow until Report appears and press OK. 3. Press the left/right arrow until Network Info. appears and press OK. 4. Press OK when Yes appears to confirm printing. Network Configuration Report will then be printed out. Please review your machines User's Guide to learn of additional details. Using this Network Configuration Report, you can find your machine MAC address and IP address. For example: MAC Address : 00:15:99:41:A2:78 IP Address : 192.0.0.192 30 _Getting started Setting IP address Firstly, you have to set up an IP address for network printing and managements. In most cases a new IP address will be automatically assigned by a DHCP (Dynamic Host Configuration Protocol Server) located on the network. In a few situations the IP address must be set manually. This is called a static IP and is often required in corporate Intranets for security reasons. • DHCP IP assignment: Connect your machine to the network, and wait a few minutes for the DHCP server to assign an IP address to the machine. (If the access point has an available LAN port, you may connect your machine directly to the access point.) Then, print the Network Configuration Report as explained above. If the report shows that the IP address has changed, the assignment was successful. You will see the new IP address in the report. Leave the machine attached to the network. • Static IP assignment: Use SetIP program to change the IP address from your computer. If your machine has a control panel, you can also change IP address using the machine's control panel. In an office environment, we recommend that you contact a network administrator to set this address for you. IP setting using control panel 1. Press Menu on the control panel until you see Network on the bottom line of the display and press OK. 2. Press the left/right arrow until TCP/IP appears and press OK. 3. Press the left/right arrow until Static appears and press OK. 4. Press the left/right arrow until IP Address appears and press OK. 5. Enter a byte between 0 and 255 using the number keypad and press the left/right arrow to move between bytes. 6. Repeat this to complete the address from the 1st byte to the 4th byte. 7. When you have finished, press OK. 8. Repeat steps 6 and 7 to configure the other TCP/IP parameters: subnet mask and gateway address. IP setting using SetIP program The following procedure is based on Windows XP. This program is for manually setting the network IP address of your machine using its MAC address to communicate with the machine. A MAC address is the hardware serial number of the network interface and can be found in the Network Configuration Report. • You only need to run this program if your network requires a static IP address. Otherwise, you may proceed to the Configuring the machine's wireless network part of this document. If you are unsure of this requirement ask the system administrator or the person who has set up your local network. • You can only use the SetIP program when your machine is connected to a network or directly connected to a PC with the crossover network cable included with your machine. In most cases we recommend using the crossover cable. You will be asked to connect this cable in a moment. Installing the program 1. Insert the Printer Software CD-ROM provided with your machine. When the driver CD runs automatically, close that window. 2. Start a web browser such as Internet Explorer and open the X drive. (X represents your CD-ROM drive.) 3. Double-click Application > SetIP. 4. Double-click Setup.exe to install this program. 5. Click OK. If necessary, select a language from the drop-down list.
-
 1
1 -
2
-
3
-
4
-
5
-
6
-
7
-
8
-
9
-
10
-
11
-
12
-
13
-
14
-
15
-
16
-
17
-
18
-
19
-
20
-
21
-
22
-
23
-
24
-
 25
25 -
 26
26 -
 27
27 -
 28
28 -
 29
29 -
 30
30 -
 31
31 -
 32
32 -
 33
33 -
 34
34 -
 35
35 -
36
-
37
-
38
-
39
-
40
-
41
-
42
-
43
-
44
-
45
-
46
-
47
-
48
-
49
-
50
-
51
-
52
-
53
-
54
-
55
-
56
-
57
-
58
-
59
-
60
-
61
-
62
-
63
-
64
-
65
-
66
-
67
-
68
-
69
-
70
-
71
-
72
-
73
-
74
-
75
-
76
-
77
-
78
-
79
-
80
-
81
-
82
-
83
-
84
-
85
-
86
-
87
-
88
-
89
-
90
-
91
-
92
-
93
-
94
-
95
-
96
-
97
-
98
-
99
-
100
-
101
-
102
-
103
-
104
-
105
-
106
-
107
-
108
-
109
-
110
-
111
-
112
-
113
-
114
-
115
-
116
-
117
-
118
-
119
-
120
-
121
-
122
-
123
-
124
-
125
-
126
-
127
-
128
-
129
-
130
-
131
-
132
-
133
-
134
-
135
-
136
-
137
-
138
-
139
-
140
-
141
-
142
-
143
-
144
-
145
-
146
-
147
-
148
-
149
-
150
-
151
-
152
-
153
-
154
-
155
-
156
-
157
-
158
-
159
-
160
-
161
-
162
-
163
-
164
-
165
-
166
-
167
-
168
-
169
-
170
-
171
-
172
-
173
-
174
-
175
-
176
-
177
-
178
-
179
-
180
-
181
-
182
-
183
-
184
-
185
-
186
-
187
-
188
-
189
-
190
-
191
-
192
-
193
-
194
-
195
-
196
-
197
-
198
-
199
-
200
-
201
-
202
-
203
-
204
-
205
-
206
-
207
-
208
-
209
-
210
-
211
-
212
-
213
-
214
-
215
-
216
-
217
-
218
 |
 |
