Samsung CLX 3175FN User Manual (ENGLISH) - Page 34
Start, All Programs, Accessories, Setup.exe, Typical installation for a network printer, Finish - driver mac
 |
UPC - 635753710281
View all Samsung CLX 3175FN manuals
Add to My Manuals
Save this manual to your list of manuals |
Page 34 highlights
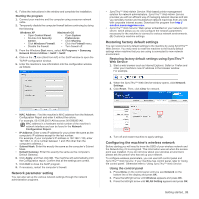
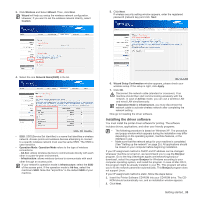
• If the installation window does not appear, click Start > Run. Type X:\Setup.exe, replacing "X" with the letter which represents your drive and click OK. • If you use Windows vista, Windows 7 and Windows Server 2008 R2, click Start > All Programs > Accessories > Run, and type X:\Setup.exe. The installation window may slightly differ, if you are reinstalling the driver. 3. Select Typical installation for a network printer, and then click Next. 4. The list of machines available on the network appears. Select the printer you want to install from the list and then click Next. • If you do not see your machine on the list, click Update to refresh the list, or select Add TCP/IP Port to add your machine to the network. To add the machine to the network, enter the port name and the IP address for the machine. • To verify your machine's IP address or the MAC address, print a Network Configuration Report page. (See "Printing reports" on page 63.) 5. After the installation is finished, a window appears asking you to print a test page and to register yourself as a user of Samsung machines in order to receive information from Samsung. If you wish to do so, select the corresponding checkbox(es) and click Finish. If your machine does not work properly after the installation, verify your network settings and try reinstalling the printer driver. Congratulations, you have installed your Samsung wireless network printer. Print another copy of the Configuration report and keep it for future reference. You are now ready to use your new Samsung wireless printer on your network. 34 _Getting started
-
 1
1 -
2
-
3
-
4
-
5
-
6
-
7
-
8
-
9
-
10
-
11
-
12
-
13
-
14
-
15
-
16
-
17
-
18
-
19
-
20
-
21
-
22
-
23
-
24
-
25
-
26
-
27
-
28
-
 29
29 -
 30
30 -
 31
31 -
 32
32 -
 33
33 -
 34
34 -
 35
35 -
 36
36 -
 37
37 -
 38
38 -
 39
39 -
40
-
41
-
42
-
43
-
44
-
45
-
46
-
47
-
48
-
49
-
50
-
51
-
52
-
53
-
54
-
55
-
56
-
57
-
58
-
59
-
60
-
61
-
62
-
63
-
64
-
65
-
66
-
67
-
68
-
69
-
70
-
71
-
72
-
73
-
74
-
75
-
76
-
77
-
78
-
79
-
80
-
81
-
82
-
83
-
84
-
85
-
86
-
87
-
88
-
89
-
90
-
91
-
92
-
93
-
94
-
95
-
96
-
97
-
98
-
99
-
100
-
101
-
102
-
103
-
104
-
105
-
106
-
107
-
108
-
109
-
110
-
111
-
112
-
113
-
114
-
115
-
116
-
117
-
118
-
119
-
120
-
121
-
122
-
123
-
124
-
125
-
126
-
127
-
128
-
129
-
130
-
131
-
132
-
133
-
134
-
135
-
136
-
137
-
138
-
139
-
140
-
141
-
142
-
143
-
144
-
145
-
146
-
147
-
148
-
149
-
150
-
151
-
152
-
153
-
154
-
155
-
156
-
157
-
158
-
159
-
160
-
161
-
162
-
163
-
164
-
165
-
166
-
167
-
168
-
169
-
170
-
171
-
172
-
173
-
174
-
175
-
176
-
177
-
178
-
179
-
180
-
181
-
182
-
183
-
184
-
185
-
186
-
187
-
188
-
189
-
190
-
191
-
192
-
193
-
194
-
195
-
196
-
197
-
198
-
199
-
200
-
201
-
202
-
203
-
204
-
205
-
206
-
207
-
208
-
209
-
210
-
211
-
212
-
213
-
214
-
215
-
216
-
217
-
218
 |
 |