Samsung CLX 3175FN User Manual (ENGLISH) - Page 31
Network parameter setting, Restoring factory default settings - mac
 |
UPC - 635753710281
View all Samsung CLX 3175FN manuals
Add to My Manuals
Save this manual to your list of manuals |
Page 31 highlights
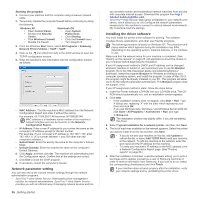
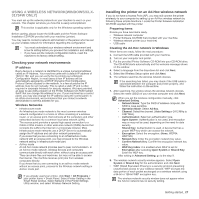
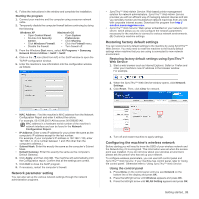
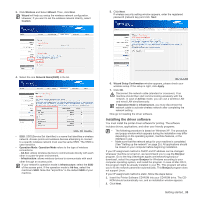
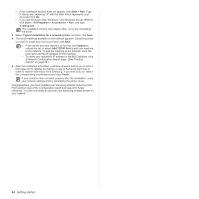
6. Follow the instructions in the window and complete the installation. Starting the program 1. Connect your machine and the computer using crossover network cable. 2. Temporarily disable the computer firewall before continuing by doing the following: Windows XP Macintosh OS • Open Control Panel. • Open System • Double click Security Preferences. Center. • Click Sharing. • Click Windows Firewall. • Click the Firewall menu. • Disable the firewall. • Turn firewall off. 3. From the Windows Start menu, select All Programs > Samsung Network Printer Utilities > SetIP > SetIP. 4. Click on the icon (third from left) in the SetIP window to open the TCP/IP configuration window. 5. Enter the machine's new information into the configuration window as follows: • SyncThru™ Web Admin Service: Web-based printer management solution for network administrators. SyncThru™ Web Admin Service provides you with an efficient way of managing network devices and lets you remotely monitor and troubleshoot network machines from any site with corporate internet access. Download this program from http:// solution.samsungprinter.com. • SyncThru™ Web Service: Web server embedded on your network print server, which allows you to: (A) Configure the network parameters necessary for the machine to connect to various network environments. (B) Customize machine settings. Restoring factory default settings You can restore factory default settings to the machine by using SyncThru™ Web Service. You may need to reset the machine to the factory default settings when machine that you are using is connected to new network environment. Restoring factory default settings using SyncThru™ Web Service 1. Start a web browser such as Internet Explorer, Safari or Firefox and enter your machine's new IP address in the browser window. For example, 2. When the SyncThru™ Web Service window opens, click Network Settings. 3. Click Reset. Then, click Clear for network. • MAC Address : Find the machine's MAC address from the Network Configuration Report and enter it without the colons. For example, 00:15:99:29:51:A8 becomes 0015992951A8. MAC address is a hardware serial number of the machine's network interface and can be found in the Network Configuration Report. • IP Address: Enter a new IP address for your printer the same as the computer's IP address except for the last number. For example, if your computer's IP address is 192.168.1.150, enter 192.168.1.X. (X is number between 1 and 254 other than the computer's address.) • Subnet Mask: Enter this exactly the same as the computer's Subnet Mask. • Default Gateway: Enter this exactly the same as the computer's Default Gateway. 6. Click Apply, and then click OK. The machine will automatically print the Configuration report. Confirm that all the settings are correct. 7. Click Exit to close the SetIP program. 8. If necessary, restart the computer's firewall. Network parameter setting You can also set up the various network settings through the network administration programs. 4. Turn off and restart machine to apply settings. Configuring the machine's wireless network Before starting you will need to know the SSID of your wireless network and the Network Key if it is encrypted. This information was set when the access point was installed. If you do not know about your wireless environment, please ask the person who has set up your network. To configure wireless parameters, you can use both control panel and SyncThru™ Web Service. If your machine has control panel, refer to 'Using the control panel'. Otherwise refer to 'Using SyncThru™ Web Service. Using the control panel 1. Press Menu on the control panel until you see Network on the bottom line of the display and press OK. 2. Press the left/right arrow until Wireless appears and press OK. 3. Press the left/right arrow until WLAN Setting appears and press OK. Getting started_ 31
-
 1
1 -
2
-
3
-
4
-
5
-
6
-
7
-
8
-
9
-
10
-
11
-
12
-
13
-
14
-
15
-
16
-
17
-
18
-
19
-
20
-
21
-
22
-
23
-
24
-
25
-
 26
26 -
 27
27 -
 28
28 -
 29
29 -
 30
30 -
 31
31 -
 32
32 -
 33
33 -
 34
34 -
 35
35 -
 36
36 -
37
-
38
-
39
-
40
-
41
-
42
-
43
-
44
-
45
-
46
-
47
-
48
-
49
-
50
-
51
-
52
-
53
-
54
-
55
-
56
-
57
-
58
-
59
-
60
-
61
-
62
-
63
-
64
-
65
-
66
-
67
-
68
-
69
-
70
-
71
-
72
-
73
-
74
-
75
-
76
-
77
-
78
-
79
-
80
-
81
-
82
-
83
-
84
-
85
-
86
-
87
-
88
-
89
-
90
-
91
-
92
-
93
-
94
-
95
-
96
-
97
-
98
-
99
-
100
-
101
-
102
-
103
-
104
-
105
-
106
-
107
-
108
-
109
-
110
-
111
-
112
-
113
-
114
-
115
-
116
-
117
-
118
-
119
-
120
-
121
-
122
-
123
-
124
-
125
-
126
-
127
-
128
-
129
-
130
-
131
-
132
-
133
-
134
-
135
-
136
-
137
-
138
-
139
-
140
-
141
-
142
-
143
-
144
-
145
-
146
-
147
-
148
-
149
-
150
-
151
-
152
-
153
-
154
-
155
-
156
-
157
-
158
-
159
-
160
-
161
-
162
-
163
-
164
-
165
-
166
-
167
-
168
-
169
-
170
-
171
-
172
-
173
-
174
-
175
-
176
-
177
-
178
-
179
-
180
-
181
-
182
-
183
-
184
-
185
-
186
-
187
-
188
-
189
-
190
-
191
-
192
-
193
-
194
-
195
-
196
-
197
-
198
-
199
-
200
-
201
-
202
-
203
-
204
-
205
-
206
-
207
-
208
-
209
-
210
-
211
-
212
-
213
-
214
-
215
-
216
-
217
-
218
 |
 |
