Sony HDWD1800 Operation Manual - Page 20
ALARM indicator and KEY INHI, indicator, MULTI CONTROL knob and PUSH, SHIFT indicator, Tape
 |
View all Sony HDWD1800 manuals
Add to My Manuals
Save this manual to your list of manuals |
Page 20 highlights
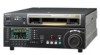
Chapter 2 Location and Function of Parts For details about selecting the E-E mode, see the description of the REC button in the tape transport control section (page 20) and PB/EE setting in the function menu page P01: HOME (page 65). b PB (audio playback level control) knobs These individually adjust the output levels on channels 1 to 4, and cue audio. During playback, press to protrude the control knobs and adjust the playback level while monitoring the audio level indication in audio level meter block 2. When the knobs are pushed in, the playback levels return to the preset levels and cannot be adjusted. 3 ALARM indicator and KEY INHI indicator ALARM indicator This lights when a hardware error is detected on the unit, and goes off when the error is resolved. When this indicator lights, an error message appears in the time data display area. If you are using the HDSDI OUTPUT 3 (SUPER), SDI OUTPUT 3 (SUPER) or COMPOSITE VIDEO OUTPUT 3 (SUPER) connector, and the setting of F5 (CHARA) in function menu page P04: MISC-1 is "ON", then the error message also appears on the video monitor. For details on error messages, refer to the Maintenance Manual Volume 1. KEY INHI (inhibit) indicator This indicator lights when the KEY INHI switch on the switch panel (see page 22) is set to "ON". 4 MULTI CONTROL knob and PUSH/ SHIFT indicator In function menu operations, turn the MULTI CONTROL knob to change settings that flash in the menu display section. In setup menu operations, turn this knob to select menu items. The PUSH/SHIFT indicator is lit when you press this knob in. In this state, the value of the setting changes by a greater amount when you turn the knob. 5 Tape transport control section 1 REC button 2 STANDBY button REC STANDBY REW PLAY F FWD STOP 3 STOP button 4 F FWD button 5 PLAY button 6 SERVO indicator 7 REW button a REC (record) button To start recording, press this button together with the PLAY button, turning it on. To monitor in E-E mode When the unit is in stop mode, pressing the REC button lights the button and allows you to monitor the video and audio in E-E mode. To return to the original state, press the STOP button. During playback, search, fast forward, or rewind, holding down the REC button allows you to monitor the video and audio in E-E mode. In this case the button does not light. b STANDBY button When this button is off with a cassette inserted in the unit, to put the unit in standby mode, press the button, turning it on. In standby mode, the drum is rotating and the tape is in contact with the drum, and therefore recording or playback can start immediately. To cancel standby mode, press the STANDBY button, turning it off. If 8 minutes (value can be changed using setup menu item 501) elapse in standby mode, the unit automatically switches out of standby mode to protect the tape. c STOP button To stop recording or playback, press this button, turning it on. When you stop playback, the unit switches either to still playback or to E-E mode according to the setting of F6 (PB/EE) in function menu page P01: HOME and the setting in setup menu item 108. Fault display function The STOP button flashes in the following cases related to reference signals: • When F2 (REF VID) is set to "INPUT" in function menu page P03: VID PROC, there is no input video signal. 20 2-1 Control Panels
-
 1
1 -
2
-
3
-
4
-
5
-
6
-
7
-
8
-
9
-
10
-
11
-
12
-
13
-
14
-
 15
15 -
 16
16 -
 17
17 -
 18
18 -
 19
19 -
 20
20 -
 21
21 -
 22
22 -
 23
23 -
 24
24 -
 25
25 -
26
-
27
-
28
-
29
-
30
-
31
-
32
-
33
-
34
-
35
-
36
-
37
-
38
-
39
-
40
-
41
-
42
-
43
-
44
-
45
-
46
-
47
-
48
-
49
-
50
-
51
-
52
-
53
-
54
-
55
-
56
-
57
-
58
-
59
-
60
-
61
-
62
-
63
-
64
-
65
-
66
-
67
-
68
-
69
-
70
-
71
-
72
-
73
-
74
-
75
-
76
-
77
-
78
-
79
-
80
-
81
-
82
-
83
-
84
-
85
-
86
-
87
-
88
-
89
-
90
-
91
-
92
-
93
-
94
-
95
-
96
-
97
-
98
-
99
-
100
-
101
-
102
-
103
-
104
-
105
-
106
-
107
-
108
-
109
-
110
-
111
-
112
-
113
-
114
-
115
-
116
-
117
-
118
-
119
-
120
-
121
 |
 |
