Sony HDWD1800 Operation Manual - Page 67
P03: Vid Proc
 |
View all Sony HDWD1800 manuals
Add to My Manuals
Save this manual to your list of manuals |
Page 67 highlights
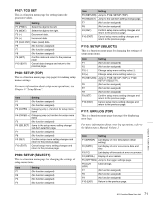
Item F10 (TCR) Setting Select the type of timecode to display in the time data display. LTC: Display LTC. AUTO: Display VITC when tape speed is 1/ 2 or less of normal speed, and LTC otherwise. VITC: Display VITC. P03: VID PROC This is a function menu page for setting items relating to video processing. Item F1 (VIDEO IN) F2 (REF VID) F3 (SYNC PHS) Setting Select the input video signal. SDI: HDSDI signal SG: Test signal from the internal test signal generator (Normally not displayed. For details, see setup menu item 710 (page 94).) To change to SG, hold down the ALT/ DELETE button, then press the F1 button. Select the reference signal of this unit, according to the settings in setup menu items 309 and 334, and this unit's operating state. REF: Use the signal input to a REF. VIDEO INPUT connector as the reference signal. When recording, input digital audio signals and video signals must be synchronized with this signal. INPUT: Use the input video signal as the reference signal. Set the HD output signal sync phase. With the displayed setting flashing, turn the MULTI CONTROL knob to adjust the output signal sync phase across the range ±15 µs relative to this unit's input reference signal. (The value indication ranges from -128 to +127.) Adjust this item when you want to adjust the output signal sync phase precisely to match a reference signal, or when connecting this unit and other VTRs to a device such as a switcher to carry out operations such as special effects editing. Item F4 (SYNC FIN) Setting Set the HD output signal sync phase (fine adjustment). With the displayed setting flashing, turn the MULTI CONTROL knob to adjust the output signal sync phase across the range ±200 ns relative to this unit's input reference signal. (The value indication ranges from 0 to 1028.) F5 (V.PROC) Adjust this item when you want to adjust the output signal sync phase precisely to match a reference signal, or to make further fine adjustment when connecting this unit and other VTRs to a device such as a switcher to carry out operations such as special effects editing. Select the control method or setting for the internal digital video processor. LOCAL: Change the settings of the internal digital video processor by using this function menu. MENU: Change the settings of the internal digital video processor by using F9 (MENU) in function menu page P01: HOME. (For making the settings in the setup menus) Note When controlling the unit from the HKDV503/900, set this item to "MENU". F6 (VID LEVL) Set the HD/SD video signal output level (-∞ to +3 dB). PRESET: Regardless of manually set values, the video signal output level is set to the standard value. Manual setting: With the displayed setting flashing, turn the MULTI CONTROL knob to adjust the video signal output level. F7 (CHR LEVL) Set the HD/SD chroma signal output level (-∞ to +3 dB). PRESET: Regardless of manually set values, the chroma signal output level is set to the standard value. Manual setting: With the displayed setting flashing, turn the MULTI CONTROL knob to adjust the chroma signal output level. F8 (HUE) Set the hue. (59.94i mode)/ PRESET: Regardless of manually set (CHR PHAS) (50i mode) values, the hue is set to the standard value. Manual setting: With the displayed setting flashing, turn the MULTI CONTROL knob to adjust the value across the range ±30º. Chapter 8 Function Menu 67 8-2 Function Menu Item List
-
 1
1 -
2
-
3
-
4
-
5
-
6
-
7
-
8
-
9
-
10
-
11
-
12
-
13
-
14
-
15
-
16
-
17
-
18
-
19
-
20
-
21
-
22
-
23
-
24
-
25
-
26
-
27
-
28
-
29
-
30
-
31
-
32
-
33
-
34
-
35
-
36
-
37
-
38
-
39
-
40
-
41
-
42
-
43
-
44
-
45
-
46
-
47
-
48
-
49
-
50
-
51
-
52
-
53
-
54
-
55
-
56
-
57
-
58
-
59
-
60
-
61
-
 62
62 -
 63
63 -
 64
64 -
 65
65 -
 66
66 -
 67
67 -
 68
68 -
 69
69 -
 70
70 -
 71
71 -
 72
72 -
73
-
74
-
75
-
76
-
77
-
78
-
79
-
80
-
81
-
82
-
83
-
84
-
85
-
86
-
87
-
88
-
89
-
90
-
91
-
92
-
93
-
94
-
95
-
96
-
97
-
98
-
99
-
100
-
101
-
102
-
103
-
104
-
105
-
106
-
107
-
108
-
109
-
110
-
111
-
112
-
113
-
114
-
115
-
116
-
117
-
118
-
119
-
120
-
121
 |
 |
