Sony STR-DA4300ES Operating Instructions (Large File - 20.21 MB) - Page 45
On setting up the active sub, woofer, Using the receiver as a pre, amplifier - problems
 |
UPC - 027242715127
View all Sony STR-DA4300ES manuals
Add to My Manuals
Save this manual to your list of manuals |
Page 45 highlights
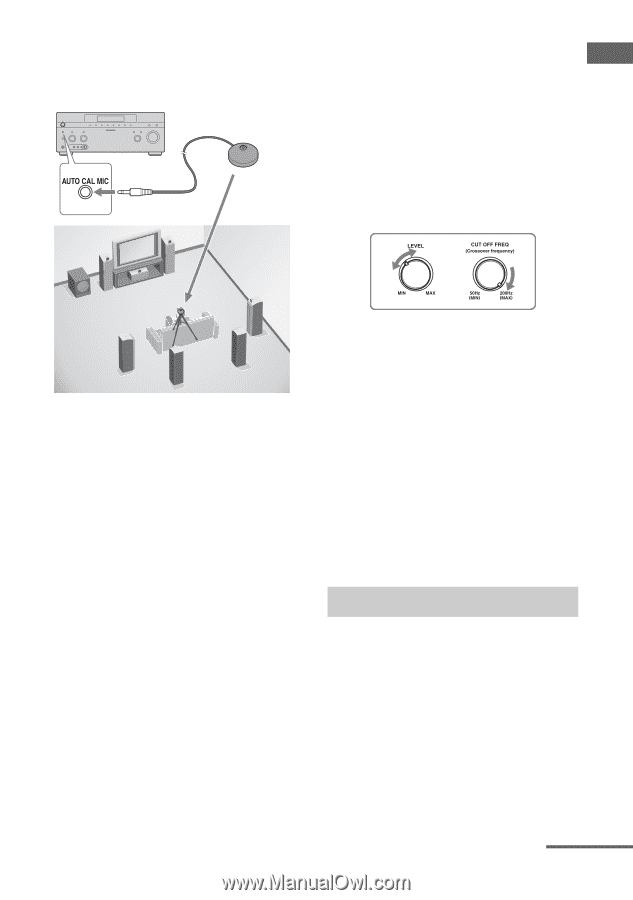
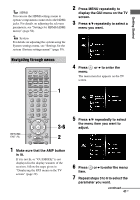
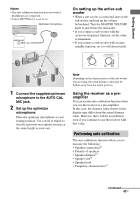
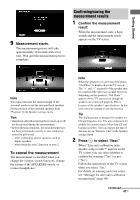
Getting Started Notes • The auto calibration function does not work if headphones are connected. • Cancel MUTING if it is set to on. Optimizer microphone On setting up the active sub woofer • When a sub woofer is connected, turn on the sub woofer and turn up the volume beforehand. Turn the MASTER VOLUME knob to just before the mid-point. • If you connect a sub woofer with the crossover frequency function, set the value to maximum. • If you connect a sub woofer with an auto standby function, set it to off (deactivated). 1 Connect the supplied optimizer microphone to the AUTO CAL MIC jack. 2 Set up the optimizer microphone. Place the optimizer microphone at your seating position. Use a stool or tripod so that the optimizer microphone remains at the same height as your ears. Note Depending on the characteristics of the sub woofer you are using, the setup distance value may be further away from the actual position. Using the receiver as a preamplifier You can use the auto calibration function when you use the receiver as a pre-amplifier. In this case, the distance value shown on the display may differ from the actual distance value. However, there will be no problems even if you continue to use the receiver with that value. Performing auto calibration The auto calibration function allows you to measure the following: • Speaker connectionsa) • Polarity of speakers • Speaker distanceb) • Speaker sizeb) • Speaker level • Frequency characteristicsc) continued 45GB
-
 1
1 -
2
-
3
-
4
-
5
-
6
-
7
-
8
-
9
-
10
-
11
-
12
-
13
-
14
-
15
-
16
-
17
-
18
-
19
-
20
-
21
-
22
-
23
-
24
-
25
-
26
-
27
-
28
-
29
-
30
-
31
-
32
-
33
-
34
-
35
-
36
-
37
-
38
-
39
-
 40
40 -
 41
41 -
 42
42 -
 43
43 -
 44
44 -
 45
45 -
 46
46 -
 47
47 -
 48
48 -
 49
49 -
 50
50 -
51
-
52
-
53
-
54
-
55
-
56
-
57
-
58
-
59
-
60
-
61
-
62
-
63
-
64
-
65
-
66
-
67
-
68
-
69
-
70
-
71
-
72
-
73
-
74
-
75
-
76
-
77
-
78
-
79
-
80
-
81
-
82
-
83
-
84
-
85
-
86
-
87
-
88
-
89
-
90
-
91
-
92
-
93
-
94
-
95
-
96
-
97
-
98
-
99
-
100
-
101
-
102
-
103
-
104
-
105
-
106
-
107
-
108
-
109
-
110
-
111
-
112
-
113
-
114
-
115
-
116
-
117
-
118
-
119
-
120
-
121
-
122
-
123
-
124
-
125
-
126
-
127
-
128
-
129
-
130
-
131
-
132
-
133
-
134
-
135
-
136
-
137
-
138
-
139
-
140
-
141
-
142
-
143
-
144
-
145
-
146
-
147
-
148
-
149
-
150
-
151
-
152
-
153
-
154
-
155
-
156
-
157
-
158
-
159
-
160
-
161
-
162
-
163
-
164
-
165
-
166
-
167
-
168
-
169
-
170
-
171
-
172
-
173
-
174
-
175
-
176
-
177
-
178
-
179
-
180
-
181
-
182
-
183
-
184
-
185
-
186
-
187
-
188
-
189
-
190
-
191
-
192
-
193
-
194
-
195
-
196
-
197
-
198
-
199
-
200
-
201
-
202
-
203
-
204
-
205
-
206
-
207
-
208
-
209
-
210
-
211
-
212
-
213
-
214
-
215
-
216
-
217
-
218
-
219
-
220
-
221
-
222
-
223
-
224
-
225
-
226
-
227
-
228
-
229
-
230
-
231
-
232
-
233
-
234
-
235
-
236
-
237
-
238
-
239
-
240
-
241
-
242
-
243
-
244
-
245
-
246
-
247
-
248
-
249
-
250
-
251
-
252
-
253
-
254
-
255
-
256
-
257
-
258
-
259
-
260
-
261
-
262
-
263
-
264
-
265
-
266
-
267
-
268
-
269
-
270
-
271
-
272
-
273
-
274
-
275
-
276
-
277
-
278
-
279
-
280
-
281
-
282
-
283
-
284
-
285
-
286
-
287
-
288
-
289
-
290
-
291
-
292
-
293
-
294
-
295
-
296
-
297
-
298
-
299
-
300
-
301
-
302
 |
 |