Yamaha DTX-MULTI Owner's Manual
Yamaha DTX-MULTI Manual
 |
View all Yamaha DTX-MULTI manuals
Add to My Manuals
Save this manual to your list of manuals |
Yamaha DTX-MULTI manual content summary:
- Yamaha DTX-MULTI | Owner's Manual - Page 1
Owner's Manual EN - Yamaha DTX-MULTI | Owner's Manual - Page 2
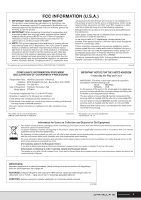
components supplied or; a cart, rack, or stand that is recommended by Yamaha. If a cart, etc., is used, please observe all safety markings and instructions that accompany the accessory product. SPECIFICATIONS SUBJECT TO CHANGE: The information contained in this manual is believed to be correct at - Yamaha DTX-MULTI | Owner's Manual - Page 3
product in a residential environment will not result in harmful interference with other electronic devices. This equipment generates/uses radio frequencies and, if not installed and used according to the instructions found in the users manual, may cause interference harmful to the operation of other - Yamaha DTX-MULTI | Owner's Manual - Page 4
them in any way. The instrument contains no user-serviceable parts. If it should appear to be malfunctioning, discontinue use immediately and have it inspected by qualified Yamaha service personnel. Water warning • Do not expose the instrument to rain, use it near water or in damp or wet conditions - Yamaha DTX-MULTI | Owner's Manual - Page 5
Latest Firmware Version From time to time, Yamaha may update product firmware without prior notice. We recommend, therefore, that you check our web site (below) for the latest version and keep your DTX-MULTI 12 firmware up to date. http://dtxdrums.yamaha.com The content of this Owner's Manual applies - Yamaha DTX-MULTI | Owner's Manual - Page 6
Welcome Thank you for purchasing the Yamaha DTX-MULTI 12 Electronic Percussion Pad. To get the most out of your new instrument, please read this owner's manual carefully. And after reading this document, be sure to store it in a safe place so that you can refer back to it again as needed. - Yamaha DTX-MULTI | Owner's Manual - Page 7
DTX-MULTI 12 11 Connecting a USB Memory Device 11 Connecting Other MIDI Devices 12 Connecting to a Computer 13 Making Music with a Computer 13 Setting up Cubase Remote Control 15 Quick Guide Producing Sounds with the Pads Reverb Effect Setup 50 KIT7 Other Drum Kit Settings 51 KIT8 Kit - Yamaha DTX-MULTI | Owner's Manual - Page 8
!1 !2 !3 !5 YAMAHA y u i o !0 !4 !6 !7 q VOLUME Dial This dial controls the master volume (i.e., the volume at the OUTPUT jacks). Turn the dial clockwise to increase the volume or counter-clockwise to decrease it. w Display This LCD screen shows information and data needed for - Yamaha DTX-MULTI | Owner's Manual - Page 9
be able to save data created on the DTX-MULTI 12 to the USB memory device and to import settings, sound files, and the like. !9 USB TO HOST Port This port is used to connect the DTX-MULTI 12 to a computer via a USB cable. When connected in this way, you will be able to exchange MIDI data between the - Yamaha DTX-MULTI | Owner's Manual - Page 10
with the sound produced by the DTX-MULTI 12 and output together from the OUTPUT (L/MONO and R) and PHONES jacks. This makes it very easy to play along with your favorite tunes. If necessary, furthermore, you can adjust the input volume using the GAIN knob. MS100DRJ or MS50DRJ Electronic Drum Kit - Yamaha DTX-MULTI | Owner's Manual - Page 11
(from the KIT setting area). YAMAHA ■ Connecting a mixer or other MIDI devices Ensure that the volume on all devices is turned fully down. Then, turn on the devices one-by-one in the following sequence: q MIDI controllers (master devices), w MIDI receivers (slave devices), e audio - Yamaha DTX-MULTI | Owner's Manual - Page 12
, the DTX-MULTI 12 can be used to control synthesizers and other sound modules. Meanwhile, the instrument's internal tone generator can be played using other connected MIDI devices. These and many other MIDI functions allow for an even greater range of performance and recording possibilities. NOTE - Yamaha DTX-MULTI | Owner's Manual - Page 13
also be sent directly to the tone generator, and as a result, the direct and returned data will overlap, making it sound as if the pads are being struck twice. Sound is produced Within DTX-MULTI 12 On Internal tone Off generator No sound is produced. Local Control Settings Owner's Manual 13 - Yamaha DTX-MULTI | Owner's Manual - Page 14
port DTX-MULTI 12 IN OUT Computer Internal tone generator Local control LocalCtrl ="off" Pads OUT IN MIDI Thru turned on within DAW application. NOTE • DAW is an abbreviation of digital audio workstation. DAW applications such as Cubase can be used to record, edit, and mix audio and MIDI data - Yamaha DTX-MULTI | Owner's Manual - Page 15
configure your computer correctly. 1 Download the latest version of the DTX-MULTI 12 Extension from the following web page. Save the compressed file in a convenient location and then expand it. http://dtxdrums.yamaha.com NOTE • Ensure that the latest USB MIDI driver is installed on your computer (see - Yamaha DTX-MULTI | Owner's Manual - Page 16
having fun with your DTX-MULTI 12 as soon as possible, this section will begin by explaining the basic way in which the pads can be played using drum sticks (sold separately), and following that, will show how to select various kits (i.e., sets of pad sounds). Pad Names As shown below, numbers - Yamaha DTX-MULTI | Owner's Manual - Page 17
of placing a hand on a struck percussion instrument in order to silence it, and the DTX-MULTI 12 pads support this playing technique. In addition, when multiple sounds have been assigned to a pad, you can use also muting to switch between these sounds for more expressive performances. NOTE • For - Yamaha DTX-MULTI | Owner's Manual - Page 18
Categories Similar voices are grouped together in voice categories. In addition to melodic instruments such as timpani and marimba, you can also select voice categories containing Preset patterns, User patterns, and waves. For more information, refer to the Data List booklet. 18 Owner's Manual - Yamaha DTX-MULTI | Owner's Manual - Page 19
time the pad is struck, or they can alternate between on and off upon successive hits. Details on layers can be found on page 32. ■ Playing by hand The DTX-MULTI 12 features a number of different preset kits suitable for hand percussion - that is, for playing with hands instead of drum sticks. As - Yamaha DTX-MULTI | Owner's Manual - Page 20
sounds that your DTX-MULTI 12 can produce. Patterns numbered eP004 and higher can be freely assigned to pads for use in your own User drum kits. Listening to Demo used for playback of the demo pattern. ≥ P039:Orchestra 3 To stop the demo to a pad, follow the pro- cedure described - Yamaha DTX-MULTI | Owner's Manual - Page 21
Making Your Own Patterns Using the DTX-MULTI 12, you can also create User patterns by recording your own performances. And in the same way as Preset patterns, these User patterns can then be freely assigned to pads and played back. Recording Your Performance as a Pattern Following the steps below - Yamaha DTX-MULTI | Owner's Manual - Page 22
drum kit selected, strike Pad 6 to hear the pattern that you assigned. NOTE • Up to 50 User patterns can be recorded on your DTX-MULTI 12. If an attempt is made to record more than this number, the message "Seq data is not empty" will be displayed and the recording process will end. In such a case - Yamaha DTX-MULTI | Owner's Manual - Page 23
Your Data on a USB Memory Device Data that you have made, such as User kits and User patterns, can be conveniently saved as combined files on a USB memory device. In the following example, we will create a single file containing all of the data created or modified in the various DTX-MULTI 12 setting - Yamaha DTX-MULTI | Owner's Manual - Page 24
permanently damaged. CAUTION • Be sure to always unplug USB memory devices from the DTX-MULTI 12 before you start to play. If you were to accidentally strike a memory device with a drum stick while playing, it could be permanently damaged and all data saved on it could be lost. 24 Owner's Manual - Yamaha DTX-MULTI | Owner's Manual - Page 25
used with your DTX-MULTI 12. If the audio files you wish to use have been recorded with a differ- ent bit depth, please convert them to 16-bit in advance using, for example, the bundled DAW software. For details regarding the conversion method, refer to the DAW software's manual. • Your DTX-MULTI 12 - Yamaha DTX-MULTI | Owner's Manual - Page 26
that the DTX-MULTI 12 is not turned off until this message disappears. If the instrument were to be turned off at this time, data for all User kits could be permanently lost. ≥≥Please≥keep ≥≥power≥on... 11 To hear the imported wave, strike the pad to which it was assigned. 26 Owner's Manual - Yamaha DTX-MULTI | Owner's Manual - Page 27
pads, and external controllers. Each pad has up to four layers (A to D) to which voices can be assigned. Preset voices Waves Preset patterns User patterns Import Import Pattern recording USB TO DEVICE SMF file (Format 0) WAV file AIFF file Signals for controlling the internal tone generator MIDI - Yamaha DTX-MULTI | Owner's Manual - Page 28
items of performance data, such as the strength with which the pad was struck, will be produced. These trigger signals are delivered to a tone generator, which outputs the appropriate sound in response. ■ Built-in Pads (1 to 12) As shown below, each of the DTX-MULTI 12's built-in pads is assigned - Yamaha DTX-MULTI | Owner's Manual - Page 29
with acoustic drums, furthermore, the tone of the sound produced can be influenced by how fast or slow you depress the controller. In addition, drum sounds can be produced without the vibration and mechanical noise typical of acoustic bass-drum pedals. HH65 [Setup] • With the DTX-MULTI 12 turned off - Yamaha DTX-MULTI | Owner's Manual - Page 30
external pads and controllers are processed in an ideal manner. Your DTX-MULTI 12 comes pre-loaded with five Preset trigger setups suitable for many different needs, and you can also create up to ten unique User trigger setups to suit your own individual requirements. ■ Using Optional Pads & Drum - Yamaha DTX-MULTI | Owner's Manual - Page 31
type plays in a different way and is configured using different parameters. ■ Preset Voices As an electronic percussion instrument played by striking pads, the DTX-MULTI 12 comes preloaded with a vast library of drum sounds, such as snares, bass drums, and cymbals, together with a broad spectrum of - Yamaha DTX-MULTI | Owner's Manual - Page 32
shows the same voice assigned to two or more pads, the sounds produced by each will not necessarily be the same. ■ Voice Layers Using the DTX-MULTI 12's Layer function, you can assign a number of different voices to a single pad or external controller. Specifically, this instrument allows up to four - Yamaha DTX-MULTI | Owner's Manual - Page 33
area • Volume of each pad (or layer) • Tuning of each pad • Stereo pan of each pad • Effect settings for each pad etc. *: Voices cannot be assigned to any controller or foot switch already having a function assigned on the Pad Function page (UTIL4-1). VOICE MIDI WAVE PATTERN UTILITY TRIGGER - Yamaha DTX-MULTI | Owner's Manual - Page 34
Note messages to be sent from a single pad in order to play layered or alternating voices using the Layer function. In addition, these MIDI Note messages can also be output via the MIDI OUT connector or USB TO HOST port in order to control another MIDI instrument. In the following example, we will - Yamaha DTX-MULTI | Owner's Manual - Page 35
: OakCustom Cy013: Thin16Eg snare sound cymbal sound C7 108 127 KIT VOICE MIDI WAVE PATTERN UTILITY TRIGGER ■ Using the DTX-MULTI 12 as a MIDI Controller Instead of MIDI Note messages, the DTX-MULTI 12 can be setup to send MIDI Program Change messages, MIDI Control Change messages, and the - Yamaha DTX-MULTI | Owner's Manual - Page 36
Internal Design Effects The effect processor built into your DTX-MULTI 12 applies special audio effects to the output from the tone generator in order to modify and enhance its sound in a wide variety of ways. Normally applied during the final stages of editing, such effects allow you to optimize - Yamaha DTX-MULTI | Owner's Manual - Page 37
to modify how punchy or sustained an audio signal sounds. Multi-band compression, meanwhile, splits the input into three tone. Gentler overall than a flanger, this effect can be put to use in a wider range of situations, and for example, is often used with electric pianos to sweeten their sound - Yamaha DTX-MULTI | Owner's Manual - Page 38
the sound of acoustic environments of varying sizes and constructions. Effect Type Rev Var Description SPX Hall SPX Room SPX Stage R3 Hall R3 Room R3 Plate EarlyRef GateReverb ReverseGate Emulation of hall acoustics using an ✓ ✓ algorithm derived from the classic Yamaha SPX1000 Digital Multi - Yamaha DTX-MULTI | Owner's Manual - Page 39
to set the input-signal level at which the compressor starts to process the sound (i.e., the threshold). Cutoff This parameter is used to set the offset value for the filter's control frequency. Delay This parameter is used to set the delay time in terms of note lengths. DelayC This parameter - Yamaha DTX-MULTI | Owner's Manual - Page 40
parameter is used to set how the feedback sound decays in the used to set how much of the delay sound is used to set the height of the simulated room. HiAtk This parameter is used sound. L/RDpth This parameter is used to set the depth of the left-right panning effect. Lag This parameter is used - Yamaha DTX-MULTI | Owner's Manual - Page 41
guitar amplifiers and the like, this parameter is used to control the high-frequency band. Ratio This parameter is used to set the compression ratio. Release This parameter is used to set the amount of time that elapses until the sound is no longer being compressed. Resonance This parameter is - Yamaha DTX-MULTI | Owner's Manual - Page 42
in memory for reuse. ■ Data Retained by the DTX-MULTI 12 The following types of setting data can be stored in the instrument's internal memory. ● User kits Original drum kits that you have created by assigning voices to pads and external controllers can be stored as User kits in the instrument - Yamaha DTX-MULTI | Owner's Manual - Page 43
setups External USB memory device Data-creating functions • Kit editing • Voice setting • MIDI setting • Trigger setting • Utility setting • Wave editing • Pattern editing Store Save / Load User memory Flash ROM • User kits • User trigger setups • Utility setting • Waves • User patterns UTIL7 - Yamaha DTX-MULTI | Owner's Manual - Page 44
data. ■ Parameter Setting Areas Within your DTX-MULTI 12, PAD UTIL5 HI-HAT The button corresponding to each setting area will light up in green when that area is selected. In the case of the VOICE and MIDI setting areas, the [KIT] button will also light up. UTIL6 MIDI UTIL7 FILE UTIL8 ≥≥FACTORY - Yamaha DTX-MULTI | Owner's Manual - Page 45
] button to open the Store Kit page. KIT≥Store≥to U001:User≥Kit Destination for stored data. VCE3-3 Release=+≥0 VCE3-4 Fc=+≥0≥≥Q=+≥0 In certain cases, a number of additional pages may be accessed from a parameter setting page using the [ENTER] button, which will light up whenever this is possible - Yamaha DTX-MULTI | Owner's Manual - Page 46
KIT setting area, which can be accessed using the [KIT] button. Your DTX-MULTI 12 is preloaded with a rich selection of Preset kits (P001 to P050) for immediate use, and you can also create and save up to 200 of your own drum kits as User kits (U001 to U200). Use the KIT setting area to select and - Yamaha DTX-MULTI | Owner's Manual - Page 47
pattern will stop automatically. • If you select a new drum kit while a preset voice or wave assigned to one if its pads is being played, the corresponding sound will be automatically silenced. • If identical voices are assigned to the same Channel-10 MIDI note numbers in both the newly selected kit - Yamaha DTX-MULTI | Owner's Manual - Page 48
this parameter to select a variation-effect category. Settings Refer to the separate Data List booklet. B Variation type Use this parameter to select a variation-effect type. Settings Refer to the separate Data List booklet. With an effect category and type selected, you can press the [ENTER - Yamaha DTX-MULTI | Owner's Manual - Page 49
type. Settings Refer to the separate Data List booklet. KIT5-2 Chorus Return page KIT5-2 CHO> ≥ChoReturn=≥64 1 1 Chorus return (ChoReturn) Use this parameter to set the level of the return signal from the chorus effect. Settings 0 to 127 MIDI WAVE PATTERN UTILITY TRIGGER Owner - Yamaha DTX-MULTI | Owner's Manual - Page 50
of different ways. Reverb effects are applied to all voices (on all MIDI channels). With the REVERB page (KIT6) displayed, press the [ENTER] button to the separate Data List booklet. KIT6-2 Reverb Return page KIT6-2 REV> ≥RevReturn=≥64 1 1 Reverb return (RevReturn) Use this parameter - Yamaha DTX-MULTI | Owner's Manual - Page 51
as "muting". This technique can be used to delicately change the sound of a performance, and with the DTX-MULTI 12, you can setup muting in advance in order to change or silence sounds when you press a hand down on a pad. KIT7-1 Layer Switch page Using the Layer Switch function, you can apply the - Yamaha DTX-MULTI | Owner's Manual - Page 52
KIT7-4 Hi-hat MIDI Channel page KIT7-4≥≥≥ ≥HH≥MIDI≥ch=10 1 1 Hi-hat MIDI channel (HH MIDI ch) If "MIDI" has been selected on the Hi-hat Function page (KIT7-3), use this parameter to set the MIDI channel for output of MIDI messages generated by the hi-hat controller. Settings 1 to 16 - Yamaha DTX-MULTI | Owner's Manual - Page 53
all of the DTX-MULTI 12's built-in pads. Settings 01 to 12, 13, 13R1, 13R2, 14 to 17, FTSW, HHCL, HHSP, 01 to 12, or all NOTE • All information set for the pad in question and the corresponding layers (i.e., note numbers) will be copied. • Certain factors may require that output MIDI note numbers - Yamaha DTX-MULTI | Owner's Manual - Page 54
Store operation as described on page 45 to store the currently selected drum kit as a different User kit. KIT8-4 Initialize Pad page From the Initialize Pad page, you can initialize individual pads from the currently selected drum kit. With this page displayed, press the [ENTER] button to open the - Yamaha DTX-MULTI | Owner's Manual - Page 55
setting area is subdivided into five different sections (VCE1 to VCE5). Use the [B]/[C] buttons to navigate between these sections. If a section contains parameter pad and/or layer to be modified. Please note that when you store changes made to parameters within the VOICE setting area, the entire drum - Yamaha DTX-MULTI | Owner's Manual - Page 56
be assigned to MIDI note numbers. D Voice number: Voice name Use these parameters to select a preset voice, pattern, or wave from the category indicated by 3. Settings Refer to the separate Data List booklet. E Pattern playback mode If a pattern has been assigned to the pad, use this parameter - Yamaha DTX-MULTI | Owner's Manual - Page 57
in question. Drum sounds and waves (i.e., imported audio files): 1 2 VCE2-1 Tune=+≥0.00 3 Instrument sounds (i.e., piano, guitar, etc.): 1 2 VCE2-1 ≥≥≥Note=C#-1 4 Patterns: 1 VCE2-1≥-º¡≥Transpose=+≥0 5 1 Pad number Use this parameter to select the number of the pad or MIDI note to - Yamaha DTX-MULTI | Owner's Manual - Page 58
messages are not sent for pads and layers for which "off" is selected on the MIDI area's Receive Key-Off page (MIDI1-5). Therefore, the release-time setting has no effect in such a case. VCE3-4 Filter page 1 2 VCE3-4 Fc=+≥0≥≥Q=+≥0 3 4 1 Pad number Settings 01 to 12, 13, 13R1, 13R2, 14 - 17 - Yamaha DTX-MULTI | Owner's Manual - Page 59
the layer indicated by 2 will be sent to the Chorus effect. Settings 0 to 127 NOTE • The chorus send level for the entire kit can be adjusted on the KIT area's Chorus Send page (KIT3-1). VCE4 ≥≥EFFECT≥SEND In the EFFECT SEND section, you can adjust the degree to which the DTX-MULTI 12's built - Yamaha DTX-MULTI | Owner's Manual - Page 60
Layer number Settings A, B, C, or D C Mono/Poly Use this parameter to specify how overlapping sounds from the same pad or layer will be treated. • mono......... When two overlapping sounds are produced by striking the same pad, the latter sound the earlier sound is silenced. earlier sound is - Yamaha DTX-MULTI | Owner's Manual - Page 61
MIDI Setting Area (MIDI) Reference KIT VOICE MIDI WAVE This section describes the MIDI setting area, which can be accessed using the [MIDI] button. In this area, you can set MIDI-related parameters on an individual-kit basis. In addition, layer settings for each pad (i.e., the number of layers - Yamaha DTX-MULTI | Owner's Manual - Page 62
, or stop NOTE • "note" type messages are sent simultaneously to the DTX-MULTI 12's internal tone generator and to connected external MIDI devices. • Message types other than "note" are sent only to connected external MIDI devices. The parameter-setting pages that can be accessed within the MIDI1 - Yamaha DTX-MULTI | Owner's Manual - Page 63
. The following are typical examples of how these modes can be used. ● Playing just one sound when a pad is struck Select "stack" on the Playing Mode page (MIDI1-1), and assign a MIDI note to Layer A only on the MIDI Note page (MIDI1-2). Layer A B C D Note number D1 off off off ● Playing two - Yamaha DTX-MULTI | Owner's Manual - Page 64
Pad number Settings 01 to 12, 13, 13R1, 13R2, 14 to 17, FTSW, HHCL, or HHSP B Layer number Settings A, B, C, or D C Receive key-off (RcvKeyOff) Use this parameter to set whether or not MIDI Note Off messages will be sent for the layer indicated by 2. Most drum voices are one-shot sounds that - Yamaha DTX-MULTI | Owner's Manual - Page 65
can be setup on your DTX-MULTI 12. If there is no need for a pad to be assigned to a trigger alternate group, you can set this parameter to "off". Settings off or 1 to 32 NOTE • If no note numbers have been assigned to any of the pad's layers (A to D) on the MIDI Note page (MIDI1-2), this setting - Yamaha DTX-MULTI | Owner's Manual - Page 66
be set. Settings 1 to 16 B External MIDI switch (MIDI Switch) Use this parameter to indicate whether MIDI messages produced by playing pads and changing drum kits should be sent to an external tone generator via the MIDI OUT connector on the rear panel or the USB TO HOST port on the side panel - Yamaha DTX-MULTI | Owner's Manual - Page 67
(MIDI3-1), this setting will be displayed as "---" and modification will not be possible. MIDI3-3 Pan page MIDI3-3 Ch≥1 1 ≥≥≥≥Pan=≥C 2 1 MIDI channel (Ch) Settings 1 to 16 B Pan Use this parameter to set the pan value to be sent whenever the current kit is selected. Settings L63 to C to - Yamaha DTX-MULTI | Owner's Manual - Page 68
. Settings 0 to 127 MIDI3-8 CC Number & Value page MIDI3-8 Ch≥1 1 CCNo=off/Val=≥≥0 2 3 1 MIDI channel (Ch) Settings 1 to 16 B Control change number (CCNo) Use this parameter to set the type (or number) of MIDI Control Change message to be sent whenever the current kit is selected. No - Yamaha DTX-MULTI | Owner's Manual - Page 69
using the [WAVE] button. Your DTX-MULTI 12 can be used to import AIF and WAV audio files from a wide range of sources. These files (referred to as "waves") can then be used pages. In certain cases, a number of additional pages may be accessed from a parameter setting page, also using the lit [ENTER] - Yamaha DTX-MULTI | Owner's Manual - Page 70
) to select and play waves. Only waves that have been saved in the DTX-MULTI 12's internal memory by importing (see page 72) will be available for selection on this page. In other words, audio files stored on a USB memory device are not immediately made available for selection simply by plugging in - Yamaha DTX-MULTI | Owner's Manual - Page 71
. In other words, no data in front of this point Use this parameter to specify a five-digit position value for the selected trim point. The [B]/[C] buttons can be used to move the cursor between digits, and the [-/DEC] and [+/INC] buttons can be used a USB memory device into the DTX-MULTI 12's - Yamaha DTX-MULTI | Owner's Manual - Page 72
in the DTX-MULTI 12's internal USB memory device into the DTX-MULTI 12's USB memory device's root directory, using a computer to move it if necessary. 2 Plug the USB memory device into the instrument's USB Use the [-/DEC] and [+/INC] buttons to select the pad pad at this time. IMPORT ≥PadAssign=¡£Ω¡ Pad - Yamaha DTX-MULTI | Owner's Manual - Page 73
maximize the amount of unused wave memory. In order to do this, the content of the DTX-MULTI 12's internal wave memory is rearranged to make more memory available. Optimization can be an effective way wish to proceed, press the [ENTER] button once again. MIDI WAVE PATTERN UTILITY TRIGGER Owner - Yamaha DTX-MULTI | Owner's Manual - Page 74
User patterns that can be freely recorded and edited (U001 to U050). Use the PATTERN area to record and edit these patterns. NOTE • Parameter setting pages from the COMMON section (PTN2), the MIDI cases, a number of additional pages may be accessed from a parameter setting page, also using the - Yamaha DTX-MULTI | Owner's Manual - Page 75
Use these parameters to select the pattern to be played, recorded, or processed. Settings With " P" (Preset pattern) selected: 001 to 128 With " U" (User pattern) selected: 001 to 050 Whenever a demo whether the pattern is played using the [A] button or by striking a pad to which it has been - Yamaha DTX-MULTI | Owner's Manual - Page 76
12's internal tone generator and external MIDI devices. With the MIDI page (PTN3) displayed, press the [ENTER] button to access its seven parameter-setting pages (PTN3-1 to PTN3-7). You can use the [B]/[C] buttons to navigate between these pages. NOTE • This section can be used only with User - Yamaha DTX-MULTI | Owner's Manual - Page 77
-1), this setting will be displayed as "---" and modification will not be possible. To select a DTX-MULTI 12 drum kit, set parameters for MIDI channel 10 as follows. • Preset kits: MSB = 125, LSB = 000, PC = Preset kit number • User kits between U001 and U100: MSB = 125, LSB = 001, PC = 001 to 100 - Yamaha DTX-MULTI | Owner's Manual - Page 78
If you change the chorus send level for MIDI channel 10, the setting on the Chorus Send section, you can quantize the currently selected User pattern, import SMF files, and perform . Settings When time signature from PTN1 or for recording is 3/8, 6/8, 9/8, 12/8, or 15/8: ˙3 16 th note triplets - Yamaha DTX-MULTI | Owner's Manual - Page 79
User pattern is cleared as described above, its data is completely erased from the instrument's pattern memory. Be sure, therefore, to always save important data on a USB used. • The channel-specific MIDI settings of Merge pattern 1 are set as those of the merged pattern. In the case, however, of MIDI - Yamaha DTX-MULTI | Owner's Manual - Page 80
the Import SMF page, you can import a standard MIDI file (SMF) into the DTX-MULTI 12 from a USB memory device for use as a User pattern. SMFs contain sequenced MIDI data and have a ".mid" file extension. It should be noted that the DTXMULTI 12 supports Format 0 SMFs only. PTN4-7 JOB> ≥≥≥Import≥SMF - Yamaha DTX-MULTI | Owner's Manual - Page 81
DTX-MULTI 12 memory for User used in percentage format. B Used memory / Total memory (KB) This indicates separately the amount of memory used and the total memory in kilobyte (KB) units. PATTERN Setting Area (PTN) Reference KIT VOICE MIDI WAVE PATTERN UTILITY TRIGGER Owner's Manual - Yamaha DTX-MULTI | Owner's Manual - Page 82
setting page, also using the lit [ENTER] button. Furthermore, you can press the [EXIT] button to move back towards the top of the setting area. Sections UTIL1 GENERAL UTIL2 CLICK UTIL3 ≥≥≥MASTER≥EQ UTIL4 PAD UTIL5 HI-HAT UTIL6 MIDI UTIL7 FILE UTIL8 ≥≥FACTORY≥SET Parameter-setting pages - Yamaha DTX-MULTI | Owner's Manual - Page 83
KIT VOICE MIDI UTIL1 GENERAL 127 1 1 Master volume Use this parameter to set the master volume of the instrument's internal tone generator. If a small DTX-MULTI 12 is turned on. Patterns are identified using a category (eP for Preset, eU for User) and a number, and you can move the cursor using - Yamaha DTX-MULTI | Owner's Manual - Page 84
drum and musical instrument sounds. Settings 1 to 127 UTIL2-2≥≥ ≥≥≥Volume=127 1 1 Click-track master volume Use sound to be used, the volume, and where the click track will be output. MIDI for pattern recording is 3/8, 6/8, 9/8, 12/8, or only, and in such a case, "phones" should be - Yamaha DTX-MULTI | Owner's Manual - Page 85
. UTIL2-5-1 Click-track MIDI In page UTIL2-5-1 ≥≥MIDI≥IN=off 1 1 MIDI IN Use this parameter to specify whether or not click-track sounds are to be produced based on MIDI Note On messages received via the MIDI IN connector. When set to "on", the DTX-MULTI 12 operates as follows: • A click - Yamaha DTX-MULTI | Owner's Manual - Page 86
an external source, playback will occur at the DTX-MULTI 12's current tempo setting (see page 91). UTIL3 MASTER EQ Master Equalization UTIL3 ≥≥≥MASTER≥EQ In the MASTER EQ section, you can adjust the master equalization parameters that control the tone of all preset voices, patterns, and waves - Yamaha DTX-MULTI | Owner's Manual - Page 87
12 to +0 to +12 C Frequency (F) Use using (Q) Use this parameter tone will change markedly tone will change gradually around the center frequency. Settings 0.1 to 12.0 + Q = 0.1 Q = 12 using Use this parameter to select the master-EQ frequency band to be set. Settings low or high B Shape Use Use - Yamaha DTX-MULTI | Owner's Manual - Page 88
pad or external controller can be used to tap the tempo. • clickOn/Off......... The click track will be turned on or off. • CC01 to CC95 .... A MIDI Control Change message will be sent to the internal tone generator and connected external MIDI control- change value cannot be specified in this case. - Yamaha DTX-MULTI | Owner's Manual - Page 89
these rim pads will be disabled. When they are struck, the DTX-MULTI 12 behaves in the same way as if the corresponding main pads (7 sounds with the hi-hat controller. High values may, however, result in splash sounds being unintentionally produced when, for example, you depress the hihat controller - Yamaha DTX-MULTI | Owner's Manual - Page 90
on this page, the DTX- MULTI 12's internal tone generator can produce sound in response to MIDI messages received via the MIDI IN connector and the USB TO HOST port; furthermore, MIDI messages produced by pads, patterns, and external controllers will be output via the MIDI OUT connector. Settings - Yamaha DTX-MULTI | Owner's Manual - Page 91
UTILITY Setting Area (UTIL) UTIL6-6 MIDI Sync page UTIL6-8 Sequencer Control page UTIL6-6≥≥≥ ≥MIDI≥Sync=int 1 1 MIDI synchronization (MIDISync) Use this parameter to specify whether patterns and the click track are to play at the tempo set for the DTX-MULTI 12 or are to be synchronized - Yamaha DTX-MULTI | Owner's Manual - Page 92
(UTIL) UTIL6-11 MIDI Merge page UTIL6-11≥≥ ≥≥≥Merge=off 1 1 MIDI merge The MIDI Merge function allows you to mix MIDI messages received via the MIDI IN connector with performance data produced by playing the DTX-MULTI 12, and to output this mixed MIDI data via the MIDI OUT connector. Set - Yamaha DTX-MULTI | Owner's Manual - Page 93
of special directories that are created as follows within a USB memory device when it is formatted for use on the Format page (UTIL7-5). Please note that the DTX-MULTI 12 does not display this directory structure on-screen. \YAMAHA DTXMULTI ALL ALLKIT ALLWAV ALLPTN ALLTRG UTL All AllKit AllWave - Yamaha DTX-MULTI | Owner's Manual - Page 94
DTX-MULTI 12. 2 Navigate to the Load File page (UTIL7-2) and press the [ENTER] button. The Type page (UTIL7-2-1) will open. UTIL7-2-1≥ Type=All File type The Type parameter specifies the types of file to be loaded. • All All user data - i.e., all User when loading a single drum kit, you first - Yamaha DTX-MULTI | Owner's Manual - Page 95
or the DTXMULTI 12 while data is being loaded. Failure to observe this precaution can lead to the memory device or the DTX-MULTI 12 being permanently damaged. When the data has been loaded, the display will return to the Load File page (UTIL7-2). UTIL7-2≥≥≥ ≥≥≥Load≥File MIDI WAVE PATTERN - Yamaha DTX-MULTI | Owner's Manual - Page 96
of the DTX-MULTI 12. 2 Navigate to the Rename File page (UTIL7-3) and press the [ENTER] button to open the Type page (UTIL7-3-1). UTIL7-3-1≥ Type=All File type Use the Type parameter to indicate the type of file to be renamed. • All All user data - i.e., all User kits, all User waves, all - Yamaha DTX-MULTI | Owner's Manual - Page 97
the side of the DTX-MULTI 12. 2 Navigate to the Delete File page (UTIL7-4) and press the [ENTER] button. The Type page (UTIL7-4-1) will open. UTIL7-4-1≥ Type=All File type The Type parameter specifies the types of file to be deleted. • All All user data - i.e., all User kits, all waves, all - Yamaha DTX-MULTI | Owner's Manual - Page 98
USB memory device, it must not be unplugged from the USB TO DEVICE port and the memory device and the DTX-MULTI 12 USB FACTORY SET Instrument Reset UTIL8 ≥≥FACTORY≥SET In the FACTORY SET section, you can restore all of the DTXMULTI 12's user data (i.e., all User kits, waves, User patterns, User Factory - Yamaha DTX-MULTI | Owner's Manual - Page 99
as whether sticks or hands are used, and in the case of external pads, the design of the pads themselves. The TRIGGER setting area allows you to optimize each pad's trigger signals for processing by the DTX-MULTI 12 and to save these settings as trigger setup data. CAUTION • Be sure to store any - Yamaha DTX-MULTI | Owner's Manual - Page 100
that also supports finger-tip playing. U01 to U10 User triggers. PAD Pad Setup TRG2 PAD In the PAD section, you can set parameters affecting the sensitivity, output, and other characteristics of each of your DTX-MULTI 12's built-in pads and of external pads connected via the PAD jacks. With the PAD - Yamaha DTX-MULTI | Owner's Manual - Page 101
Velocity curve (VelCurve) Use this parameter to select a velocity curve for the selected pad(s). A velocity curve determines how the relative strength of playing affects the signal produced. For example, with the "loud2" velocity curve shown below, relatively loud sounds (i.e., high velocities) can - Yamaha DTX-MULTI | Owner's Manual - Page 102
or beater strikes a pad, it may rebound and strike again, producing a second trigger signal and causing a voice to sound twice. The term "double trigger" is used to refer to this phenomenon. A reject-time setting is used to prevent double triggers from occurring, and the DTX-MULTI 12 will reject any - Yamaha DTX-MULTI | Owner's Manual - Page 103
Use this approach when pad sensitivity is set to allow playing by hand and, for example, striking of Pad 4 also results in Pad 5 producing a sound NOTE • If this level is set too high, Pad 5 may not produce any sound when struck relatively softly together with Pad 4. 1 TRG2-2-2 Level=≥28%(04) 32 4 - Yamaha DTX-MULTI | Owner's Manual - Page 104
page, you can assign a name of up to 12 characters in length to the current trigger setup. Use the [B]/[C] buttons to move the flashing cursor to Whenever trigger-setup data is copied, all of the trigger-setup data for the pad indicated by 2 will be replaced. Be sure, therefore, to use the [STORE] - Yamaha DTX-MULTI | Owner's Manual - Page 105
MIDI devices using your DTX-MULTI 12. (See page 66.) ● Ensure that a pad function has not been assigned to the pads in question. To do so, open the Pad Function page for each of the pads ([UTILITY] → UTIL4 → UTIL4-1) and ensure that the Func parameter is set to "off". No internal or external sound - Yamaha DTX-MULTI | Owner's Manual - Page 106
lightly. (See page 64.) ● Ensure that you are using only the recommended Yamaha external pads. Products from other manufacturers can output excessively large signals. Check the following if sounds output from the DTX-MULTI 12 appear to be distorted. ● Ensure that effects have been set appropriately - Yamaha DTX-MULTI | Owner's Manual - Page 107
on the DT20 or other drum trigger. Check the following if closed hi-hat sounds cannot be played. ● Open the Pad Type page ([SHIFT] + [UTILITY] → TRG2 → TRG2-1) and ensure that a suitable type has been selected. If you are using a Yamaha RHH130 or RHH135 hi-hat controller, the pad type must be set to - Yamaha DTX-MULTI | Owner's Manual - Page 108
Choose user either for use with the instrument USB memory device fails to respond. No wave data. This message is displayed to you are attempting to perform a wave management task even though no wave data exists. No unused MIDI note. This message is displayed upon execution of a copy-pad - Yamaha DTX-MULTI | Owner's Manual - Page 109
, making it impossible to perform record new patterns, perform associated management tasks, or load data from a USB memory device. To free up some of this sequence memory, delete unneeded User patterns. This message is displayed if a problem occurred while writing data to the instrument's internal - Yamaha DTX-MULTI | Owner's Manual - Page 110
Specifications Pad section Built-in pads 12 External inputs 5 (three-zone x 1; monaural x 4) Tone generator Maximum polyphony 64 notes Wave memory Voices 100 MB (16-bit linear conversion) Drum and percussion: 1,061 Keyboard: 216 Drum kits Preset: 50 User-defined: 200 Effects Variation x - Yamaha DTX-MULTI | Owner's Manual - Page 111
Kit 54 Initialize Pad 54 Input level indicator 100 Instrument Reset 98 J Jack 9 K KIT 46 Kit 32 Kit category 47 Kit name 47 Kit number 47 Kit Volume 47 L Layer 32 Layer Switch 51 Level 101 Load 42, 94 Local Control 13, 90 LocalCtrl 90 Loop 75 Owner's Manual 111 Appendix - Yamaha DTX-MULTI | Owner's Manual - Page 112
100 Trigger velocity 64 Trim point 71 Trimming 71 Tune 57 Tuning 57 Turn off all sound 8 U USB memory device 11, 23 USB TO DEVICE port 9, 11 USB TO HOST port 9, 12, 13 Used memory 73, 81, 98 User kit 17, 22, 32, 42 User pattern 21, 31, 42 User trigger 30, 42, 100 UTILITY 82 112 Owner - Yamaha DTX-MULTI | Owner's Manual - Page 113
V Val (Control change value) ...... 65, 68 Var (Variation send level) .. 59, 68, 77 limit 64 VOICE 55 Voice 31 Voice category 56 Voice Layer 32 Voice name 56 Voice number 56 Voice Volume 57 Volume (Click-track 84 Volume (kit 47 Volume (MIDI 77 Volume (Voice 57 VOLUME dial 8 VOLUME knob ( - Yamaha DTX-MULTI | Owner's Manual - Page 114
MEMO 114 Owner's Manual - Yamaha DTX-MULTI | Owner's Manual - Page 115
Yamaha representative or the authorized distributor listed below. Pour plus de détails sur les produits, veuillez-vous adresser à Yamaha ou au distributeur le plus proche de vous figurant dans la liste Yamaha Yamaha Yamaha av Yamaha Scandinavia CHINA Yamaha Music & Electronics ( Yamaha Yamaha Yamaha - Yamaha DTX-MULTI | Owner's Manual - Page 116
Yamaha Electronic Drums web site: http://www.yamaha.co.jp/english/product/drums/ed Yamaha Manual Library http://www.yamaha.co.jp/manual/ U.R.G., Pro Audio & Digital Musical Instrument Division, Yamaha Corporation © 2009 Yamaha Corporation WR85360 907PO???.?-01A0 Printed in China
-
 1
1 -
 2
2 -
 3
3 -
 4
4 -
 5
5 -
 6
6 -
 7
7 -
8
-
9
-
10
-
11
-
12
-
13
-
14
-
15
-
16
-
17
-
18
-
19
-
20
-
21
-
22
-
23
-
24
-
25
-
26
-
27
-
28
-
29
-
30
-
31
-
32
-
33
-
34
-
35
-
36
-
37
-
38
-
39
-
40
-
41
-
42
-
43
-
44
-
45
-
46
-
47
-
48
-
49
-
50
-
51
-
52
-
53
-
54
-
55
-
56
-
57
-
58
-
59
-
60
-
61
-
62
-
63
-
64
-
65
-
66
-
67
-
68
-
69
-
70
-
71
-
72
-
73
-
74
-
75
-
76
-
77
-
78
-
79
-
80
-
81
-
82
-
83
-
84
-
85
-
86
-
87
-
88
-
89
-
90
-
91
-
92
-
93
-
94
-
95
-
96
-
97
-
98
-
99
-
100
-
101
-
102
-
103
-
104
-
105
-
106
-
107
-
108
-
109
-
110
-
111
-
112
-
113
-
114
-
115
-
116
 |
 |
Owner’s Manual
EN