Adaptec 3200S User Guide - Page 39
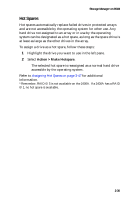
Creating a Multilevel RAID, File > Set System Config, RAID > Create
 |
UPC - 760884136430
View all Adaptec 3200S manuals
Add to My Manuals
Save this manual to your list of manuals |
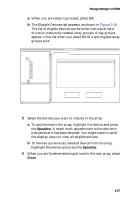
Page 39 highlights
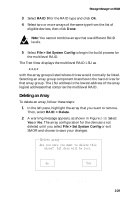
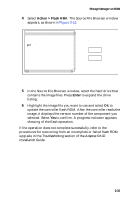
Storage Manager on ROM 5 If you are creating a RAID 1 array, the RAID 1 Build Option window appears, as shown in Figure 2-17. RAID 1 arrays are built by copying the existing data from one device to the other. Select the direction for the copy, then select Ok. RAID 1 Build Option: ( ) Copy from (1,2,0,0) to (1,0,12,0) ( ) Copy from (1,0,12,0) to (1,2,0,0) Ok Cancel Figure 2-17. RAID 1 Build Option Window 6 Select File > Set System Config to start the build process. The build process begins for the array you created. If you created multiple arrays, they are built serially in the order they were defined. Alternatively, you can exit SMOR. Upon exiting, you are prompted to save the configuration changes. If you save, the build process begins for any arrays you defined. For large redundant arrays, the build process can take several hours to complete. You can exit SMOR and perform other activities on the system while the build continues. An array being built can be accessed during the build process. If you exit SMOR and you want to monitor the progress of the build operation, you can use the Storage Manager Array Group Information window. See Array Groups on page 3-12 for additional information. Creating a Multilevel RAID Creating a multilevel RAID (RAID 0/1 or 0/5) is similar to creating a normal RAID 1 or RAID 5 array group. To create a RAID 0/1 or RAID 0/5 multilevel RAID, follow these steps: 1 Create and build your array groups as described in Creating an Array on page 2-26. Do not initiate the build process on any arrays that you intend to use in a multilevel RAID. 2 After you have created your initial array groups, select RAID > Create again. 2-28
-
 1
1 -
2
-
3
-
4
-
5
-
6
-
7
-
8
-
9
-
10
-
11
-
12
-
13
-
14
-
15
-
16
-
17
-
18
-
19
-
20
-
21
-
22
-
23
-
24
-
25
-
26
-
27
-
28
-
29
-
30
-
31
-
32
-
33
-
 34
34 -
 35
35 -
 36
36 -
 37
37 -
 38
38 -
 39
39 -
 40
40 -
 41
41 -
 42
42 -
 43
43 -
 44
44 -
45
-
46
-
47
-
48
-
49
-
50
-
51
-
52
-
53
-
54
-
55
-
56
-
57
-
58
-
59
-
60
-
61
-
62
-
63
-
64
-
65
-
66
-
67
-
68
-
69
-
70
-
71
-
72
-
73
-
74
-
75
-
76
-
77
-
78
-
79
-
80
-
81
-
82
-
83
-
84
-
85
-
86
-
87
-
88
-
89
-
90
-
91
-
92
-
93
-
94
-
95
-
96
-
97
-
98
-
99
-
100
-
101
-
102
-
103
-
104
-
105
-
106
-
107
-
108
-
109
-
110
-
111
-
112
-
113
-
114
-
115
-
116
-
117
-
118
-
119
-
120
-
121
-
122
-
123
-
124
-
125
-
126
-
127
-
128
-
129
-
130
-
131
-
132
-
133
-
134
-
135
 |
 |
