Adaptec 3200S User Guide - Page 45
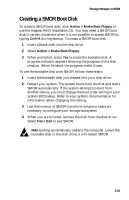
Creating a SMOR Boot Disk
 |
UPC - 760884136430
View all Adaptec 3200S manuals
Add to My Manuals
Save this manual to your list of manuals |
Page 45 highlights
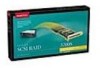
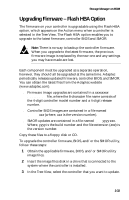
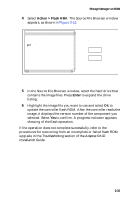
Storage Manager on ROM Creating a SMOR Boot Disk To create a SMOR boot disk, click Action > Make Boot Floppy or use the Adaptec RAID Installation CD. You may need a SMOR boot disk in certain situations when it is not possible to access SMOR by typing Ctrl+A during startup. To create a SMOR boot disk 1 Insert a blank disk into the disk drive. 2 Select Action > Make Boot Floppy. 3 When prompted, select Yes to create the bootable disk. A progress indicator appears showing the progress of the disk creation. When finished, the progress meter closes. To use the bootable disk with SMOR, follow these steps: 1 Insert the bootable disk you created into your disk drive. 2 Restart your system. The system boots from the disk and starts SMOR automatically. If the system attempts to boot from another device, you must change the boot order setting in your system BIOS setup. Refer to your system documentation for information about changing this setting. 3 Use this version of SMOR to perform whatever tasks are necessary to configure your storage subsystem. 4 When you are finished, remove the disk from the disk drive. Select File > Exit to exit SMOR. Note: Exiting automatically restarts the computer. Leave the bootable disk in the disk drive, it will restart SMOR. 2-34
-
 1
1 -
2
-
3
-
4
-
5
-
6
-
7
-
8
-
9
-
10
-
11
-
12
-
13
-
14
-
15
-
16
-
17
-
18
-
19
-
20
-
21
-
22
-
23
-
24
-
25
-
26
-
27
-
28
-
29
-
30
-
31
-
32
-
33
-
34
-
35
-
36
-
37
-
38
-
39
-
 40
40 -
 41
41 -
 42
42 -
 43
43 -
 44
44 -
 45
45 -
 46
46 -
 47
47 -
 48
48 -
 49
49 -
 50
50 -
51
-
52
-
53
-
54
-
55
-
56
-
57
-
58
-
59
-
60
-
61
-
62
-
63
-
64
-
65
-
66
-
67
-
68
-
69
-
70
-
71
-
72
-
73
-
74
-
75
-
76
-
77
-
78
-
79
-
80
-
81
-
82
-
83
-
84
-
85
-
86
-
87
-
88
-
89
-
90
-
91
-
92
-
93
-
94
-
95
-
96
-
97
-
98
-
99
-
100
-
101
-
102
-
103
-
104
-
105
-
106
-
107
-
108
-
109
-
110
-
111
-
112
-
113
-
114
-
115
-
116
-
117
-
118
-
119
-
120
-
121
-
122
-
123
-
124
-
125
-
126
-
127
-
128
-
129
-
130
-
131
-
132
-
133
-
134
-
135
 |
 |
