Asus AP1720-E1 User Guide - Page 54
Hold the outer side of the HDD fan cage and hook the two side tabs
 |
View all Asus AP1720-E1 manuals
Add to My Manuals
Save this manual to your list of manuals |
Page 54 highlights
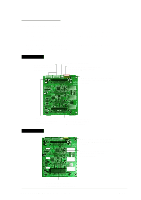
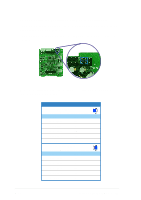
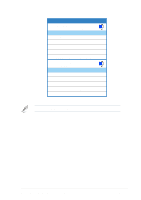
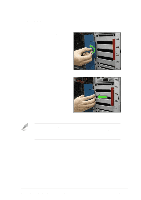
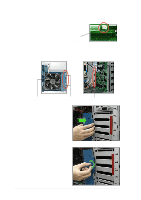
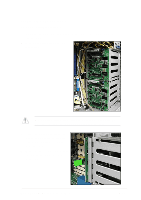
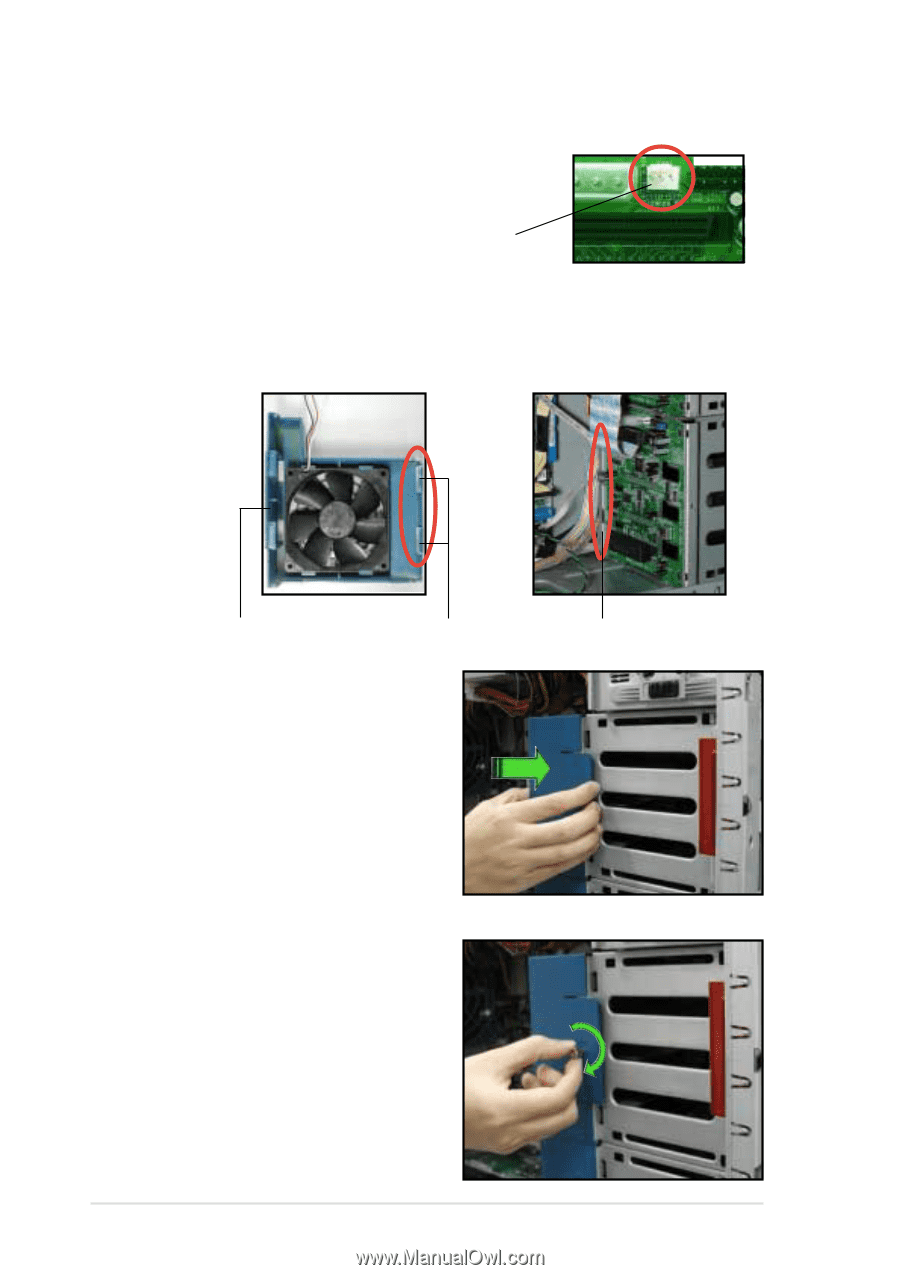
To re-install the HDD fan: 1. Re-connect the 3-pin fan cable to the fan connector on the backplane. Fan connector on backplane (FAN1) 2. Hold the outer side of the HDD fan cage and hook the two side tabs to the inner edge of the drive cage. Make sure that the system cables are not caught up when you place the HDD fan. Outer side of fan cage Side tabs Inner edge of drive cage 3. Push the outer edge of the fan cage sideways to fit it to the drive cage. You hear a click when the fan cage correctly fits in place. 4. Secure the fan cage with the thumb screw. 2-38 Chapter 2: Hardware setup
-
 1
1 -
2
-
3
-
4
-
5
-
6
-
7
-
8
-
9
-
10
-
11
-
12
-
13
-
14
-
15
-
16
-
17
-
18
-
19
-
20
-
21
-
22
-
23
-
24
-
25
-
26
-
27
-
28
-
29
-
30
-
31
-
32
-
33
-
34
-
35
-
36
-
37
-
38
-
39
-
40
-
41
-
42
-
43
-
44
-
45
-
46
-
47
-
48
-
 49
49 -
 50
50 -
 51
51 -
 52
52 -
 53
53 -
 54
54 -
 55
55 -
 56
56 -
 57
57 -
 58
58 -
 59
59 -
60
-
61
-
62
-
63
-
64
-
65
-
66
-
67
-
68
-
69
-
70
-
71
-
72
-
73
-
74
-
75
-
76
-
77
-
78
 |
 |
Chapter 2:
Hardware setup
2-38
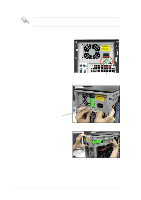
To re-install the HDD fan:
1.
Re-connect the 3-pin fan cable to the fan
connector on the backplane.
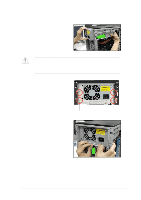
3.
Push the outer edge of the fan
cage sideways to fit it to the drive
cage. You hear a click when the
fan cage correctly fits in place.
Side tabs
Outer side of fan cage
Inner edge of drive cage
2.
Hold the outer side of the HDD fan cage and hook the two side tabs to
the inner edge of the drive cage. Make sure that the system cables are
not caught up when you place the HDD fan.
4.
Secure the fan cage with the
thumb screw.
Fan connector on
backplane (FAN1)