Asus AP1720-E1 User Guide - Page 71
Installing an IDE drive cage
 |
View all Asus AP1720-E1 manuals
Add to My Manuals
Save this manual to your list of manuals |
Page 71 highlights
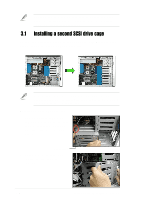
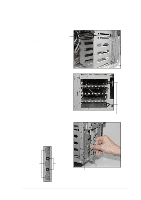
3.2 Installing an IDE drive cage Perform this installation if you wish to upgrade your 4-SCSI configuration system (AS4 model) to a combination 4-SCSI/4-IDE configuration. 4-SCSI configuration 4-SCSI/4-IDE configuration Clear the space under the first SCSI drive cage. Make sure that the pre-connected cables are properly routed so they do not get in the way when you install the second drive cage. To install an IDE drive cage: 1. Position the drive cage into the bay with the screw hole tab on top and facing out. 2. Carefully slide the drive cage toward the front panel until it fits in place. Screw hole ASUS AP1720-E1 barebone server 3-5
-
 1
1 -
2
-
3
-
4
-
5
-
6
-
7
-
8
-
9
-
10
-
11
-
12
-
13
-
14
-
15
-
16
-
17
-
18
-
19
-
20
-
21
-
22
-
23
-
24
-
25
-
26
-
27
-
28
-
29
-
30
-
31
-
32
-
33
-
34
-
35
-
36
-
37
-
38
-
39
-
40
-
41
-
42
-
43
-
44
-
45
-
46
-
47
-
48
-
49
-
50
-
51
-
52
-
53
-
54
-
55
-
56
-
57
-
58
-
59
-
60
-
61
-
62
-
63
-
64
-
65
-
 66
66 -
 67
67 -
 68
68 -
 69
69 -
 70
70 -
 71
71 -
 72
72 -
 73
73 -
 74
74 -
 75
75 -
 76
76 -
77
-
78
 |
 |
3-5
ASUS AP1720-E1 barebone server
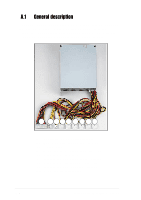
3.2
Installing an IDE drive cage
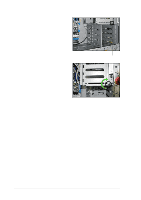
Perform this installation if you wish to upgrade your 4-SCSI configuration
system (AS4 model) to a combination 4-SCSI/4-IDE configuration.
4-SCSI configuration
4-SCSI/4-IDE configuration
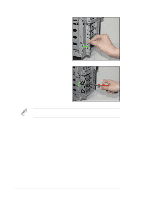
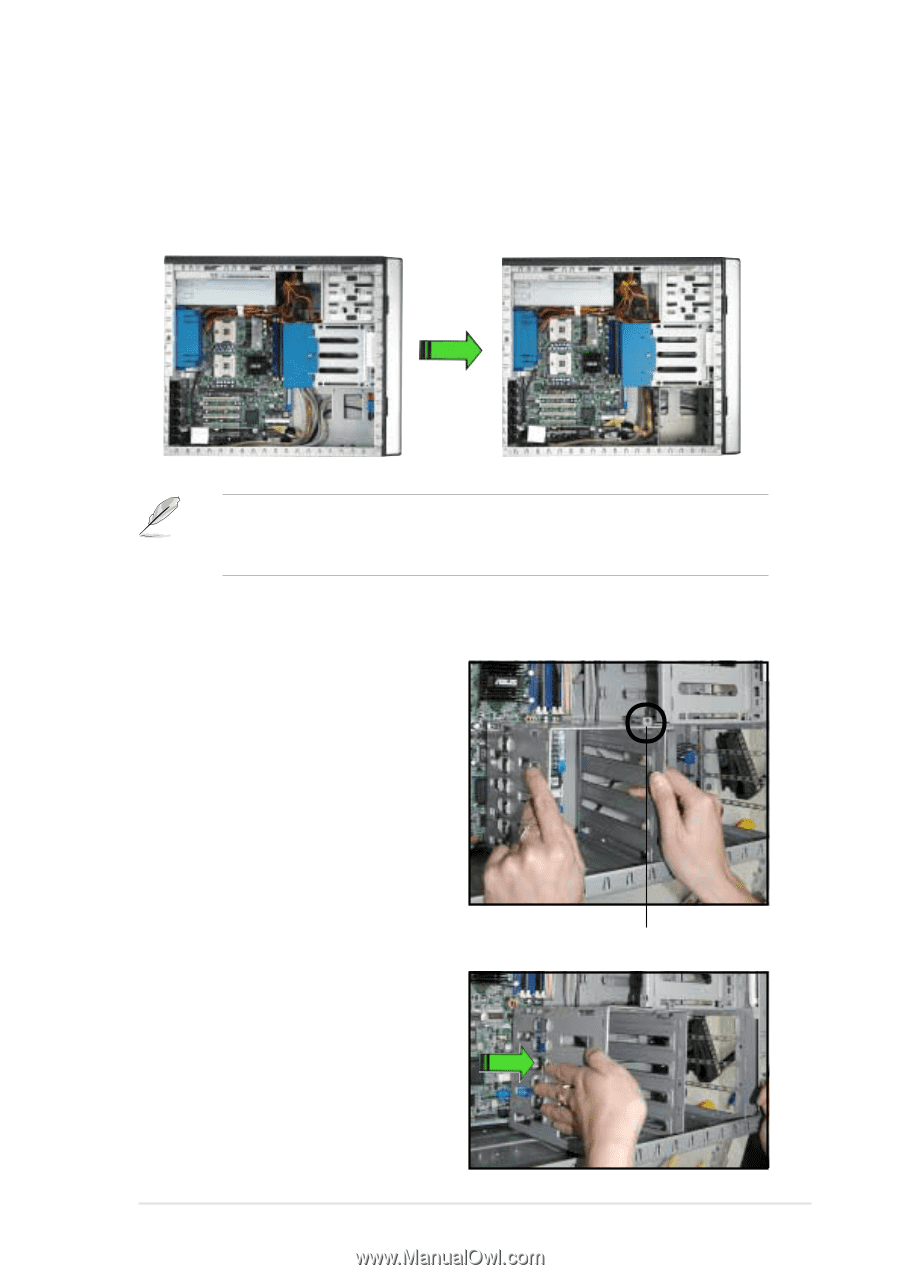
To install an IDE drive cage:
1.
Position the drive cage into the
bay with the screw hole tab on top
and facing out.
Clear the space under the first SCSI drive cage. Make sure that the
pre-connected cables are properly routed so they do not get in the way
when you install the second drive cage.
2.
Carefully slide the drive cage
toward the front panel until it fits
in place.
Screw hole