Asus AP1720-E1 User Guide - Page 60
Floppy disk drive
 |
View all Asus AP1720-E1 manuals
Add to My Manuals
Save this manual to your list of manuals |
Page 60 highlights
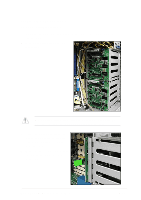
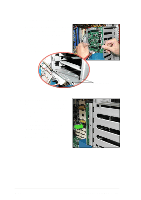
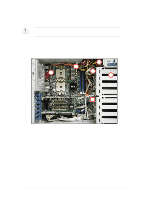
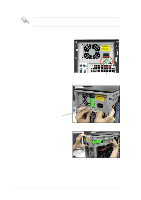
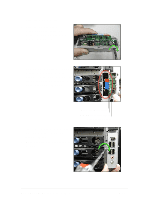
2.10.5 Floppy disk drive You need to remove the front panel assembly before you can remove the floppy disk drive. Refer to section "2.5.1 Removing the front panel assembly" for instructions. To remove the floppy disk drive: 1. Remove the screw that secures the drive to the chassis. 2. Carefully pull out the drive from the chassis until you see the cables connected to the drive. 3. Disconnect the floppy disk cable and power cable from the drive to completely release the drive. 2-44 Chapter 2: Hardware setup
-
 1
1 -
2
-
3
-
4
-
5
-
6
-
7
-
8
-
9
-
10
-
11
-
12
-
13
-
14
-
15
-
16
-
17
-
18
-
19
-
20
-
21
-
22
-
23
-
24
-
25
-
26
-
27
-
28
-
29
-
30
-
31
-
32
-
33
-
34
-
35
-
36
-
37
-
38
-
39
-
40
-
41
-
42
-
43
-
44
-
45
-
46
-
47
-
48
-
49
-
50
-
51
-
52
-
53
-
54
-
 55
55 -
 56
56 -
 57
57 -
 58
58 -
 59
59 -
 60
60 -
 61
61 -
 62
62 -
 63
63 -
 64
64 -
 65
65 -
66
-
67
-
68
-
69
-
70
-
71
-
72
-
73
-
74
-
75
-
76
-
77
-
78
 |
 |

Chapter 2:
Hardware setup
2-44
2.10.5
Floppy disk drive
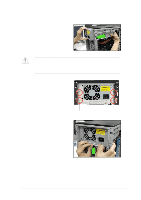
2.
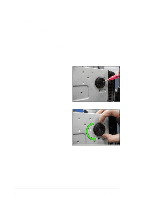
Carefully pull out the drive from
the chassis until you see the
cables connected to the drive.
To remove the floppy disk drive:
1.
Remove the screw that secures
the drive to the chassis.
You need to remove the front panel assembly before you can remove
the floppy disk drive. Refer to section “2.5.1 Removing the front panel
assembly” for instructions.
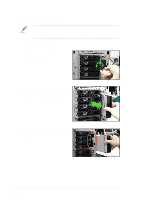
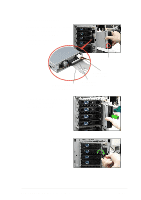
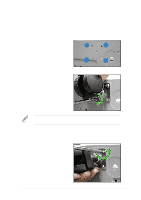
3.
Disconnect the floppy disk cable
and power cable from the drive to
completely release the drive.