Brother International ™ QL-650TD Users Manual - English and Spanish - Page 24
Attaching the paper guide
 |
View all Brother International ™ QL-650TD manuals
Add to My Manuals
Save this manual to your list of manuals |
Page 24 highlights
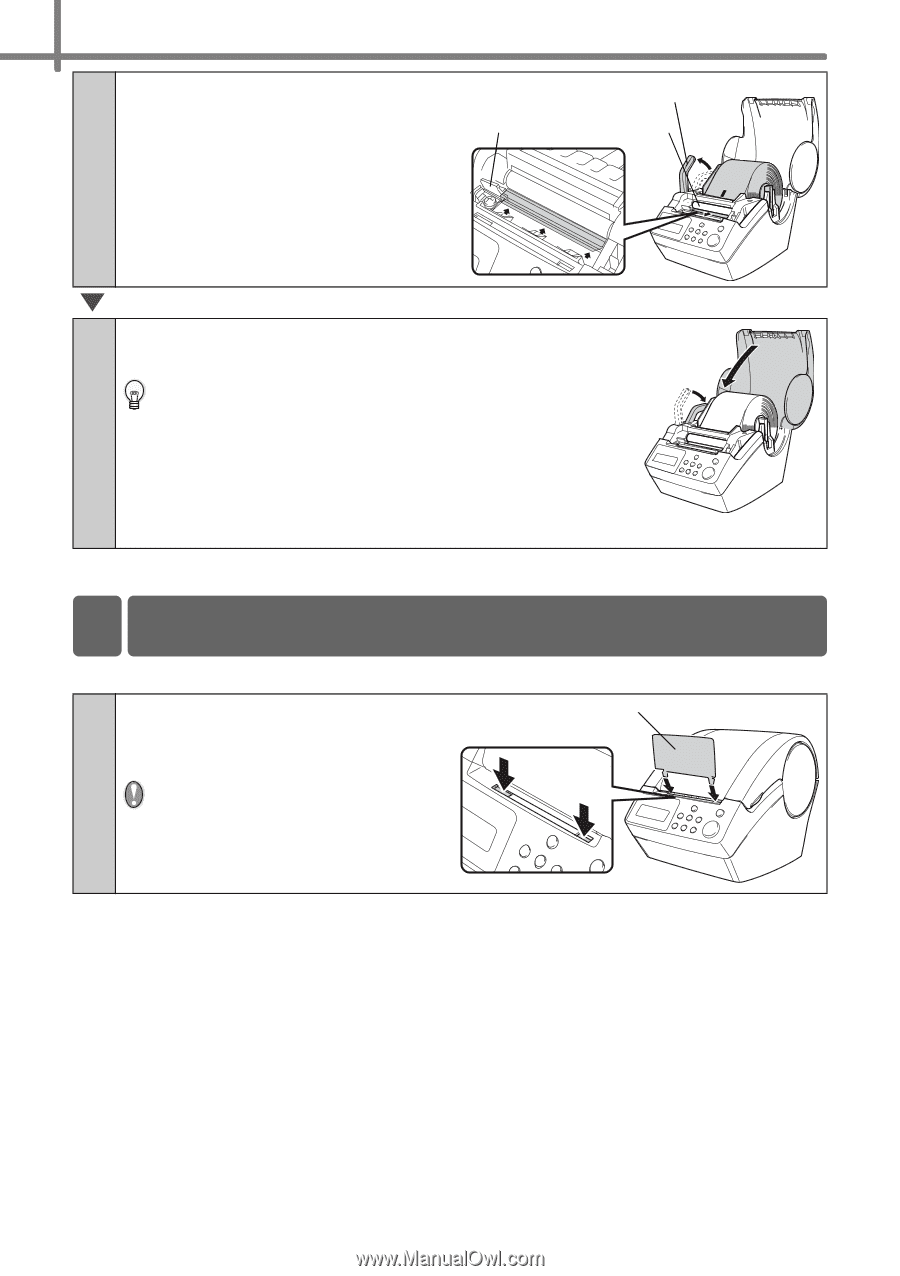
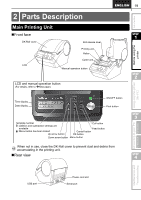
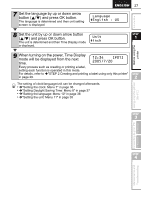
24 STEP1 Before using the printer 4 Check that the roll release lever is in the up position. Cutter Insert the edge of DK Roll into the printing unit, and pull it out to just in front of the cutter. Roll release lever Printing unit 5 Push down the roll release lever and close the DK Roll cover. When the DK Roll could not be pulled out to just before the cutter in the step 4, insert the edge of DK Roll as possible and pull down the roll release lever, and then close the roll release lever. Pressing Feed button feeds the DK Roll to the correct position (when using DK Tape, cut the fed tape as needed). 4 Attaching the paper guide The printer contains a paper guide which can hold up to 10 individual label sheets. 1 As shown right, attach the paper guide to the front face of the printer. When printing more than 10 labels continuously using the auto cut function, remove the paper guide to prevent a paper jam. Paper guide
-
 1
1 -
2
-
3
-
4
-
5
-
6
-
7
-
8
-
9
-
10
-
11
-
12
-
13
-
14
-
15
-
16
-
17
-
18
-
 19
19 -
 20
20 -
 21
21 -
 22
22 -
 23
23 -
 24
24 -
 25
25 -
 26
26 -
 27
27 -
 28
28 -
 29
29 -
30
-
31
-
32
-
33
-
34
-
35
-
36
-
37
-
38
-
39
-
40
-
41
-
42
-
43
-
44
-
45
-
46
-
47
-
48
-
49
-
50
-
51
-
52
-
53
-
54
-
55
-
56
-
57
-
58
-
59
-
60
-
61
-
62
-
63
-
64
-
65
-
66
-
67
-
68
-
69
-
70
-
71
-
72
-
73
-
74
-
75
-
76
-
77
-
78
-
79
-
80
-
81
-
82
-
83
-
84
-
85
-
86
-
87
-
88
-
89
-
90
-
91
-
92
-
93
-
94
-
95
-
96
-
97
-
98
-
99
-
100
-
101
-
102
-
103
-
104
-
105
-
106
-
107
-
108
-
109
-
110
-
111
-
112
-
113
-
114
-
115
-
116
-
117
-
118
-
119
-
120
-
121
-
122
-
123
-
124
-
125
-
126
-
127
-
128
 |
 |