Brother International ™ QL-650TD Users Manual - English and Spanish - Page 32
Other convenient functions, Editing a template: Menu 1
 |
View all Brother International ™ QL-650TD manuals
Add to My Manuals
Save this manual to your list of manuals |
Page 32 highlights
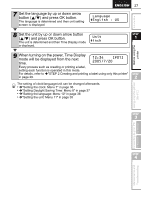
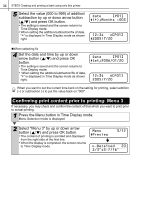
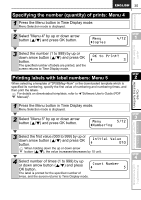
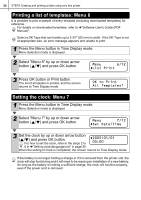
32 STEP2 Creating and printing a label using only this printer Other convenient functions The menu of the printer has various function to make the printer user-friendly, such as setting to change the contents of the template, and so on. Editing a template: Menu 1 By editing a selected template, it is possible to change the label to your own format. The editable content varies depending on the selected template. The following explains an example when selecting the template "[P07]Msg+D+T". 1 Press the Menu button in Time Display mode. Menu Selection mode is displayed. 12:34 [P07] 2005/7/20 2 Select "Menu 1" by up or down arrow button ( / ) and press OK button. Message selection mode is displayed. Menu 1/12 Label Settings 3 Select the message by up or down arrow button ( / ) and press OK button. The message is determined, and then date format selection mode is displayed. Message [P07] Received Type of message • Received • Inspected • Certified • Service By • Expires • Installed • Manufactured • None • Approved • Best Used By • Prepared Downloading the new message from PC can add the message. "None" can be selected only when using the template [P08]. 4 Select the date format by up or down arrow button ( / ) and press OK button. The date format is determined, and then time format selection mode is displayed. Date Fmt [P07] 2005/7/20
-
 1
1 -
2
-
3
-
4
-
5
-
6
-
7
-
8
-
9
-
10
-
11
-
12
-
13
-
14
-
15
-
16
-
17
-
18
-
19
-
20
-
21
-
22
-
23
-
24
-
25
-
26
-
 27
27 -
 28
28 -
 29
29 -
 30
30 -
 31
31 -
 32
32 -
 33
33 -
 34
34 -
 35
35 -
 36
36 -
 37
37 -
38
-
39
-
40
-
41
-
42
-
43
-
44
-
45
-
46
-
47
-
48
-
49
-
50
-
51
-
52
-
53
-
54
-
55
-
56
-
57
-
58
-
59
-
60
-
61
-
62
-
63
-
64
-
65
-
66
-
67
-
68
-
69
-
70
-
71
-
72
-
73
-
74
-
75
-
76
-
77
-
78
-
79
-
80
-
81
-
82
-
83
-
84
-
85
-
86
-
87
-
88
-
89
-
90
-
91
-
92
-
93
-
94
-
95
-
96
-
97
-
98
-
99
-
100
-
101
-
102
-
103
-
104
-
105
-
106
-
107
-
108
-
109
-
110
-
111
-
112
-
113
-
114
-
115
-
116
-
117
-
118
-
119
-
120
-
121
-
122
-
123
-
124
-
125
-
126
-
127
-
128
 |
 |