Brother International BES Embroidery Software 2 Instruction Manual - English - Page 123
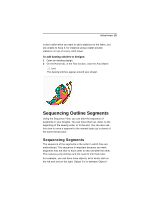
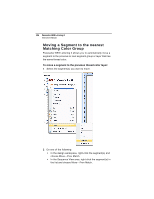
Sequencing Outline Segments
 |
View all Brother International BES Embroidery Software 2 manuals
Add to My Manuals
Save this manual to your list of manuals |
Page 123 highlights
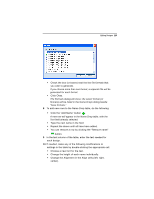
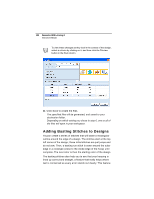
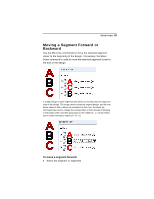
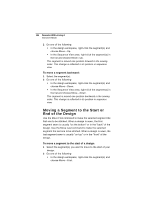
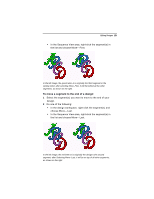
Editing Designs 121 is also useful when you want to add a stabilizer to the fabric, but are unable to hoop it, for instance using a water-soluble stabilizer on top of a terry-cloth towel. To add basting stitches to designs: 1 Open an existing design. 2 On the Home tab, in the Text section, click the Auto Baste tool. The basting stitches appear around your design. Sequencing Outline Segments Using the Sequence View, you can alter the sequence of segments in your designs. You can move them up, down, to the beginning of the sewing order, or to the end. You can also use this view to move a segment to the nearest layer (up or down) of the same thread color. Sequencing Segments The sequence of the segments is the order in which they are embroidered. The sequence is important because you want segments that are near to each other to sew one after the other. This reduces jump stitches and the need to trim them later. For example, you can have three objects, all of which start on the left and end on the right. Object 3 is in between Object 1
-
 1
1 -
2
-
3
-
4
-
5
-
6
-
7
-
8
-
9
-
10
-
11
-
12
-
13
-
14
-
15
-
16
-
17
-
18
-
19
-
20
-
21
-
22
-
23
-
24
-
25
-
26
-
27
-
28
-
29
-
30
-
31
-
32
-
33
-
34
-
35
-
36
-
37
-
38
-
39
-
40
-
41
-
42
-
43
-
44
-
45
-
46
-
47
-
48
-
49
-
50
-
51
-
52
-
53
-
54
-
55
-
56
-
57
-
58
-
59
-
60
-
61
-
62
-
63
-
64
-
65
-
66
-
67
-
68
-
69
-
70
-
71
-
72
-
73
-
74
-
75
-
76
-
77
-
78
-
79
-
80
-
81
-
82
-
83
-
84
-
85
-
86
-
87
-
88
-
89
-
90
-
91
-
92
-
93
-
94
-
95
-
96
-
97
-
98
-
99
-
100
-
101
-
102
-
103
-
104
-
105
-
106
-
107
-
108
-
109
-
110
-
111
-
112
-
113
-
114
-
115
-
116
-
117
-
 118
118 -
 119
119 -
 120
120 -
 121
121 -
 122
122 -
 123
123 -
 124
124 -
 125
125 -
 126
126 -
 127
127 -
 128
128 -
129
-
130
-
131
-
132
-
133
-
134
-
135
-
136
-
137
-
138
-
139
-
140
-
141
-
142
-
143
-
144
-
145
-
146
-
147
-
148
-
149
-
150
 |
 |